

Journeyman425
-
Posts
1,120 -
Joined
-
Last visited
-
Days Won
90
Content Type
Profiles
Forums
Gallery
Everything posted by Journeyman425
-

Blacked out Lights and Grill
Journeyman425 commented on DTSGUY's gallery image in Dodge Journey Member Albums
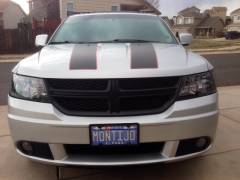 Very Cool!
 -
Code has been added. Have your dealer perform a reconfiguration, also known as a restoration after they program your new key and the DRL shoud work.
-
Hope this helps. Note - when I copy and paste from the manual, the diagrams go from a chart layout to everything running together - sorry! AMPLIFIER-RADIO C1 Harness Family: Body Cavities: 40 Color: NATURAL Gender: FEMALE Part Description: 13592526 Engineering Name: Mod_Audio_Amplifier_12_Ch_8_Ch Connector No: D3804A Option: Standard Available Views:Location View Pin Circuit Wire Color Gauge/Size Function Option 1 Z908 BK/GY 1 GROUND 1 Z908 BK/GY 16 GROUND 1 Z908 BK/PK 16 GROUND 2 D467 GY/DB .35 CAN(+) PRIVATE BUS FOR AUDIO TELEMATICS 2 D467 GY/DB 22 CAN(+) PRIVATE BUS FOR AUDIO TELEMATICS 3 NO N/A No Connect 4 X51 DG/DB .50 LEFT REAR SPEAKER (+) 4 X51 DG/DB 20 LEFT REAR SPEAKER (+) 5 X52 GY/DB .50 RIGHT REAR SPEAKER (+) 5 X52 GY/DB 20 RIGHT REAR SPEAKER (+) 6 X53 DG .50 RADIO LEFT FRONT AUDIO (+) 6 X53 DG 20 RADIO LEFT FRONT AUDIO (+) 7 X54 GY .50 RADIO RIGHT FRONT AUDIO (+) 7 X54 GY 20 RADIO RIGHT FRONT AUDIO (+) 8 X298 GY/LG .80 AMPLIFIED RIGHT I/P SPEAKER (-) 8 X298 GY/LG 18 AMPLIFIED RIGHT I/P SPEAKER (-) 9 X299 GY/YL .80 AMPLIFIED LEFT I/P SPEAKER (-) 9 X299 GY/YL 18 AMPLIFIED LEFT I/P SPEAKER (-) 10 NO N/A No Connect 11 NO N/A No Connect 12 A931 RD 1 FUSED B(+) 12 A931 RD 12 FUSED B(+) 12 A931 RD 16 FUSED B(+) 13 D466 GY/YL .35 CAN(-) PRIVATE BUS FOR AUDIO TELEMATICS 13 D466 GY/YL 22 CAN(-) PRIVATE BUS FOR AUDIO TELEMATICS 14 NO N/A No Connect 15 X57 DG/OR .50 LEFT REAR SPEAKER (-) 15 X57 DG/OR 20 LEFT REAR SPEAKER (-) 16 X58 GY/OR .50 RIGHT REAR SPEAKER (-) 16 X58 GY/OR 20 RIGHT REAR SPEAKER (-) 17 X55 DG/BR .50 RADIO LEFT FRONT AUDIO (-) 17 X55 DG/BR 20 RADIO LEFT FRONT AUDIO (-) 18 X56 GY/BR .50 RADIO RIGHT FRONT AUDIO (-) 18 X56 GY/BR 20 RADIO RIGHT FRONT AUDIO (-) 19 X208 GY/DG .80 AMPLIFIED RIGHT I/P SPEAKER (+) 19 X208 GY/DG 18 AMPLIFIED RIGHT I/P SPEAKER (+) 20 X209 GY/OR .80 AMPLIFIED LEFT I/P SPEAKER (+) 20 X209 GY/OR 18 AMPLIFIED LEFT I/P SPEAKER (+) 21 NO N/A No Connect 22 NO N/A No Connect AMPLIFIER-RADIO C2 Harness Family: Body Cavities: 28 Color: BLACK Gender: FEMALE Part Description: 175966-2 Engineering Name: Mod_Audio_Amplifier_12_Ch_8_Ch Connector No: D3804B Option: Standard Available Views:Location View Pin Circuit Wire Color Gauge/Size Function Option 1 NO N/A No Connect 2 NO N/A No Connect 3 X301 GY/WT .80 AMPLIFIED SUBWOOFER 2 (+) 3 X301 GY/WT 18 AMPLIFIED SUBWOOFER 2 (+) 4 X206 DG/LG .80 RIGHT REAR SPEAKER (+) 4 X206 DG/LG 18 RIGHT REAR SPEAKER (+) 5 X295 GY/DG .80 LEFT REAR SPEAKER (-) 5 X295 GY/DG 18 LEFT REAR SPEAKER (-) 6 X390 DG/BR .80 AMPLIFIED SUBWOOFER 1 (-) 6 X390 DG/BR 18 AMPLIFIED SUBWOOFER 1 (-) 7 X202 DG/VT .80 RIGHT FRONT SPEAKER (+) 7 X202 DG/VT 18 RIGHT FRONT SPEAKER (+) 8 X201 GY/VT .80 LEFT FRONT SPEAKER (+) 8 X201 GY/VT 18 LEFT FRONT SPEAKER (+) 9 NO N/A No Connect 10 NO N/A No Connect 11 X391 DG/WT .80 AMPLIFIED SUBWOOFER 2 (-) 11 X391 DG/WT 18 AMPLIFIED SUBWOOFER 2 (-) 12 X296 DG/GY .80 RIGHT REAR SPEAKER (-) 12 X296 DG/GY 18 RIGHT REAR SPEAKER (-) 13 X205 GY/LG .80 LEFT REAR SPEAKER (+) 13 X205 GY/LG 18 LEFT REAR SPEAKER (+) 14 X300 GY/BR .80 AMPLIFIED SUBWOOFER 1 (+) 14 X300 GY/BR 18 AMPLIFIED SUBWOOFER 1 (+) 15 X292 DG/YL .80 RIGHT FRONT SPEAKER (-) 15 X292 DG/YL 18 RIGHT FRONT SPEAKER (-) 16 X291 GY/YL .80 LEFT FRONT SPEAKER (-) 16 X291 GY/YL 18 LEFT FRONT SPEAKER (-)
-
This is the OEM Mopar hitch. The left side of the draw bar had a bracket which hung down to accomodate a seven way plug. I use a four way flat, and the bracket is ugly so we whizzed it off in my shop and painted over the welds.
-
Mopar Total Clean might work. I love this stuff - I have the black leather interior, and with my kids in and out of the car everyday it gets filthy in a hurry. Total Clean gets all the dirt and does not affect the leather or the finish of the plastics in any way and gets everything clean.
-
Hello friends - Just wanted to wish everyone a Happy Easter! Traveling 250 miles tomorrow to see family. Don't tell 'em this, but I'm almost as happy to take a road trip in the DJ as I am to visit the family... Had to hit it with the Miami Shine before the trip, of course!
-
How to disconnect negative battery cable
Journeyman425 replied to Totemus's topic in Accessories, Modifications
It appears that the electrical system will be shut down if you simply disconnect the negative jump terminal under the hood. From the manual: 08 - Electrical/8F - Engine Systems/Battery System/BATTERY/Removal REMOVAL WARNING: To protect the hands from battery acid, a suitable pair of heavy duty rubber gloves should be worn when removing or servicing a battery. Safety glasses also should be worn. WARNING: Remove metallic jewelry to avoid injury by accidental arcing of battery current. CAUTION: The negative battery cable remote terminal (2) must be disconnected and isolated from the remote battery post (1) prior to service of the vehicle electrical systems. The negative battery cable remote terminal can be isolated by using the supplied isolation hole (3) in the terminal casing. Disconnect and isolate the negative battery cable remote terminal from the remote battery post. -
Still love my Stone White M:
-
Something has changed for 2014 and I don't know what that is...yet. I have no issue adding the sales code to 2013 and earlier VIN's, but that code has been omitted from 2014's. A search of Chrysler's TechConnect site (multiple times) has not yielded any results. I'll keep you posted.
-
Nah...no discrimination. We love all Journeys equally Seriously, though - Most of the Journeys in my area are black and silver. There's a couple of blue ones and one or two whites, but not much else. I can name one Storm Gray, one Fathom Blue and one green (forget the actual name from 2009). We have the only Copper Pearl around. I love looking at it because it's so unique. Don't get me wrong - I love black, silver and I own a Stone White 300M (and yes, Terry, it looks good even when it's not so clean!) but the Copper stands out because no one else has it.
-
Thoughts on Towing a Uhaul 5'x8' trailer 1000 miles
Journeyman425 replied to onecrazyfoo4u's topic in Hauling & Towing
By the way, the Trailer Tow Prep Group provides nothing in the way of suspension upgrades. It simply adds the wiring harness and an engine oil cooler. Mine is also a Crew. If yours is FWD, then you and I have the same suspension setup. -
Thoughts on Towing a Uhaul 5'x8' trailer 1000 miles
Journeyman425 replied to onecrazyfoo4u's topic in Hauling & Towing
I have a small pop-up camper that I have towed with my '99 300M and with the Journey. I could easily feel the camper when towing it with the 300M. The Journey handled it far better. The '99 300M has about 138,000 miles on the original shocks and has a lot more wallow in it under load as a result. I thought the ride and handling with the camper in tow was quite stable and non-intrusive. Plus, the extra two ratios in the tranny and extra HP and torque made the car much more responsive with the camper in tow than the M did. Our camper weighs 1200 lb dry. With my family and all our gear in the car we were easily over 2000 lb. I did not measure fuel economy. I would expect, as Lobitz68 pointed out, that your mileage will improve with a pop-up as the aerodynamic drag will decrease. Our Journey is taller than the camper and as such it breaks the wind over the top of it. -
Sorry for all the duplicates on this page - I replied to a post earlier on my iPhone and messed something up! Can one of the moderators delete the blanks? Can I do that? I tried to delete them using the editor but did not find a way.
-
quote: the ergonomics are just perfect for my needs. The problem with the ergonomics is me - I'm not very tall and sit closer to the wheel than most others. This forces my arm position somewhat backwards in order to grip the shifter comfortably. It would be perfect for me if I could move the seat back a few inches. The shifter in my 300M is further forward relative to the seat so it falls naturally to my hand. With the seat all the way back in the Journey the lever is perfect in my hand, but then I'd need blocks on the pedals!!
-
-
-
The Pentastar V6 makes 305 HP in the Challenger vs 283 in the Journey, has a different transmission and gearing altogether, and a lower curb weight. It should feel more responsive in that vehicle as a result. Glad your sunroof is repaired!!
-
As far as the Autostick feature is concerned - try not to worry about excess wear on the components. That was figured into the design of the transmission itself. One thing that remains a relative constant with regards to the transmission's operation is something called the Clutch Volume Index (CVI). In very basic terms, the CVI value represents the volume and pressure of the transmission fluid as applied to a clutch pack in order to execute an up- or downshift. When Autostick is used, the Transmission Control Module calculates the CVI necessary to execute the selected gearshift the moment the driver selects the given gear, as opposed to the TCM performing that operation when it schedules the shift rather than the driver. Simply stated, the forces applied to the clutch packs are essentially the same regardless of whether the TCM or the driver selects the gear. I rarely use the Autostick in my Journey due to the ergonomics of the gear lever. It is not a natural feel for me and requires a bit more effort than I care for. Plus, the extra gears in the transmission kind of negate the need - there always seems to be a gear suitable for the speed. My 300M is another story. The gear lever falls easily to my hand, and it is only a four speed. I like shifting that car manually around town - it makes it more responsive coming out of turns and cruising at lower speeds. I don't use it all the time, but quite often. The car has 289,000 miles on it and shifts perfectly to this day. Granted, I've changed the transmission fluid and filter a bunch of times over those miles, but Autostick use has had no effect on its reliability thus far.
-
I added the sales code for you. Now, the car has to return to the dealership for a vehicle restoration, or reconfiguration. It's like restarting your home PC after a major update - the settings don't take effect until after your computer is restarted. Same here - when your dealership performs a restoration, the new sales code "LMK" is picked up by the car and after that you'll be able to toggle the DRL on and off using your touch screen.
-
We used to do that years ago on occasion - it's called changing the Country Code. For instance, I could enable DRL in my 2000 300M by changing the Country Code to Canada. I was not sure if that was even an option to do anymore on the newer ones, to be honest. One of these nights after work - if I can ever find the time - I want to pluck a 2014 Journey off the lot and plug it in to our Wi-Tech system and find out how to enable the DRL for myself. If and when I ever get to do this, I'll post my findings.
-
How did you make out today, Tanyia?
-
Sound system
Journeyman425 replied to senah's topic in Audio, Infotainment Navigation, MyGig, UConnect, etc.
If your Limited has Sun, Sound and Wheel Group (Sunroof and Chrome Clad wheels), then it automatically comes with the upgraded speakers and 368 watt amp. -
You can wait to have it fixed unless the light begins flashing. I have not seen P0302 in the 3.6 cause the light to flash yet. All of the cylinder heads we have replaced have compression leakage of 30% or less which so far has not caused a bad enough misfire to even be detected by most drivers. Some have complained of occasionally rough idle prior to repair. If the condition worsens to the point where the light begins to flash, then it will cause catalyst damage which may not be covered by warranty. Your vehicle warranty cannot be voided by not repairing this issue immediately. Also, there is no need to change both heads - only the left side head for cylinders 2,4 and 6. There really are no other repair options. Simply performing a valve job would only be a temporary fix. The root cause is insufficient cooling of the exhaust valves on the left side head. If you only replace the valves and not the head, the problem will return as the root cause has not been addressed. The complete head must be replaced. Thank you for your service to our country!
-
Turn Signal Flasher Relay
Journeyman425 replied to jwin1845's topic in Glass, Lighting, Mirrors, Sun Roofs & Wipers
There is no flasher for the signals. The tlash rate is controlled by the BCM. Now that the resistance has been changed due to the LED's in the rear, the BCM thinks there's a bulb out. It may have to be reflashed. I think some of the guys here have make it work properly but not sure how. From the manual, FYI. SCM = Steering Column Module, IC = Instrument Cluster, SAS = Steering Angle Sensor, BCM = Body Control Module. TURN SIGNAL LAMPSThe turn signal lamps system includes the multi-function switch on the steering column, the SCM, the SAS, the IC and the BCM. The front turn signal lamp bulbs each have a path to ground at all times through their connection to the headlamp and dash wire harness. The headlamp and dash wire harness has takeouts with eyelet terminals that are secured to the body sheet metal. The rear turn signal lamp bulbs have a path to ground at all times through a takeout and eyelet terminal of the body wire harness that is secured by a ground screw to the body sheet metal. The SCM monitors a hard wired multiplex input from the multi-function switch to determine the status of the turn signal switch, then sends the appropriate electronic turn signal switch status messages to the SAS over the LIN data bus. The SAS relays the appropriate electronic turn signal request messages to the BCM over the CAN data bus. The BCM responds to these messages by controlling a battery voltage output and the flash rate for either the right or left turn signal lamps through high side drivers on the appropriate front and rear, right or left turn signal control circuits. The BCM also sends the appropriate electronic messages to the IC to control the illumination and flash rate of the right or left turn signal indicators, as well as to control the click rate of an electromechanical relay soldered onto the IC electronic circuit board that emulates the sound emitted by a conventional electromechanical turn signal flasher. The BCM also provides a Turn Signal ON warning that will send a turn signal ON warning request message to the IC over the CAN bus that causes the IC to generate repetitive chimes to indicate that a turn signal has been active continuously for 1.6 kilometers (1 mile) with the vehicle speed greater than 22 kilometers-per-hour (15 miles-per-hour). Vehicles built for markets other than the United States and Canada have a revised distance threshold of 4 kilometers (2.49 miles) for this feature. The chime will continue until the turn signal input becomes inactive or until the vehicle speed message indicates that the speed is less than 22 kilometers-per-hour (15 miles-per-hour), whichever occurs first. -
There may be some debris caught in the blower wheel. It's worth a try before you replace the fan motor. It is easily accessible to check and / or replace: 24 - Heating and Air Conditioning/Distribution, Front/MOTOR, Blower, Front/Removal REMOVAL WARNING: Disable the airbag system before attempting any steering wheel, steering column or instrument panel component diagnosis or service. Disconnect and isolate the negative battery (ground) cable, then wait two minutes for the airbag system capacitor to discharge before performing further diagnosis or service. This is the only sure way to disable the airbag system. Failure to follow these instructions may result in accidental airbag deployment and possible serious or fatal injury. NOTE: The blower motor is located on the bottom of the passenger side of the HVAC housing. The blower motor can be removed from the vehicle without having to remove the HVAC housing. NOTE: LHD model shown. RHD model similar. Disconnect and isolate the negative battery cable. If equipped, remove the silencer from below the passenger side of the instrument panel. From underneath the instrument panel, disengage the connector lock and disconnect the instrument panel wire harness connector (1) from the blower motor (2). Remove the three screws (3) that secure the blower motor and the wire lead bracket (4) (if equipped) to the bottom of the HVAC housing (5) and remove the blower motor.