Journeyphenia
-
Posts
65 -
Joined
-
Last visited
-
Days Won
6
Content Type
Profiles
Forums
Gallery
Everything posted by Journeyphenia
-
I suspect the noise is very slight movement of the hinge plate against the body. On mine, sometimes lube at the detent helped and sometimes not. Sometimes penetrating oil behind the hinge plate got rid of the sound.
-
Try penetrating oil behind the hinge where it meets the body. Also continue to lube the detent and roller.
-
My best guess is that the door hinge plate moves slightly and rubs the body when the door is swung and that slight rub causes the groan noise, in my case more of a pop and groan, between the two surfaces. On my 2015, it's mostly when closing the door. I've lubed everything with some success. I used to think it was the hinge detent moving on the pivot point that needed lube. I used lithium grease and that helped sometimes to eliminate the noise. Sometimes, I only lube the body to hinge plate contact with penetrating oil and the noise also goes away, sometimes, it's a combo of both that works. The noise only happens on my car during colder seasons.
-
"gate" message on dash display
Journeyphenia replied to wrenchpro's topic in Electrical, Battery & Charging
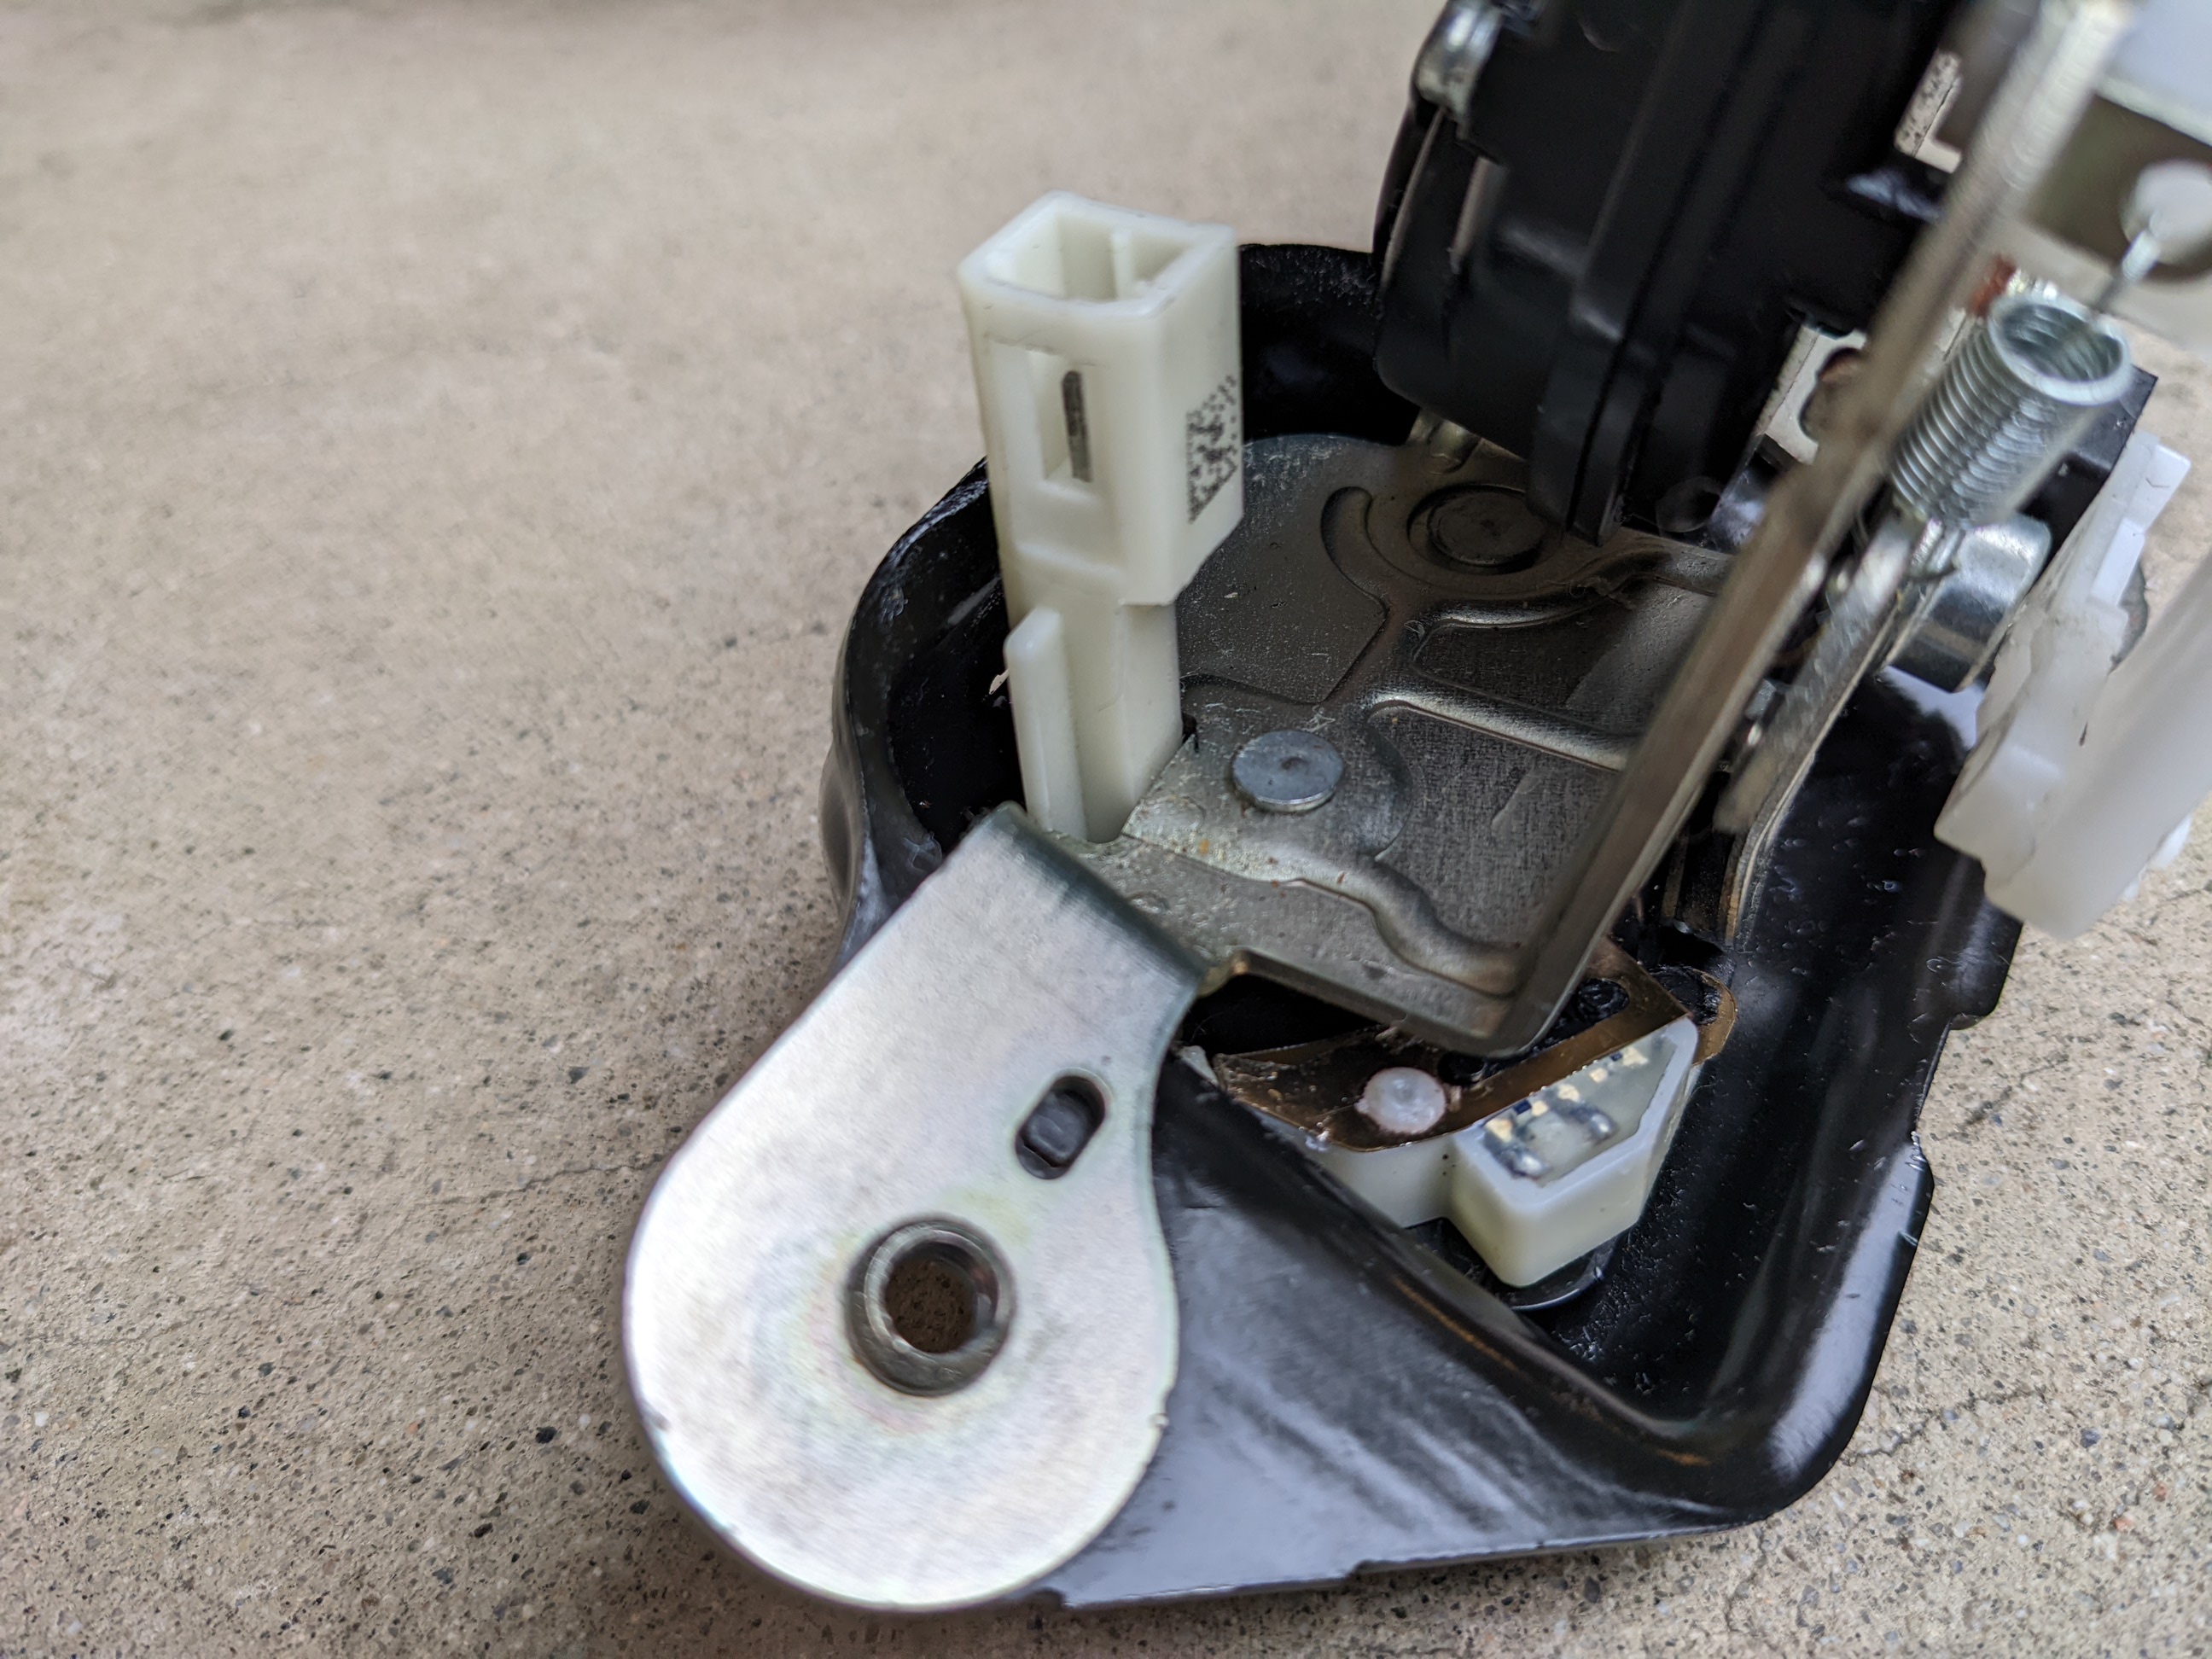
Rear hatch assembly, white relay switch at bottom right, wire connector left of that
-
"gate" message on dash display
Journeyphenia replied to wrenchpro's topic in Electrical, Battery & Charging
For anyone looking for solutions to a "liftgate open" dash warning with it closed, the most likely cause is the relay/switch in the latch assy.. If that's not it, as others have mentioned, look for a damaged wire going into the liftgate and check the wires of the 2 wire plug into the latch switch. That plug wire touches a metal edge of the liftgate and should be taped over from the factory but if not, wrap it before you finish up. If it's not a wire issue, as far as I can tell, there's no fuse for that liftgate relay/switch. The switch is an integral part of the latch assy. so you'd need a new assy.. You could live with it and remove the connector at the switch but when you keyless unlock, the system will re-lock if you only open the liftgate, you will have to open a side door to prevent re-lock. If replacing the latch assy., the 3 bolts have loctite from the factory but the two bolts attaching for the interior plastic panel didn't on mine and they were a little loose so loctite those also. The part is about $135 on RockAuto and it's about 30 minutes to change out. -
7 years without brake change
Journeyphenia replied to thabanga510's topic in Brake, Chassis & Suspension
2015 v6 fwd has 110k with orig brakes. The rear brakes are about done, another 10k guess? -
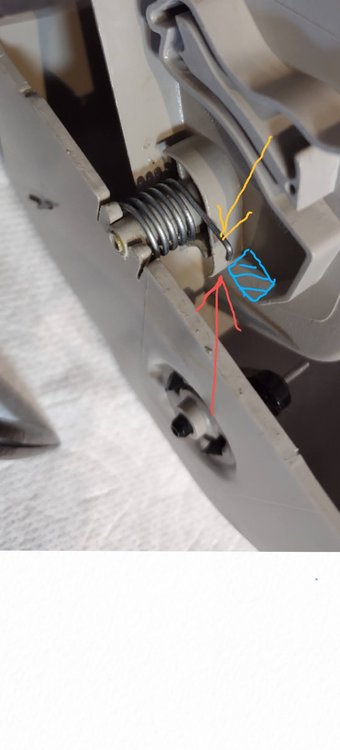
The sunglass holder, in my 2015 Crossroad broke. There was no more spring action because the spring moved from behind it's set position. It was still under warranty so Dodge fixed it but a new one would be expensive to purchase so here is a fix. The issue is likely the thin plastic edge, that the spring rests behind, isn't strong enough and cracks. Once it cracks, the spring jumps out of position. I fixed this by adding a nut in between 2 points(blue) and used gorilla glue to secure the nut. In the photo you can see the spring edge (yellow)before it is placed back behind the plastic edge(red). Getting the console out of the ceiling is fairly easy. There are six locations where it's pressed into the headliner. You want to carefully pry that off and then remove the two electrical wires for the map lights. Putting it back on is a little more difficult. I think Dodge places that console into the headliner before they install the headliner. If you try and press the console back into the headliner there's too much give in the console, it flexes too much to press the console in. I used a couple rolled up pieces of cardboard behind the headliner to give it the rigidity to be able to snap the console back up. I would suggest using foam blocks or something similar to place behind the headliner so there's a backing so you can snap the console to the headliner. Good luck!
-
The sunglass holder, in my 2015 Crossroad broke. There was no more spring action because the spring moved from behind it's set position. It was still under warranty so Dodge fixed it but a new one would be expensive to purchase so here is a fix. The issue is likely the thin plastic edge, that the spring rests behind, isn't strong enough and cracks. Once it cracks, the spring jumps out of position. I fixed this by adding a nut in between 2 points(blue) and used gorilla glue to secure the nut. In the photo you can see the spring edge (yellow)before it is placed back behind the plastic edge(red). Getting the console out of the ceiling is fairly easy. There are six locations where it's pressed into the headliner. You want to carefully pry that off and then remove the two electrical wires for the map lights. Putting it back on is a little more difficult. I think Dodge places that console into the headliner before they install the headliner. If you try and press the console back into the headliner there's too much give in the console, it flexes too much to press the console in. I used a couple rolled up pieces of cardboard behind the headliner to give it the rigidity to be able to snap the console back up. I would suggest using foam blocks or something similar to place behind the headliner so there's a backing so you can snap the console to the headliner. Good luck!

-
2013 R/T to receive new high performance suspension
Journeyphenia replied to EBK's topic in Brake, Chassis & Suspension
Forget the portion of my last post with regards to the Moog polyurethane sway bar bushing for the 27mm front sway bar. That was a lot of altering of the Moog bracket to get it to work and this April the bracket broke while exiting a driveway at low speed. The Moog bracket is junk. It's a thinner metal and is formed from flat material. The Mopar is hard steel formed from curved material to add strength. I found that the Moog K200219 is a direct polyurethane replacement to the Mopar rubber bushing. The Moog fits into the Mopar bracket so no altering is needed. Moog lists it as only fitting 2009 & 2010 but that is incorrect. Wish I had figured this out last year. -
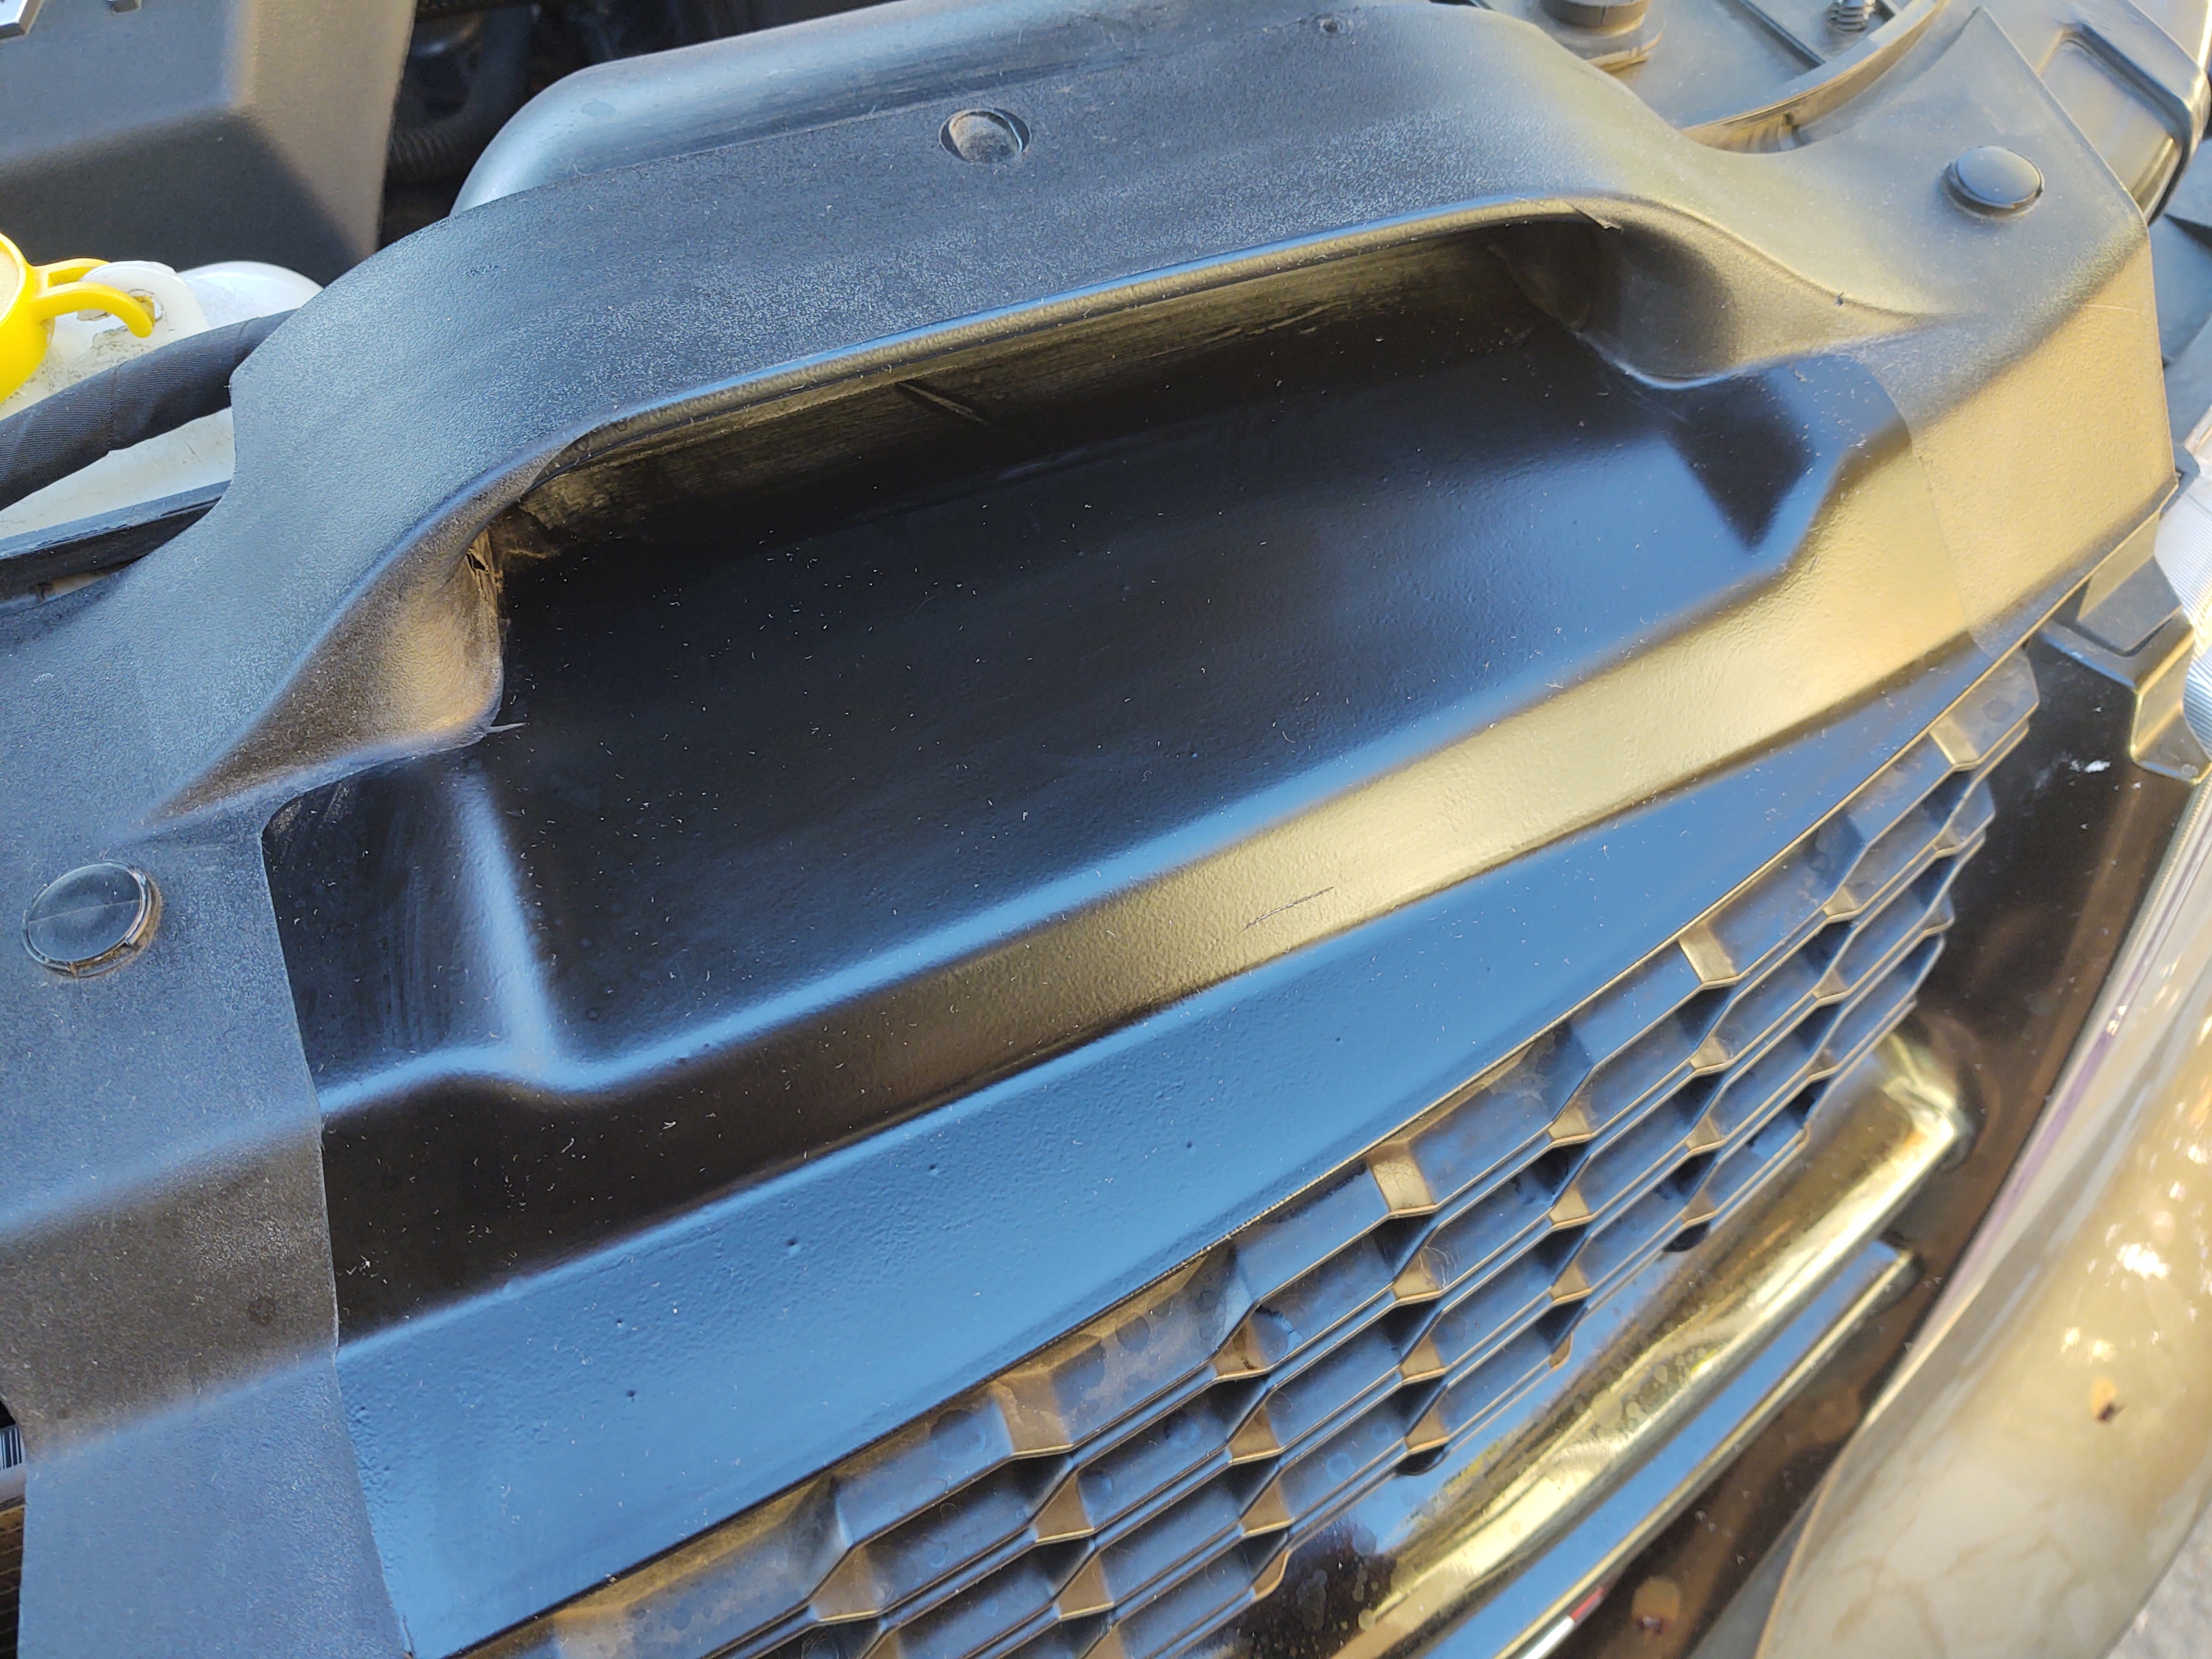
Doesn't the Journey already pull cold air from the grill? I'm not sure how much more power you'd get with changing what you have. I've seen aftermarket products but wonder if the stock design has better results in the lab. I removed the rubber gasket and the push pin at the inlet mouth, auto wrapped from the grill into the mouth, smoothed off rough plastic edges to and beyond the air filter. I also keep the entire air path cleaned and slickened with a dry lube.
-
-
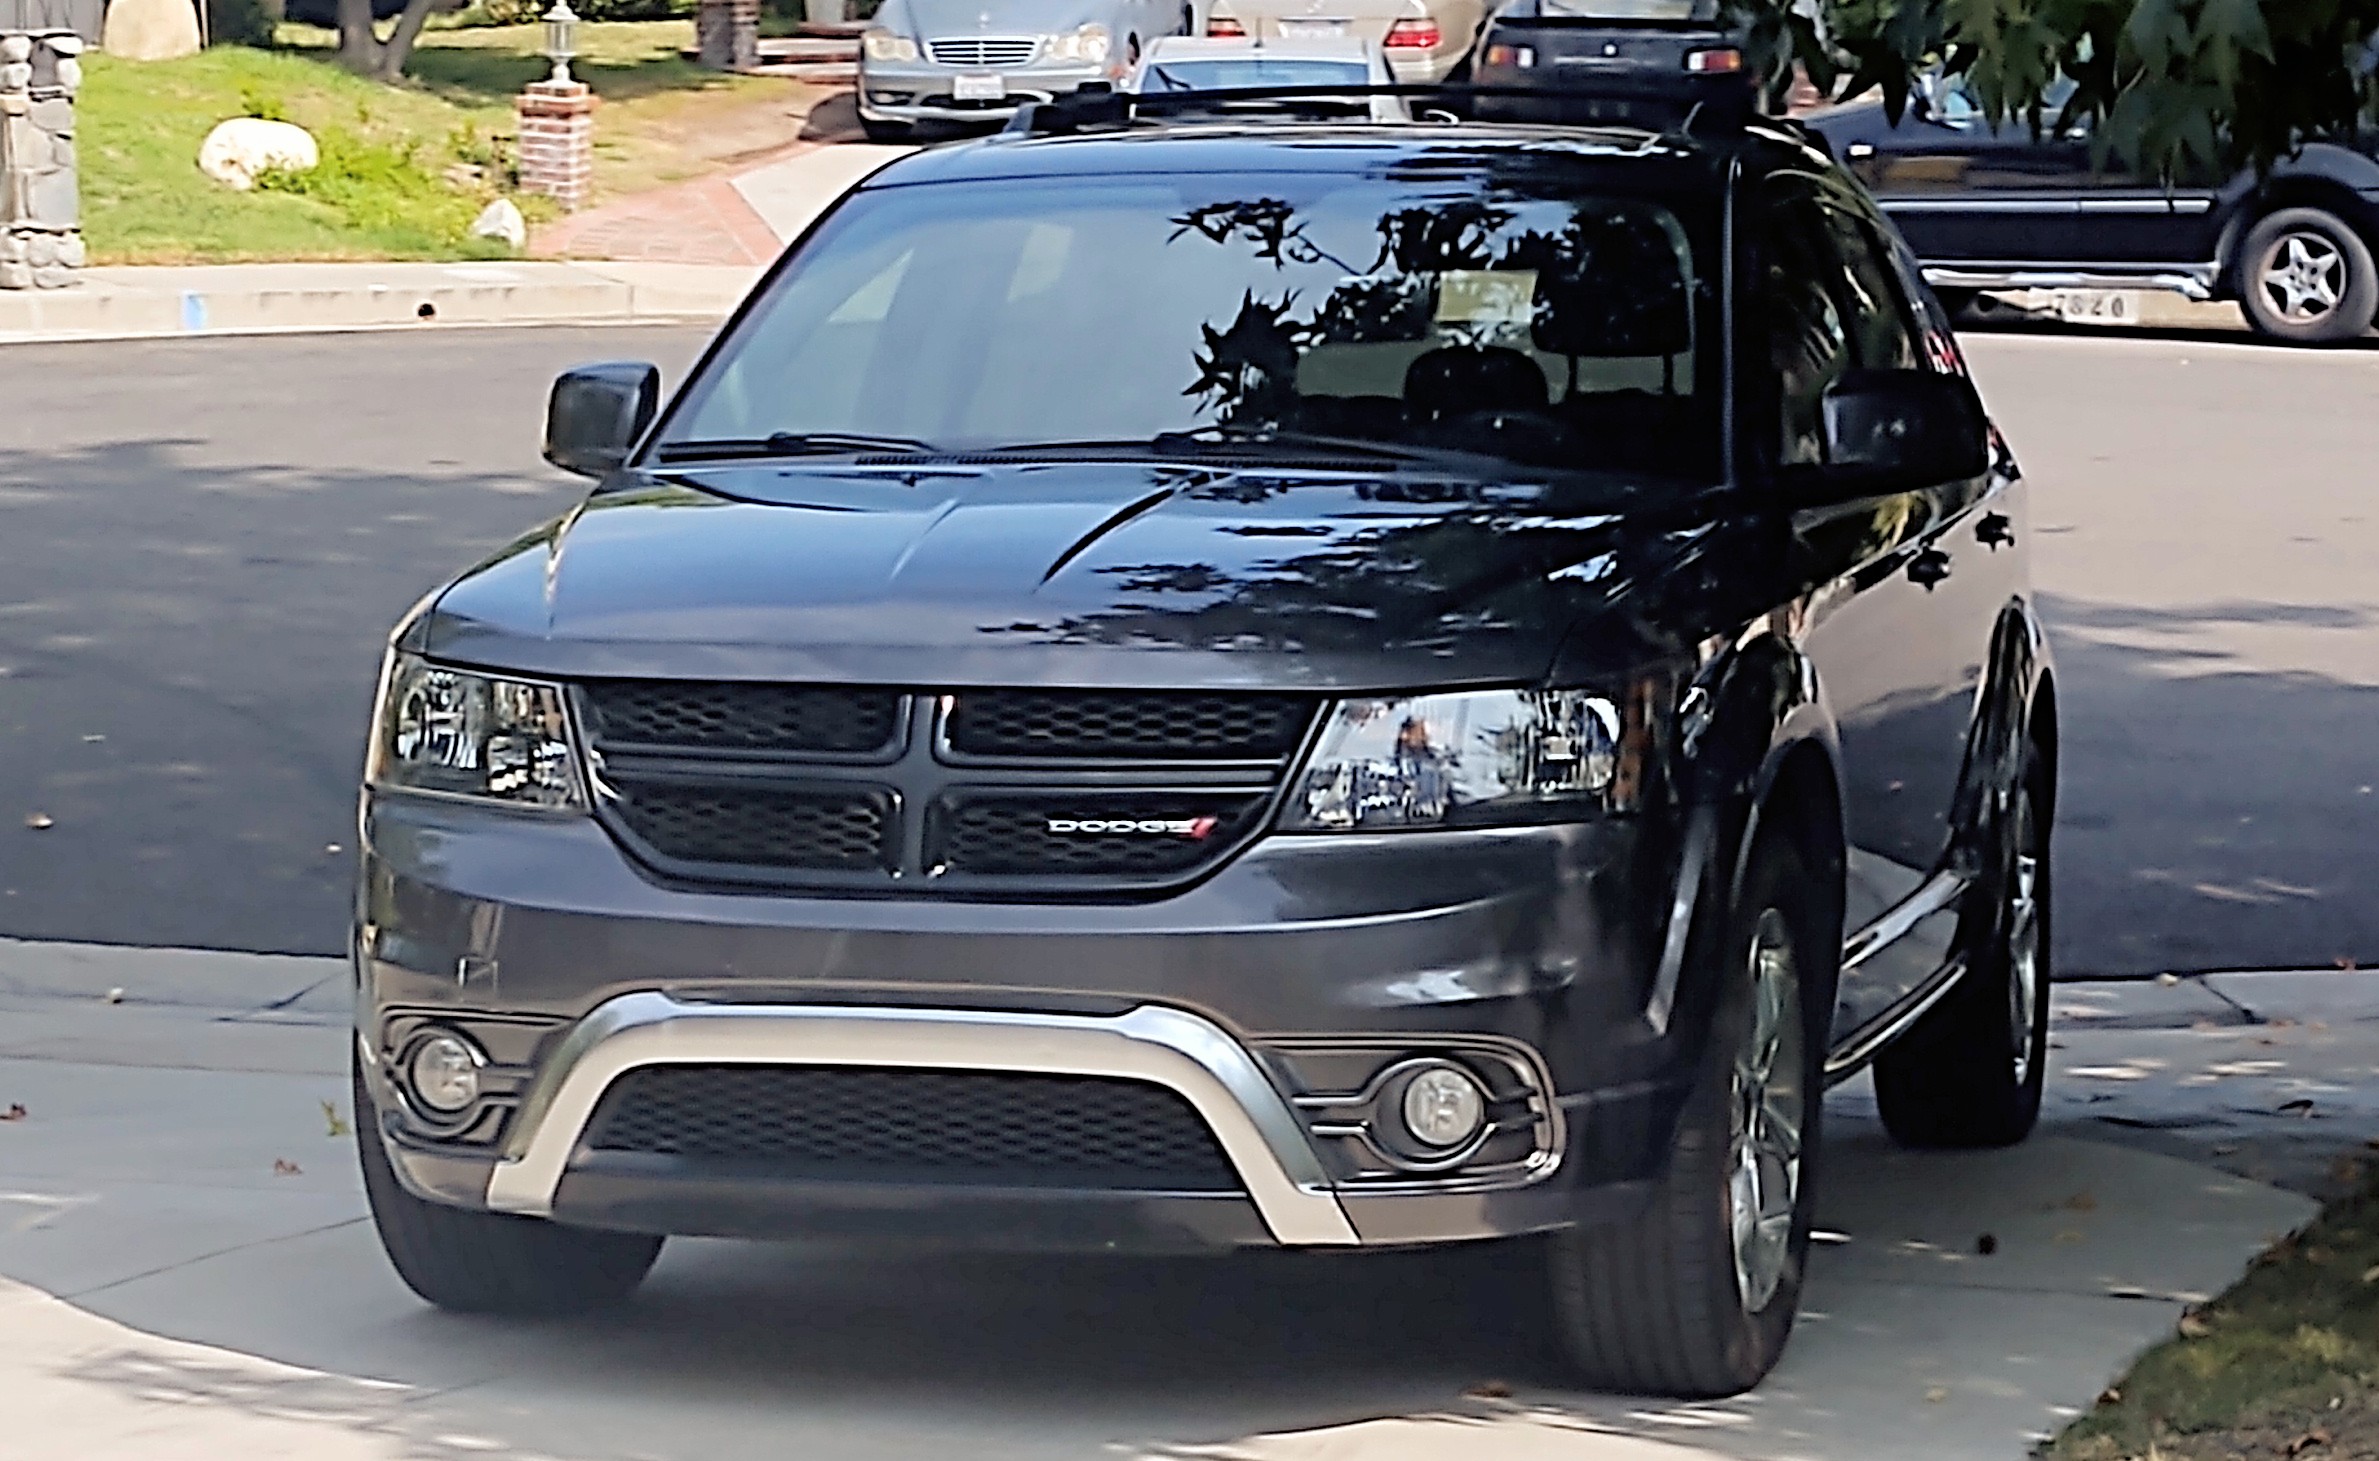
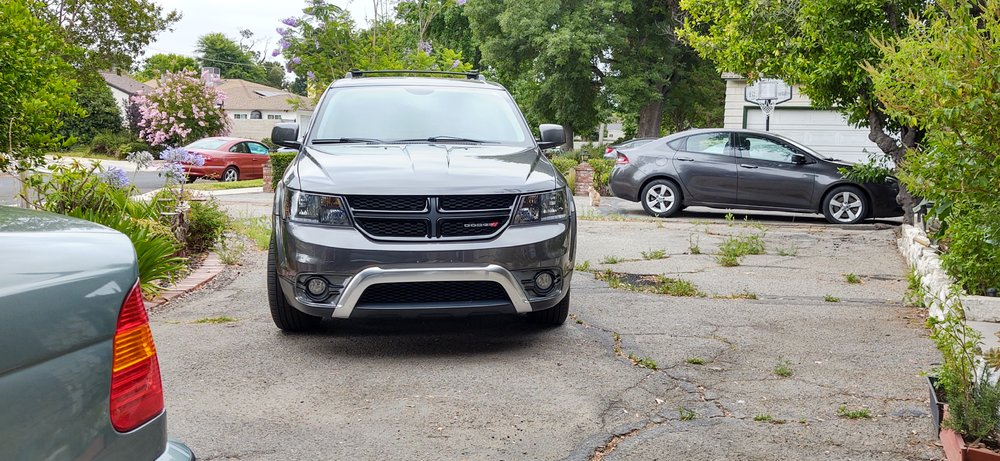
Painted the front lower fascia to match the body color, including the fog light bezels. Added carbon fiber auto-wrap as grill insert. Painted the grill satin black and bottom center fascia applique in satin black and flat black. Will likely change the bottom center fascia applique to all satin black along with the plastic insert strip above the chrome
-
2023 Dodge Journey “SUV Revival”
Journeyphenia replied to Armando G's topic in Articles, News & Reviews
Anything like that and it's bye bye utility -
-
Haters are going to hate....
Journeyphenia replied to John/Horace's topic in Articles, News & Reviews
Funny, Consumer Reports call the ride sophisticated at one point so how bad can it be in 2020 with other makes still using older platforms as well? I'm not saying it's an incredible vehicle compared to the latest and greatest but let's be honest. When I look at what is being offered, I see many vehicles have lost the utility of suv's. Ford Edge(and many others), no roof rack, BMW X5 (and many others) flat folding seats which aren't flat, Jeep Grand Cherokee, no more back hatch and the hits keep coming. Utility has it's place and until someone can show another vehicle with a flat fold passenger seat with storage below that seat, storage bins below the feet, a large false floor for storage in the back of the 5 seater, I'll continue to appreciate that the utility of the Dodge Journey is almost unmatched.- 1 reply
-
- 4
-

-
That's a different take on the front end, looks good. I still have the chrome accent on the front and was considering painting the entire road light sections, to each side of the chrome, to match the rest of the vehicle. I did a mock up with grey duct tape and I think it will look good but it's a gamble. After seeing your black accent, I'm thinking I might black out as well and still do the road lights in Granite Crystal Metallic.
-
2013 R/T to receive new high performance suspension
Journeyphenia replied to EBK's topic in Brake, Chassis & Suspension
No photo's right now. Moog has the rear sway bar bushings listed on their site . There are two sizes listed under the Crossroad, 22.1 and 24.1 so measure your sway bar diameter. Rock Auto sells the rear bushing and the sway bar links. The rear bar bushings are simple enough since it's a direct replacement and fits into the oem bracket. I had no issues with the bar links either. I think my mechanic charged $100 to do all and it took about an hour. We couldn't do the front because the Moog bracket wasn't wide enough to accept the bolts. More about that below. The front sway bar isn't listed at Moog under Dodge Journey. Measure your bar diameter, the 2015 crossroad is 27mm. I think I had to call Moog to get the part number, #K90402. The bushing isn't a direct replacement so it comes with it's own bracket and you have to use it. You have to cut into the Moog bracket and weld steel to the bracket to get the bolt holes where they need to be. 1. The footprint of the Moog bracket will need to end up similar to the oem. Either remove the oem and trace it, get an oem as a template or use my info. The oem bracket measures 4 1/4" long X 1 3/8 wide(+ - 1/16th). The bolt holes are spaced 3 1/4 apart and are 3/8 to 7/16" diameter. 2. On the Moog bracket, use a cut-off wheel to extend the existing bolt slots to the far ends so that the slot is now open ended. 3. Weld steel rectangles on the top side of the Moog bracket to give the now open ends added strength. 4. Drill out the bolt holes at 3 1/4" apart and clean it up with a grinder. Not as easy as the rear but was worth it. Not sure how it would translate with other models but with Crossroads springs and struts, it's been great. If body sway was 7 before, it's 3 now. Also, the tire traction is better at slow speeds on surfaces which cause side to side movement and was losing traction. The seats don't have a lot of side bolster but I find so much less body roll that I'm not shifting in the seat as much. If you do the change, let me know how it came out. -
bulbfacts.com is a good source for led vs halogen bulbs. While you are shopping bulbs, consider changing the rear hatch bulb to led. It's cheap, easy to do, matched the rest of the inside and provides much more light back there. I stayed with halogens and changed my low beams to Osram Night Breaker Unlimited, $45 on Amazon. They made a big improvement. My bulbs were shot though so I'm not sure how much brighter vs OEM. They are a whiter light and that looks more up to date. Went with Syulvania Silver Star Ultra Performance Hologen for the high beam/DRL One not is that, if you run your daytime running lights, that will shorten the life your LED's high beam a lot.
-
Can't Unlock Maps
Journeyphenia replied to lanc747's topic in Audio, Infotainment Navigation, MyGig, UConnect, etc.
I had my Nav go bad 3 times, by the 2nd and 3rd, it was out of warranty but it didn't matter since each time it happened was less than a year. The Nav company told me is was a blip in the update that came out to fix your car being accessed by other drivers, something like that anyway. They always replaced it with a refurbished and the 3rd refurbished has worked for about 2 - 3 years now so I think the update has been updated. In any case, let Dodge know that you know about the software update glitch that began the issue and they might admit that you should be covered. Most times, you will be covered if you are only out of warranty for under a month or so. You may have to kiss some ass to get it free though. The refurbished were about $1000 from memory and new was $1500, outch. -
2013 R/T to receive new high performance suspension
Journeyphenia replied to EBK's topic in Brake, Chassis & Suspension
If you want better cornering, an inexpensive upgrade would be polyurethane sway bar bushings. I changed all sway bar related bushings to Moog. The biggest bonus was changing the front sway bar bushings. It was also the hardest. You may need a metal shop to weld on steel in order to modify the Moog bracket to match the OEM bracket footprint. I did and it cost about $20 to do so. The rear bushings and other sway link bushings didn't seem to change handling much but the front sway bar bushings made a huge difference. The OEM bushings are rubber and much thicker so they do soften road impacts more and I'm not sure if there is more road noise yet, if so, it's minimal. Other than that, it's all gravy to switch over. Less vibration, a solid feel, more athletic cornering and good road feel. The Journey has it's issues but it's inexpensive to purchase so there is room for upgrades. Add a few of those upgrades and you have an even nicer ride. Add a pedal commander for a more sensitive throttle, change the sway bushings for handling, use synthetic oil, smooth out the cold air intake ducting, change the headlights to brighter bulbs, change the rear hatch bulb to led so it matches the rest of the interior bulbs, keep a coat of Nu Finish on the paint & windshield to reduce drag and wind noise, keep up on maintenance/ interior-exterior finish /needed repairs and you have a nice ride! -
I should have included, if you slicken the areas with dry lube silicone, use a food grade if you can, it's non-flammable. Also, be sure to do it with a cold engine and apply with a cloth instead of spray it on.
-
Pedal Commander is not going to increase power so it's equally effective on either the V6 or 4 cyl.. Probably a good way to think of it is a spot mode throttle response. It's a quicker and more sensitive response to your foot pressure so it comes down to what feels right to you. I tried going back to stock after using it and can't. To me, the Journey has some detuning issues. The transmission shifting and the throttle response are tuned to save gas and they are to the point of being small flaws. There are things you can do to improve your acceleration, here are some. 1. Smooth out the air flow from before the mouth of the snorkel to beyond where it exits the air filter box. I used a combination of auto wrap, a razor, and very fine sandpaper to create as little resistance throughout the air flow. After that, rub all of the airflow surfaces with dry lube silicone to slicken the areas for less resistance 2 Replace the air filter when it's showing dirt, before it's too dirty 3. Use Synthetic oil 4. Use 89 - 91 octane gas unless you are at higher altitude 5 Add pedal commander
-
i have the 6 cylinder. I experimented only in the City setting. I am currently at -1 for city stop and go. Sometimes at 0 or +1 when I want a little more response. Usually no higher than that. I think it has affected my mileage down a little but that may be partly due to my driving in that I tend to drive quicker these days. It didn't change the down shifting issue from 4th and 3rd much. Still hesitates to downshift somewhat.
-
My stock throttle sometimes feels like I have to press with too much pressure. I added the Pedal Commander and it works as it's described. I have it on City +4 and am still experimenting with it. I wouldn't remove it now that I have it, much better pedal feel for me. The car feels lighter and more effortless in acceleration. I don't think it's for everyone but if you feel similar about the stock throttle response, it's worth a try. You can dial it way down as well as way up so there's a lot of fine tuning for your taste.