

probak118
-
Posts
270 -
Joined
-
Last visited
-
Days Won
19
Content Type
Profiles
Forums
Gallery
Posts posted by probak118
-
-
I found in the past I had to delete that device from menu and add it again, sometimes it took several attempts but eventually it found the cell phone. I sometimes give up and try later. I tend to turn my blutooth off a lot then back on when needed, not sure if that is a factor ?
-
After changing the thermostat & housing and reconnecting the upper rad hose to it, that hose was pretty soft ( full of air). As mentioned I kept squeezing it one thermostat opened and watched as air bubbles escaped into the coolant reservoir bottle. Eventually the hose firmed more but it took some time for all the air bubbles to stop escaping into the reservoir bottle and real heat coming out from the main vent on passenger side. I think perhaps 1 litre of fluid maybe went on the floor from the hose, guess I just got lucky ?
-
17 hours ago, Hankster said:
Check the storage bins in the rear seat floor for water. Pull the front door sill trim then feel under the carpet for water. I had this issue and had water pooling under the carpet. On mine the top of the carpet was still dry to touch. I had to repair a leak then remove the carpet to dry it.
Hank
If I may clarify, I think Hankster is saying you should also check the door weather seal conditions and rear floor storage bin areas edges are still working / making a good seal ?
-
-
My 2012 3.6 was just remove and replace as I recall, no distinct differences. How about any stamped numbers or wording, can you tell the direction based on comparing the old and new that way ? Maybe go the parts dealer you bought from and look at the pictures they have, might show a direction based on the diagrams ?
-
On 12/27/2019 at 9:06 AM, probak118 said:
It is funny that with an average fill my distance to empty is generally around 560 kms but when you force more in into it or are on the right angle during a fill, I see near or just above 700 kms . There must be close to 2 gallons of empty tank in most cases. In the end, we all like you say just accept it.
Sorry everyone, meant to be 600 kms / tank not 700 kms
-
Volunteer firefighter for too many years now LOl. I have never seen a tow truck driver use any of those connections. As mentioned by 2late4u 'snatch and grab" your lucky if it is taken out of gear half the time. Unless you plan on keeping it on ready to use all the time, return it.
- jkeaton, 2late4u and Summer Solstice
-
 1
1
-
 2
2
-
10 hours ago, 2late4u said:
wait till your driving down the interstate and it senses lost traction and does its job you won't be to thrilled then,happened to me one time and the way it did its job buy downshifting it scared the hell out of me,i drive in the snow with it off...
While driving slower on a snow covered road a few years ago, same happened to me ......I also turn it off now if driving on deeper snow covered roads; sticking to old school.
-
It is funny that with an average fill my distance to empty is generally around 560 kms but when you force more in into it or are on the right angle during a fill, I see near or just above 700 kms . There must be close to 2+ gallons of empty tank in most cases. In the end, we all like you say just accept it.
-
Hankster
On 12/9/2019 at 9:22 PM, Hankster said:Time for a new thermostat. Easy diy job on either 2.4l or 3.6l.
Hank
Job was almost too easy...30 minutes at the most including a 10 minute beer break. Funny part was NAPA sold the entire assembly already assembled cheaper than buying just the thermostat and gasket alone ! Now my coolant temp climbs to and holds around 90 C ( 191 F ) easily on those -8 C (17 F ) morning 7 minute drives lately. Wife was not impressed with the heat level when coolant temp maxed at 71 C ( 162 F ) while driving LOL , thanks all for your replies
-
Coolant thermostat temperature below thermostat regulating temperature code read after engine light came on while driving. I have such a sort ride to work daily 9 miles both ways I doubt my engine gets to normal operating temperatures really. I reset the code and hope my thermostat just was a little sticky and was opened ? My coolant temp was reading about 90 C ( 194 F) but I then idled at home till it got to about 205 F and my electric fan kicked on and temp dropped. Complete fluid change out in 2018 and am going to compare temp of in car readout and a digital readout pointed at radiator inlet hose to verify both are the same temperatures. If so may change thermostat just to be safe, looks to be wide open and easily changeable myself, at least if sticking it is not sticking closed and overheating. Any tips I should know from those who have changed thermostat themselves ?
-
As mentioned V6 for sure, the DJ has some weight to it.
-
Dealer accepted your $160 but did they even check the parking brake system at all ? The " ! " symbol is a brake trouble indicator symbol on Canadian sold vehicles when I googled those symbols.
-
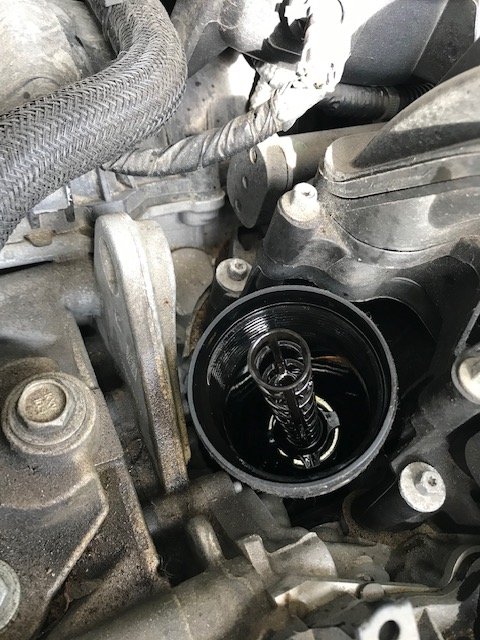
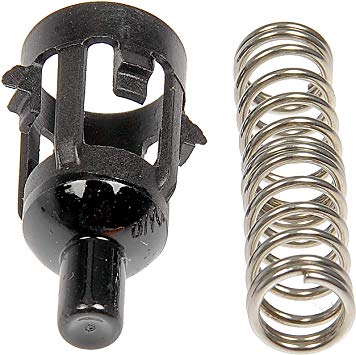
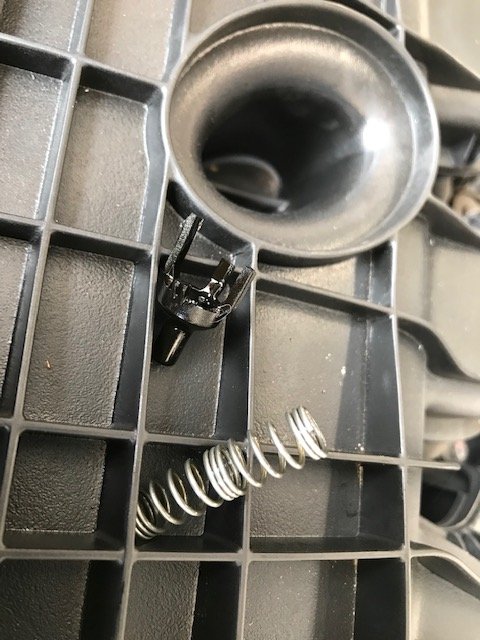
First time changing oil outside of dealer myself since the DJ was purchased new. Was letting the pan and filter holder assembly sit and drain longer when I heard a popping noise and noticed two items flying in the air. After googling and realizing two parts now where not part of the assembly. Actually I never noticed them in the first place, as they were inside the cylinder cage. Found the oil filter spring and a broken check valve after half and hour lying in the bottom of the engine compartment. See images attached ( hopefully) but they are dealer items that thru the dealer the entire filter holder assembly must be bought. Luckily, amazon has the two pieces sold as a pair for only ( $ 28 cdn ). I have since been told 2013 and earlier DJs have this plastic check valve and spring, what are the odds of it breaking the FIRST time I decide to change oil myself on this car ? I can't help but think the Chrysler quick oil change labourers had it break on them and simply put it together again without mentioning what happened ? Who knows, ordered replacement parts and will simply install during the next oil and filter change. Did not save any money on this oil change but learned a little something.
-
I have had the same issue for a couple years now, tried radio firmware update / reset did not help. It happens randomly and radio simply freezes and stops working, I simply shut off car at the next stop and restart, problem solved. not worth the $$ to fix as it does not happen daily. Personally, I think if needed an aftermarket compatible is best option.
-
-
Wife and I were driving and started counting which we saw more DJs or her GMC Terrains ? There are a lot of DJs out there for sure, plus Chrysler Jeeps. Not sure if is just our area in the south end of Ontario ?
-
-
After seeing this thread and our 2012 3.6 L having 99300 kms it was time. Loosened the lower corner only allowing a limited drain ( no mess) then lowered the entire cover. removed all residual sealant from cover face and cleaned the inside including the magnet. Did the same on the transmission face after allowing it to drip naturally for about an hour, then cleaned both faces with brake cleaner to be sure surface was clean. Removing the old filter was easy only two torx screws to remove then twist and pull but, the small sleeve remained in place. Did not want to risk damaging the insert smooth walls and still not get it out. So, we left the original one in place and did not use the new replacement. The new filter minus the replacement sleeve took a little force to slip into the sleeve but you felt in slip into position and knew it was seated properly. Had a second set of hands hold a rag over the the small dip of fluid still leaking so not to leak on any of the sealant before both faces were together. Remove the rag as you are lifting the cover back into place.
Now for the fluid replacement, we used ATF+4 not a general ATF. We measured the volume of fluid in the drain pan after also emptying the fluid from the old filter, about 6 quarts / liters. This amount was slowly installed using a long neck funnel into the tube marked for dealer use only. We then did the usual add about half the volume and going thru all gears then adding the remainder. Check for leaks from the cover and hopefully none and you are good to go. Cost was about $120 Cdn total.
-
mwsdhd,
I tested my sunroof drains (2) after noticing a couple small water marks on each of the "A" post where it meets the roof liner. My two drains exit on each side alongside the inside of the front tires, on the same side as the drain holes.
-
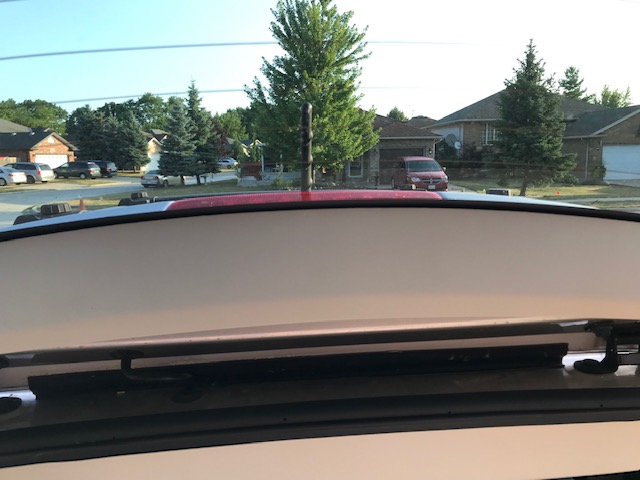
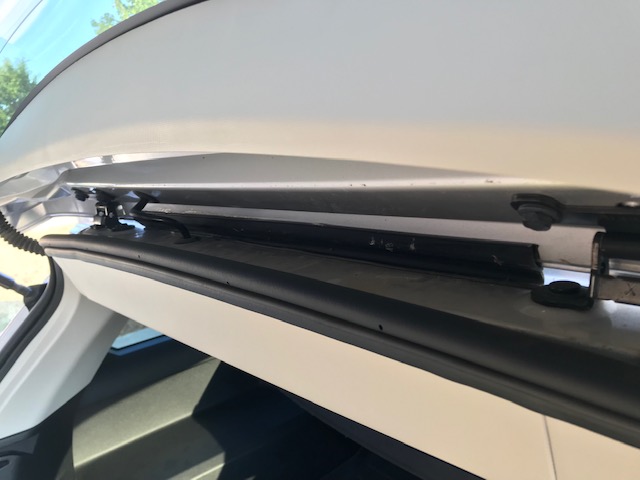
Half of the left side had come off, you can see some glue above the left side top now.
-
That flexible rubber strip was about half off of my 2012, you see it when lift gate is fully open; attached to the underside of the liftgate top. I used gorilla glue to re-attach but am now curious what that rubber strip is for really ? It looks like a drip edge you would find over a storm door but does not go the whole width of the liftgate opening. Does it help with wind noise or simply force water entering the seem to go to the sides and not drip on you when open ?
-
Great idea, thanks I will do just that
-
FYI :
From a article I just found, the SXT , Crew and R/T trim packages indicate as having a 6 speed transmission the SE in noted as being a 4 cylinder 4 speed base model.
")
Dodge journey wrap
in Photos & Videos
Posted
Hood scoop and stripes on the hood look sharp. Must be an optical allusion on the rear as the upper looks wider from the picture.