khnitz
-
Posts
62 -
Joined
-
Last visited
-
Days Won
11
About khnitz
-
 John/Horace reacted to a post in a topic:
What Did You do to your Journey Today
John/Horace reacted to a post in a topic:
What Did You do to your Journey Today
-
khnitz reacted to a post in a topic:
What Did You do to your Journey Today
-
My in-laws have a 2014. I've done some repairs on it over the years, like this one and this. That one is now with another member of the family. It's a nice vehicle - about the only thing it should have had by that model year (but didn't) was a backup camera. I never got around to adding it, but it would have been on the list had it made it into my garage.
-
khnitz reacted to a post in a topic:
What Did You do to your Journey Today
-
khnitz reacted to a post in a topic:
Replaced LF Wheel Speed sensor, now traction control light but no codes
-
5rebel9 reacted to a post in a topic:
What Did You do to your Journey Today
-
John/Horace reacted to a post in a topic:
What Did You do to your Journey Today
-
larryl reacted to a post in a topic:
What Did You do to your Journey Today
-
Well, the Journey was picked up yesterday and sent on to it's new owner in the Southeast. I learned a lot working on this one, and I hope it serves the purpose for its new owner well.

-
I've driven 150+ miles since replacing the shift solenoid pack and the Journey hasn't entered limp mode 🙏 The P0401 EGR code did come back once. When I read it, it showed as Stored, and not Active. I drove around a bit and was watching some of the EGR-related values. Here are the readings while I was sitting at idle at a stoplight. I have a pretty limited understanding of what is correct for the EGR system. The only thing that looks odd to me is that the actual EGR opening never reached 0.0mm, when that is the targeted position. During acceleration the EGR values would vary, and then settle at steady-state speeds.

-
khnitz reacted to a post in a topic:
What Did You do to your Journey Today
-
khnitz reacted to a post in a topic:
What Did You do to your Journey Today
-
The transmission vent does have it's cover. I'll have to check if it's plugged or not. I'll look into the TIPM solutions, too. Thanks for the direction 👍 Come to think of it, the intermittent wipers on my '05 Ram Cummins don't work correctly, either. They don't randomly turn on when the switch is off, but they don't function normally, either.
-
khnitz reacted to a post in a topic:
What Did You do to your Journey Today
-
khnitz reacted to a post in a topic:
What Did You do to your Journey Today
-
One more for today: Any guesses on what this white stuff was inside the front transmission cover? It wiped off easy enough, just seemed odd.

-
2late4u reacted to a post in a topic:
What Did You do to your Journey Today
-
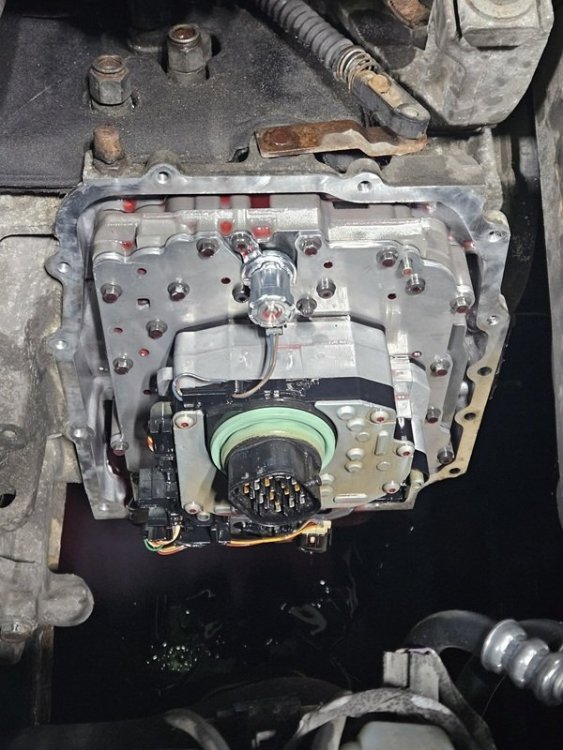
I installed the new (rebuilt) shift solenoid pack today. It's the actual current Mopar part and it was only about $200 at RockAuto. I did the manual relearn process initiation and took it for a test drive - it did well so far 🤞🙏 Another quirk of the car... Even though the wipers are off, they will occasionally cycle. And, it is not as steady as if set an an intermittent wiping interval. The just randomly cycle. Sometimes not for a while, and then other times 5-10s apart. It's weird. Ideas?


-
khnitz reacted to a post in a topic:
What Did You do to your Journey Today
-
khnitz reacted to a post in a topic:
What Did You do to your Journey Today
-
The AM/FM is still not working - except - for 100.7FM - that comes through loud and clear 🤔 I made use of the aux input and iPod connection to play my podcasts and music on the drive. The heat is still AWOL on the passenger side. What heat that is available on the driver's side kept the car above freezing. Thankfully, the seat heaters work 😁 I think the next step would be to replace the heater core (again), but that will be for the next owner to decide to do - I will make them aware of it, though. A question on the heater core, though: does coolant always pass through it by design, or is there a on/off valve somewhere? When I was doing the power steering lines replacement, I noticed that the coolant hoses at the back of the engine seemed to be in a non-OEM configuration, but I didn't have a reference to compare against. The code I got for the TCC solenoid was P2764. That hasn't returned since replacing that solenoid. I've put over 1100 miles on the Journey since finishing the suspension work, installing the new(er) tires and getting an alignment. And, it's been over 800 miles with that new TCC solenoid. Yeah, as you also do, I've been trying to shake out the car, getting any last issues to reveal themselves so I can address the most important ones before passing the Journey on to its next owner in South Carolina.
-
5rebel9 reacted to a post in a topic:
What Did You do to your Journey Today
-
I completed the 600+ miles round trip late last night with the Journey. There were 2 limp-mode incidents: I forgot about one that happened just as I was leaving, and then another early this morning. It seemed that if I got to the highway and was cruising at speed, there would be no issues after that. The new solenoid pack (I went with the MOPAR part) was waiting when I got home, and I'll get it installed this weekend. All-in-all, the car did very well on the drive. And actually, I thought the base audio sounded really good for what it is
-
I completed the first 300miles of my with the Journey today. The only code shown after all that is the stored DTC P0765 UD SOLENOID CIRCUIT error. The Journey did not go into limp mode at all during the drive (including one stop for gas). I have a new solenoid pack on order that should arrive before I get back home. I'll install that this weekend, and hopefully that will put the 0765 DRTC to rest 🙏
-
larryl reacted to a post in a topic:
What Did You do to your Journey Today
-
khnitz reacted to a post in a topic:
What Did You do to your Journey Today
-
I stand corrected... As I was letting the engine idle while I checked the transmission fluid level again, I had turned off the HVAC (both front and rear) to let the engine warm up as much as possible. And, lo and behold, the radiator fan WAS running. Son of a gun... So, that is a next item - I've ordered a new radiator fan resistor and will install that once it shows up later this week. Then, while the engine was idling for the above fluid level checking, I noticed some drops of ATF on the garage floor. !@#@%@#$! Turns out, the o-rings on the newly-installed Dorman 624645 transmission cooling lines were bad. I had traveled about 500miles since they were installed. I'm glad I spotted the issue before an upcoming long drive this week. Looks like they were too big (too large an outer diameter) for the application and tore as the lines were connected to the the transmission cooler. This is why each is shown in 2pcs below: the thicker piece is what stayed in the groove on the line, and the thinner piece is what was cut/tore-off during installation. I used Viton o-rings as replacements. Here is the evidence of the leak - the fluid wept out of the connection and onto the lines. @5rebel9, thanks, again for the addition detail!


-
@2late4u, my signature shows it as a 2009. This is the one that I got from my step-son and his family when they were done with it. I do also repair my in-law's 2014 from time to time, too. Hence the opportunity for confusion 🙃
-
@5rebel9, it looks like my heater core was already replaced at some point. The crimps at heater line flanges appear to be done in the "newer" style (from what I could tell by watching some core replacement videos, and in particular this one) and it has hoses and clamps on the lines up to the firewall. Also, with the engine idling here for while and the interior temperature set on high for driver and passenger, both lines to the heater core are hot. Using the thermometer I check my AC temps with, at the moment the driver's side is blowing at 96deg F, and the passenger side is blowing at 50deg F (and it's 48deg F in the garage). I keep massaging the upper radiator hose now and again and tapping on the lower heater core line trying to work any trapped air through the system.
-
Thank-you @5rebel9 for all the detail on the design of the heater core and HVAC! I watched a couple of heater core replacement videos this morning - the cut, add hose and clamp repair method does look like the best path if it winds up being the heater core. This morning I confirmed that the driver and passenger blend door actuators are functioning. The flow direction actuator (feet, chest, defrost) is working, as well. My next step this morning are to try and bleed the cooling system some more. From what I read in other threads, I will pull the front end up on ramps to elevate it, and then run the engine with the cap off the coolant. I also saw another suggestion to gently tap on the lower coolant line to the heater core while the engine is running to free up trapped air. A question: does the 3.5L have two thermostats? Besides the one on the side of the engine block above the transmission (which I changed last night), is there another at the right-front corner of the engine (behind the passenger headlamp/front grille area)? At the point where this radiator hose enters the block behind/below the alternator? And in other news, I discovered that this Journey has an iPod adapter! Which is fortunate, because I still use a 3rd Gen iPod Touch for my podcasts and music 😁 Anyone know where that frame clip to locate those connectors is supposed to attach?


-
Now I have heat on the driver's side, but not on the passenger side. I'm doing some research and the first likely culprits are either a clogged heater core (but why does the driver's side get heat) or a bad blend door actuator for the passenger side. I'm leaning towards it being the blend door. Airflow out of both sides is good. And, unfortunately, the car went into limp mode once at the start of my test drive after replacing the thermostat. After a power cycle, it did not go into limp mode again on the rest of the ~5mile test drive (at speeds of 0 to 55mph).
-
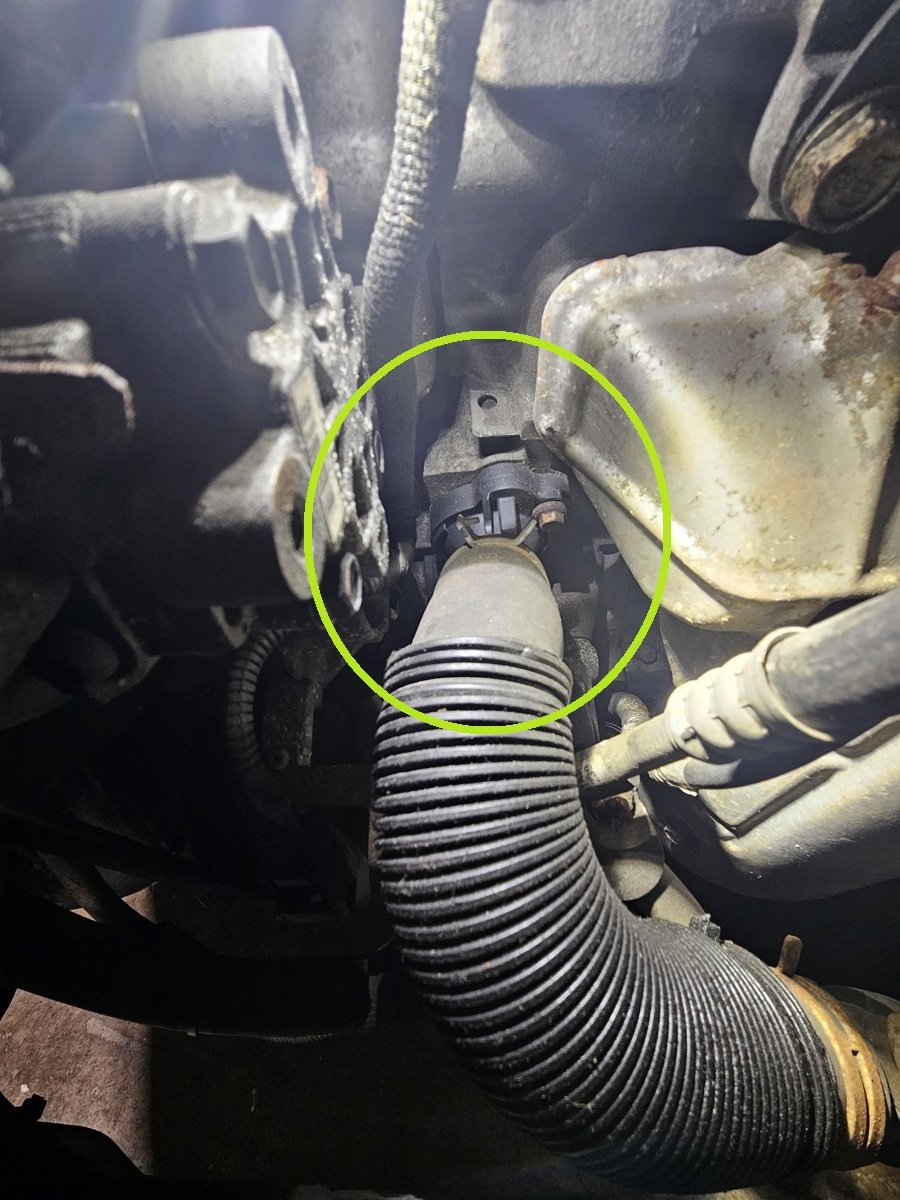
Tonight I replaced the thermostat. We'll see if that helps with interior heating in this cold weather. This video was helpful, and he replied to a question I had on his solution. He also suggested to make sure that the radiator fan resistor wasn't bad (where the fan would be running all the time). On our Journey, that is not the case...the radiator fan does not run all the time.