s4in7
-
Posts
6 -
Joined
-
Last visited
About s4in7
Recent Profile Visitors
415 profile views


-
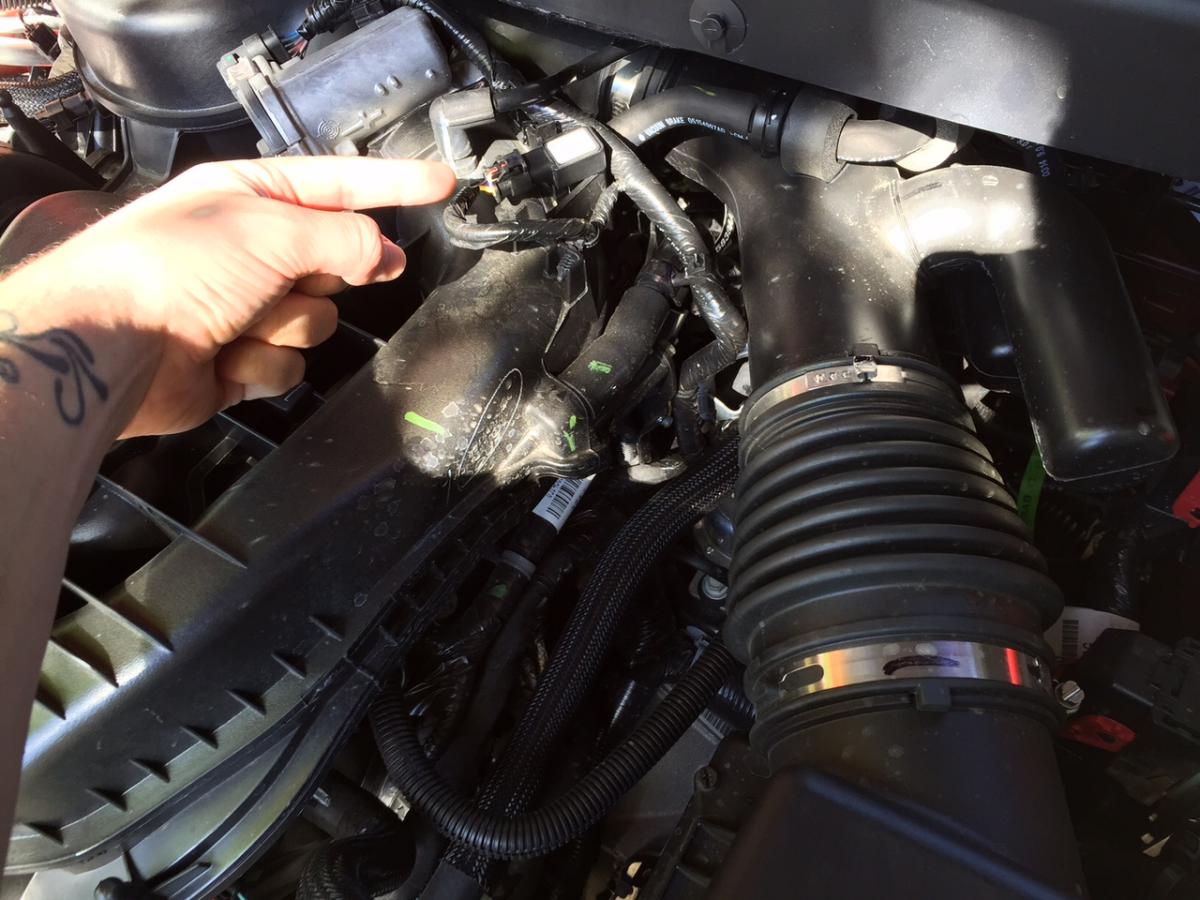
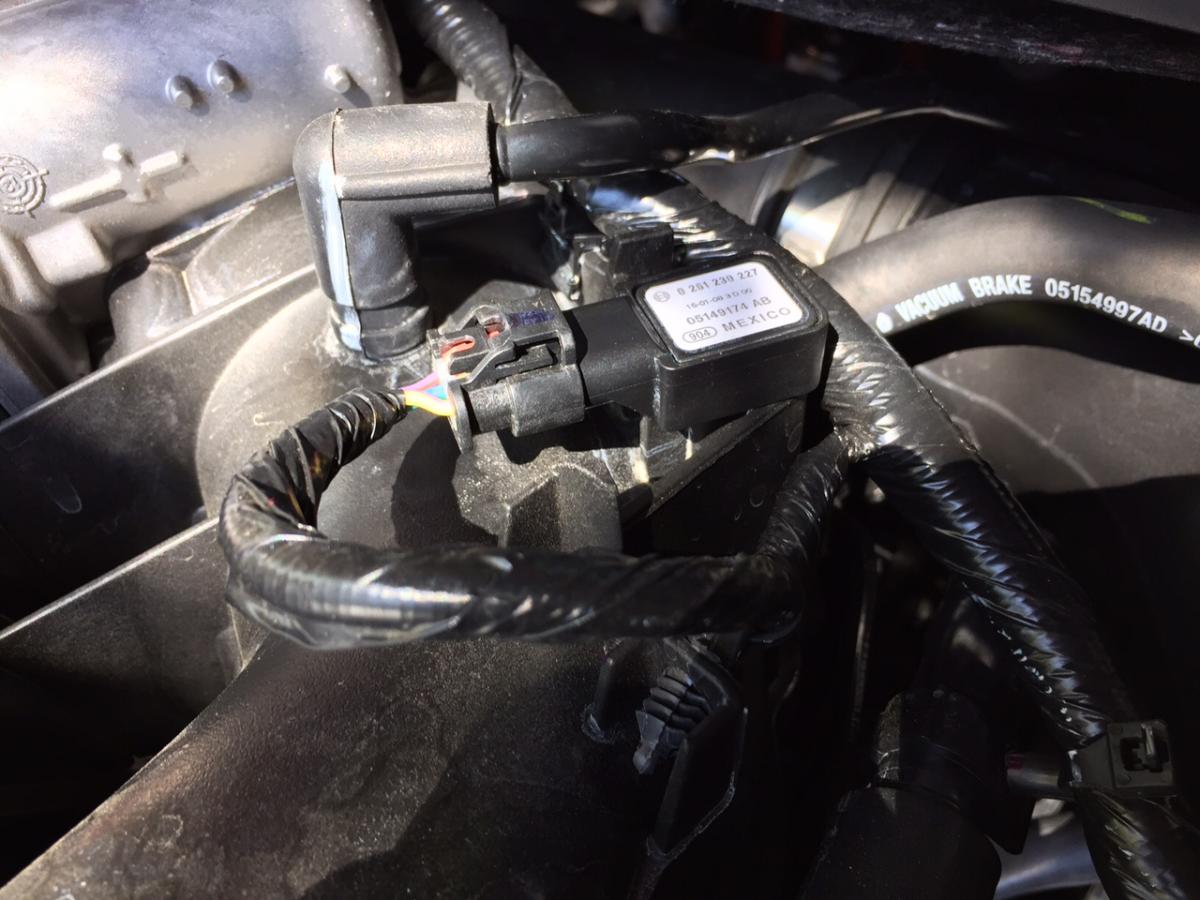
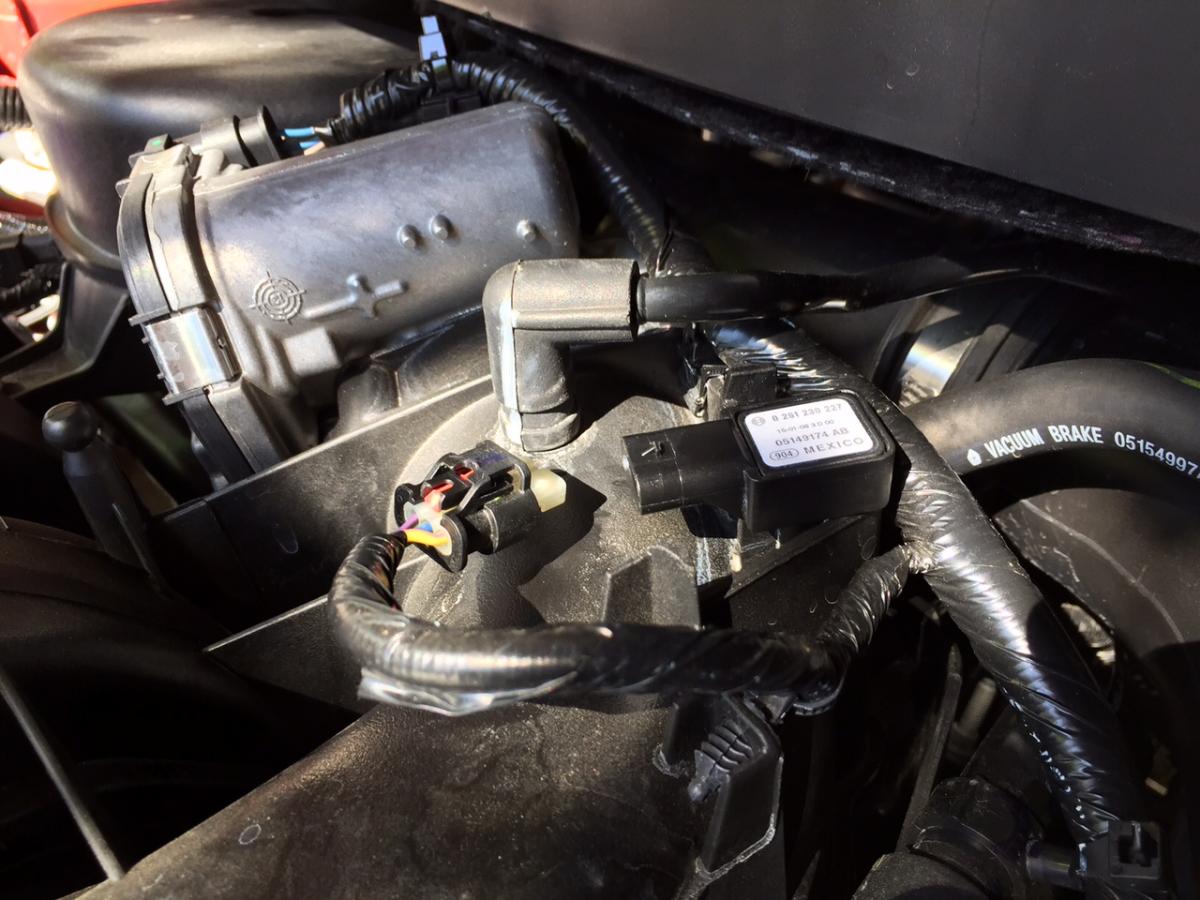
I was wondering if you knew where the map sensor would located on the DJ 2.4 ltr engine
-
 BHWofford reacted to a post in a topic:
$70 Autozone SRI (w/ pictures)
BHWofford reacted to a post in a topic:
$70 Autozone SRI (w/ pictures)
-
dhh3 reacted to a post in a topic:
$70 Autozone SRI (w/ pictures)
-
Exhaust muffler journey 3.6 2013
s4in7 replied to Emmanuelsxt6blacktop's topic in Accessories, Modifications
Just to piggyback on this topic, would you see any gains by just swapping out the factory 1 in 2 out muffler with a high flow Magnaflow? Or would you need to eliminate the stock muffler AND resonators to see any appreciable difference? -
MAF's aren't too fragile, you just have to be careful not to touch the hot wire! MAP's are much more basic and the sensor membrane is embedded in the square plastic housing, so as long as you don't get overzealous with the straw and poke it into the membrane you'll be fine It's a good idea to clean it every time you clean or change your air filter--at least in my experience.
-
Very cool stuff indeed! I'm a graphic designer with some UI experience if you need assistance on that side of things. Thanks for all your work!
-
I do And even though my vehicle has less than 1000 miles on it, the MAP sensor was still dirty with dust and specks of dirt or something on the sensor membrane. Cleaning it really made a difference to the ol' butt dyno.
-
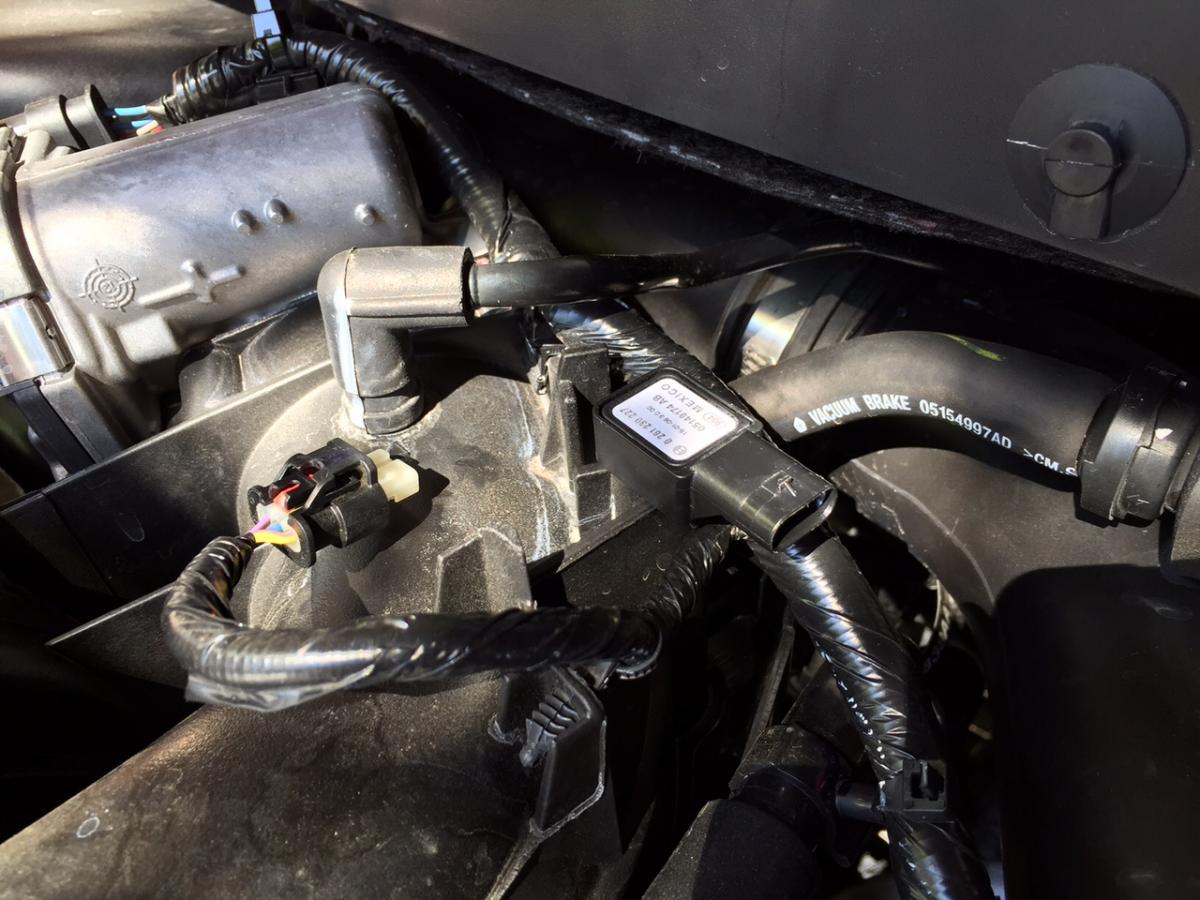
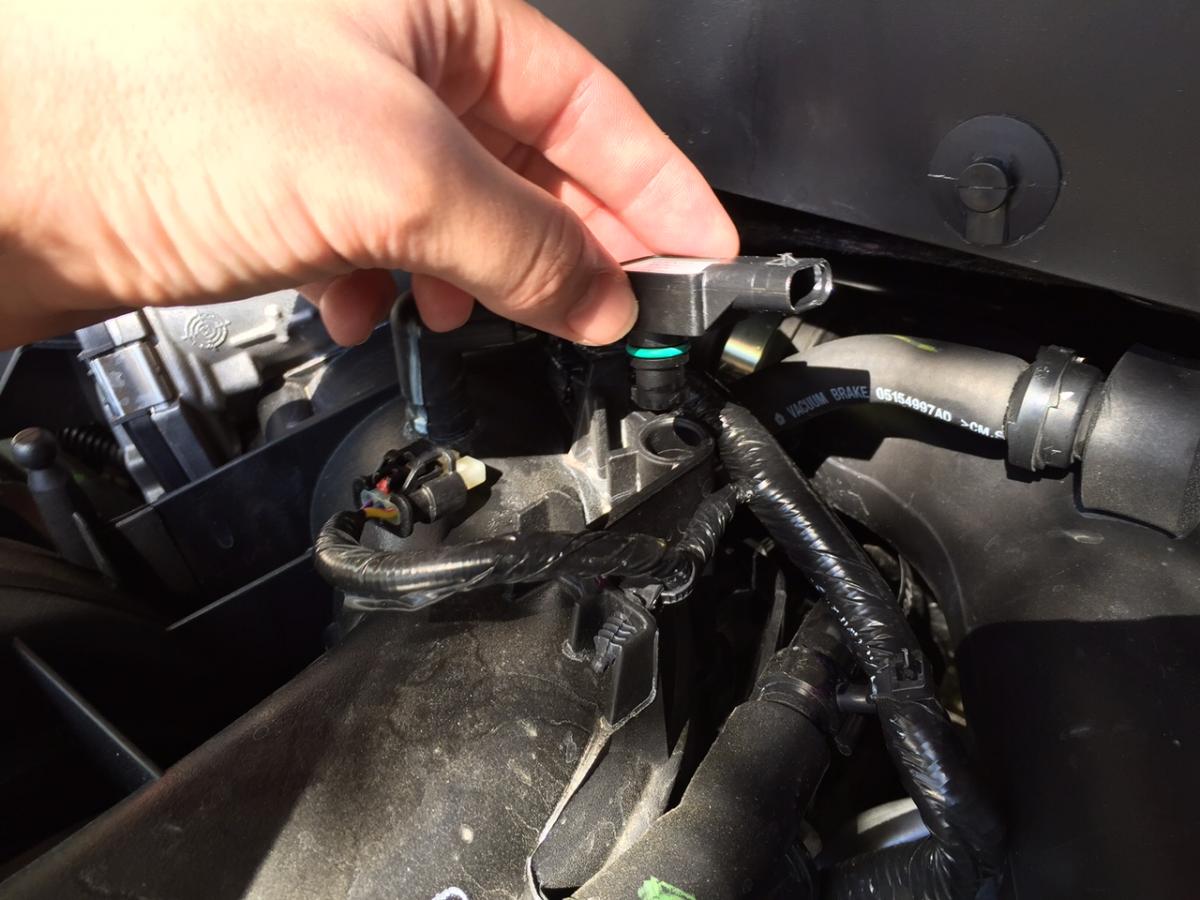
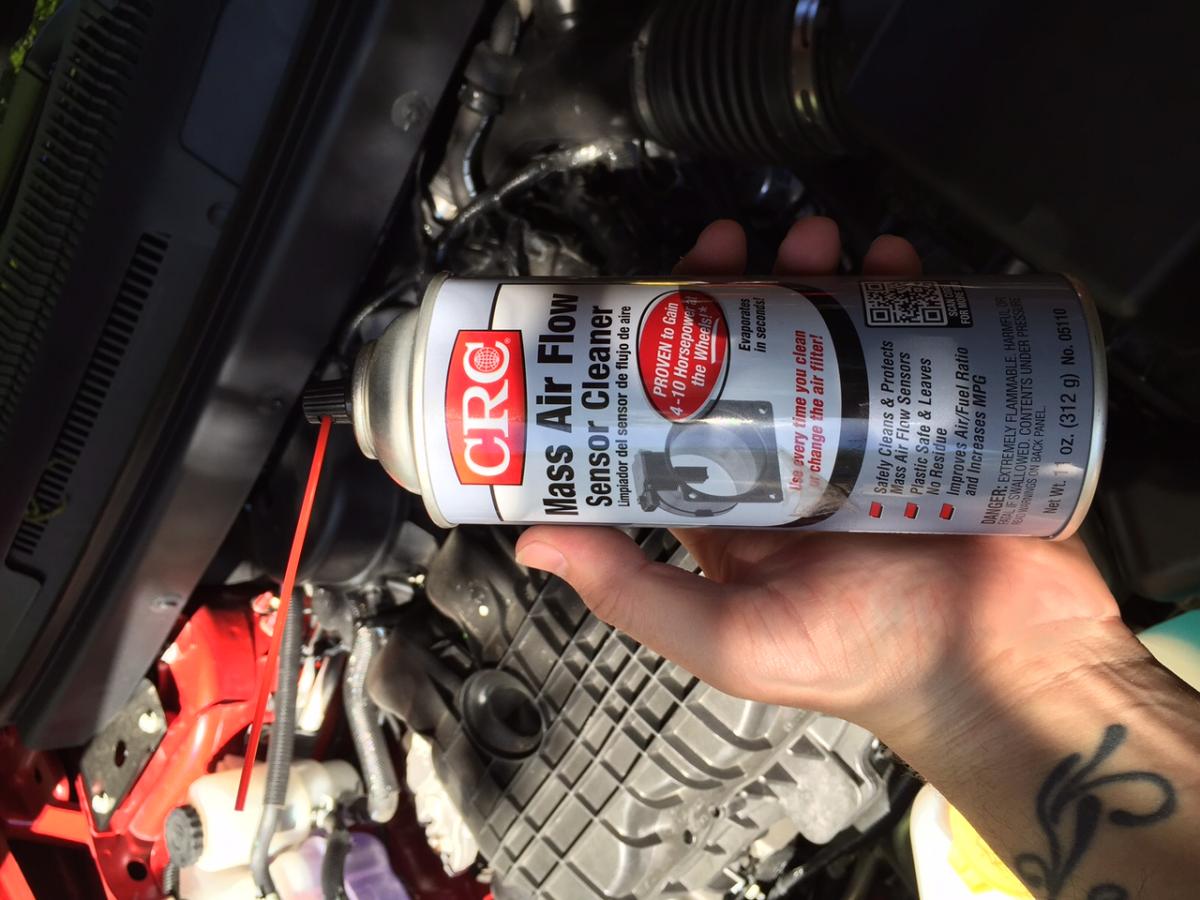
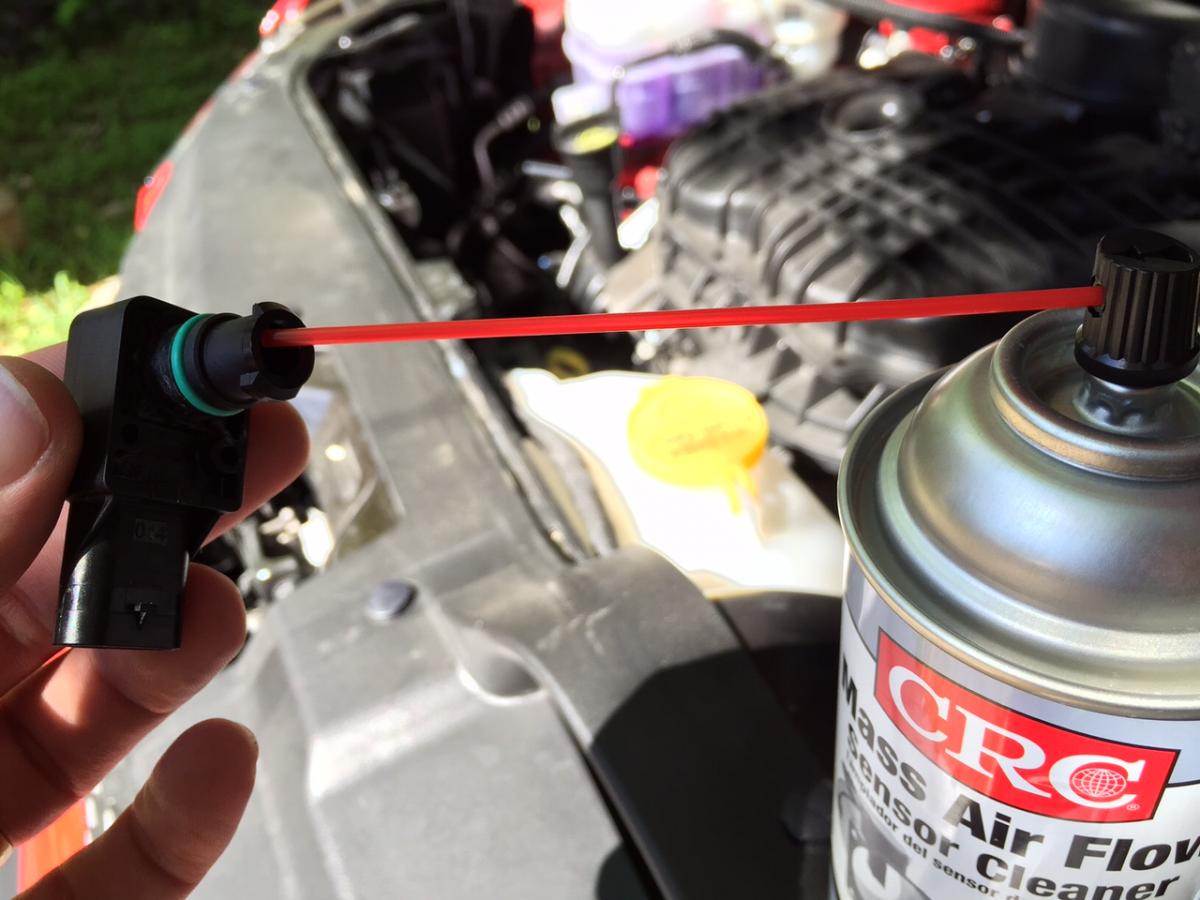
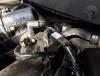
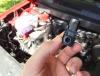
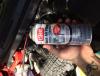
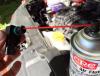
Since our DJ's (and most Chrysler Group vehicles) employ MAP sensors in place of MAF sensors, and there's barely any information about cleaning them, I figured I would step up. First, go to AutoZone or wherever and get you some MAF Sensor cleaning spray or in place of that Electrical Parts cleaning spray. Next, remove your engine cover and locate your MAP sensor. Unclip the sensor wire and remove. Then, turn the MAP sensor counter clockwise to about 3 o'clock (the back of the engine bay is 12 o'clock) and wiggle slightly while pulling straight up. It'll come out with minimal force. Grab your MAP sensor and spray and stick the straw in the hole of the sensor, careful not to go all the way down and rub the straw against the actual sensor inside the plastic housing. Give it 10 or so good, quick sprays changing angle slightly between each one. Shake out the excess and let it dry (should take 10 seconds). Plug the sensor back into it's home in the same 3 o'clock orientation and press down until the blueish o-ring is not visible. Keep pressing down, and turn the sensor clockwise back to its original factory orientation and reconnect the sensor wires. Fire it up, let it idle for a bit, rev it a few times, make sure it's not throwing a CEL and if all's good take it out for a spin. My sensor was a little dirty (I could see some dust and stuff down in there) and cleaning it really seemed to put a pep in it's step! Highly recommend doing this every time you clean or change your air filter or every few thousand miles.


-
Totemus reacted to a post in a topic:
$70 Autozone SRI (w/ pictures)
-
onecrazyfoo4u reacted to a post in a topic:
$70 Autozone SRI (w/ pictures)
-
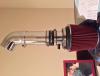
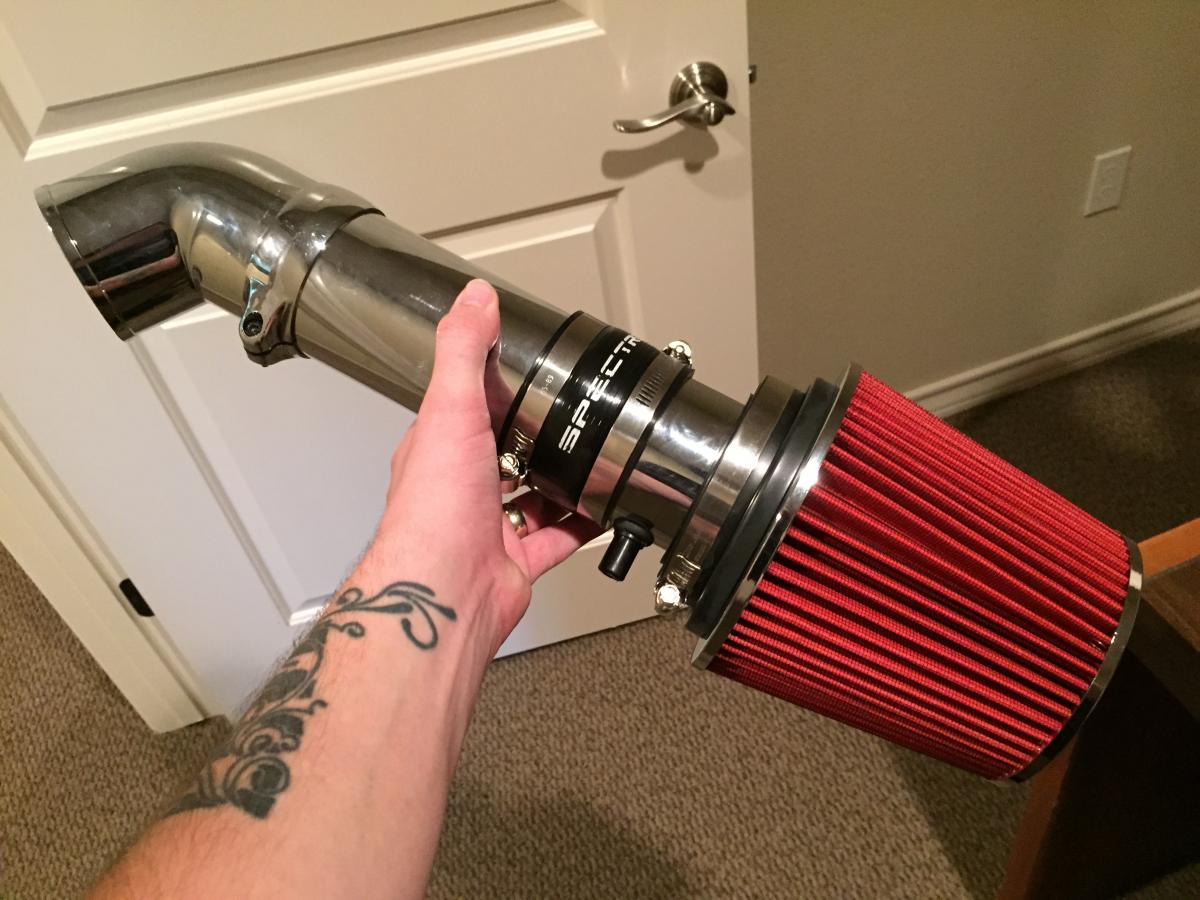
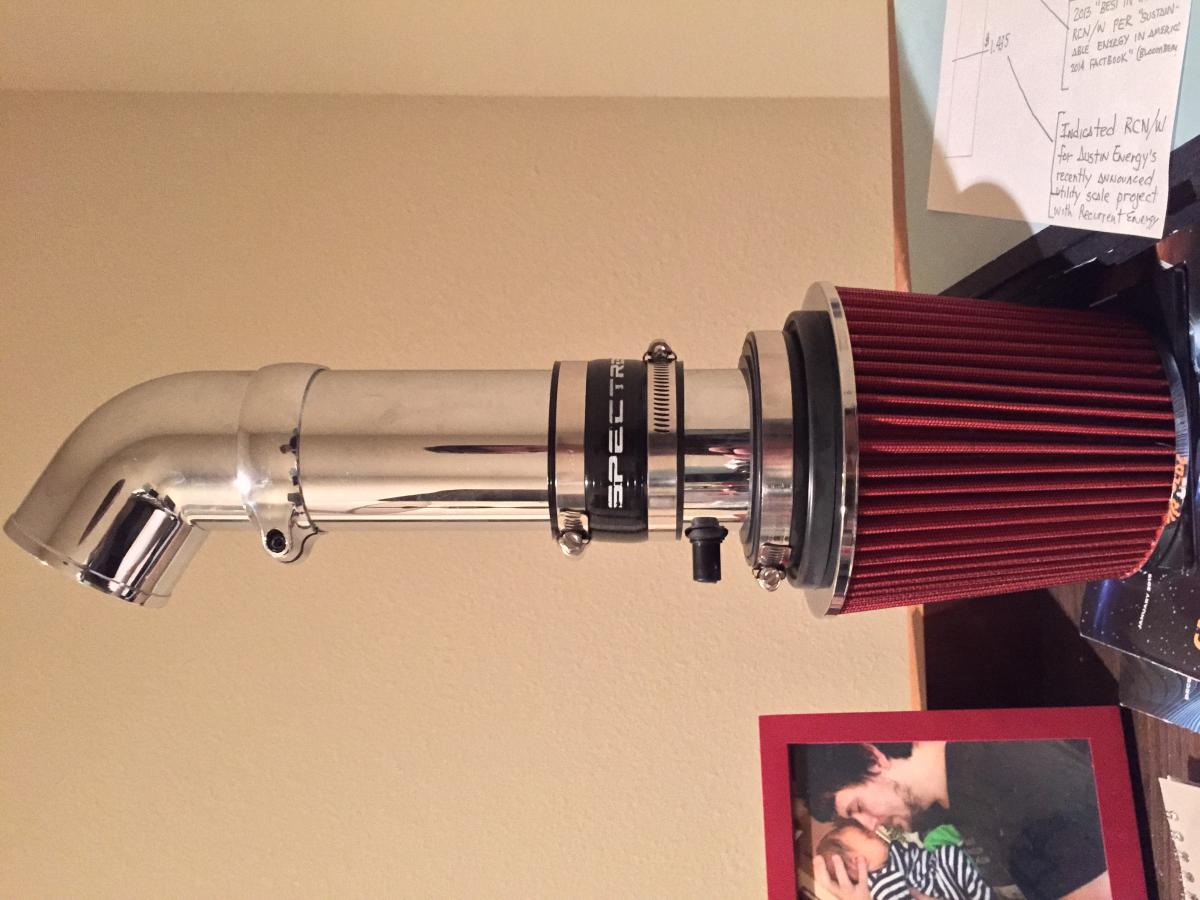
Didn't feel like spending $150+ on a brand name intake, but was very curious what, if anything, one would do for my 2015 DJ R/T. Haven't installed it yet (raining in San Antonio) so I just assembled and photographed it to show yous guys. I measured the stock intake tract from the bend behind the engine to the airbox and got parts at Autozone to match the length. The cone filter SHOULD sit squarely in the bottom part of the stock airbox (with the air snorkel still attached to get fresh air to the cone filter). I'll let y'all know my impressions after I install it!