jontrip247
-
Posts
47 -
Joined
-
Last visited
-
Days Won
2
About jontrip247
Recent Profile Visitors
875 profile views

-
 dhh3 reacted to a post in a topic:
A true camping JOURNEY !!
dhh3 reacted to a post in a topic:
A true camping JOURNEY !!
-
kudos to Lebowski - great job. This is the great thing about modifying our cars and posting online, we can learn from each other and apply these lessons to other rides
-
Lebowski reacted to a post in a topic:
How-To Install Guide
-
Not post my Journey, but my FJ.
-
jontrip247 reacted to a post in a topic:
How-To Install Guide
-
BUMP
-
jontrip247 reacted to a post in a topic:
Attention Moderators - Need "How To" Area
-
Journey_SeXT reacted to a post in a topic:
How-To Install Guide
-
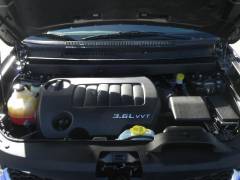
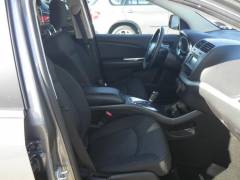
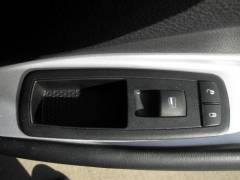
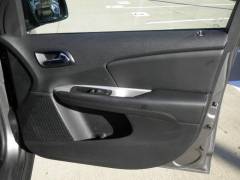
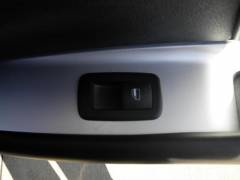
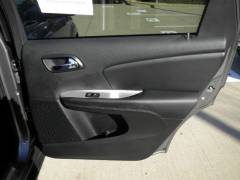
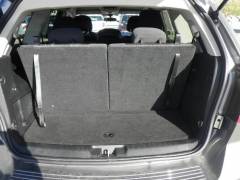
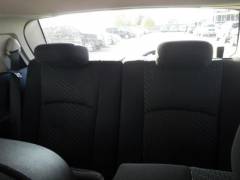
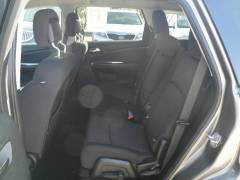
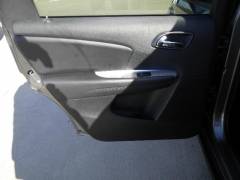
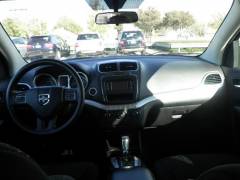
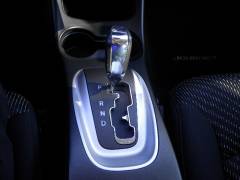
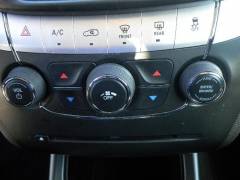
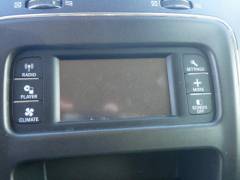
Many of you might think doing these mods are difficult; however, they are fairly simple so long as you take your time. I will provide photos, video links and descriptions on the main areas getting you started. Pleases use this as a getting started guide and take the time to look around to ensure items needing to be removed are removed. Installing bug shield: Very simple... Product: http://www.amazon.com/gp/product/B001I9JKJ4/ref=oh_details_o05_s00_i00 The bug guard will have a slight ( U ) shape cut-out on the underside. Line this ( U ) shape cutout with the hood latch located on the hood. Look everything over to make sure it fits nicely. Peel the 3M tape cover off and attach... Job complete, unless you want to attach the screws. If you decide to attach the screws - drill a small pilot hole where the screws go and then insert the screws... Installing backup camera and reverse sensors: Products: http://www.amazon.com/gp/product/B005CTKYB4/ref=oh_details_o04_s00_i01 http://www.amazon.com/gp/product/B006MPY198/ref=oh_details_o04_s00_i00 http://www.amazon.com/gp/product/B0055XCLK4/ref=oh_details_o00_s00_i00 First you need to remove or partially remove all panels/moldings. the key is to gain access and not completely remove, if possible. After these covers/bolts are removed you will be able to remove the plastic molding where the trunk latches. Additional side/top molding removal. For the seat belt bolt you will need a T50 star to unscrew it. After you verify all bolts/screws/knobs are remove you can now pull hard to pop the side and top molding away to gain access to internal compartments. Next you need to remove molding on the trunk door. Start by removing the bolts and pull like a mofo to get it off. To remove the top trim piece on the trunk, you will need to remove 2 plastic push-pins (black)-they are easy to find/see after the larger piece is removed. ***when removing the larger piece, there should be 2 smaller plastic moldings that go up each side that also comes off with the larger piece. I have an arrow pointing to the black rubber tube you will feed all your wires/video cables through. Simply pull on the points of attachment on the rubber to give you more play room. ****you might need to cut some of the rubber-band-like pieces*** don't worry this will not harm anything. Next thing is to remove the plastic above you license plate. as indicated, there are 2 bolts on the outside and one bolt you can find on the inside after removing the large plastic molding in the above step. Ignore the red line in the photo. Photo editor put it in for unknown reasons. You will need to use a drimmell to make a hole in the plastic to run the video cable. Okay, you are almost finished taking everything apart. 1 more item to go. You will need to pull the molding around the drivers & rear passengers seat away. With the drivers door open grab the top weather seal and pull on it. This is just like pealing a banana. Only remove the portion that runs along the head board. Installing the reverse camera and backup sensors. Starting with the trunk door: ***run the video cable, the camera hot wire and the reverse sensor (hot wire) through the rubber piece mentioned before. Take your time, this is not easy*** On the drivers side of the car, in the rear (where you removed the panels partially), you will see where they have a ground location installed. use this for the reverse sensor ground and camera ground. Zip tie like crazy Installing backup sensors: Watch videos: The video above provides all the info you need on sensor install. Installing the camera/monitor: You will now run the HOT camera wire and the camera video to the front of the car. Do this by tucking the wires into the headboard and BEHIND the side airbags in the door seals. *** always put wires behind the airbags*** The videos will show you some of this. -Run the video wire directly to your monitor mounted above the rear-view mirror and plug it in. -run your monitor's ground/hot wire back towards the drivers side panel and down to the drivers side floor board. Accessing your center console. Open the console and pull up on the trim. It will pop off. Grab the shift knob and pull straight up like a mofo to get the knob off. -you will now join the camera & monitor HOT wires and run 1 main HOT wire to your center console. -Next you will run your Monitors ground wire to a location close to the break pedal. -You will run an additional ground wire from the center console to the break pedal. -combine both ground wires and attach them to a bolt on the break pedal. Zip tie to keep wires safely tucked away. On your toggle you will see: Earth - ground Load - HOT monitor/camera wire Supply - HOT wire from fuse box -lastly, run a HOT wire from your fuse box on passenger side to your center console. To do this you will need http://www.amazon.com/Bussmann-BP-HHH-ATM-Add-A-Fuse/dp/B000GKEXK2/ref=sr_1_1?ie=UTF8&qid=1357417409&sr=8-1&keywords=add+a+fuse+mini and a 15-20A mini fuse. Simply attach to your HOT wire and insert into an open spot on your cars fuse box.
-
jontrip247 reacted to a post in a topic:
alpine audio system
-
gasman94 reacted to a post in a topic:
alpine audio system
-
 I know... they should have put it on the SXTs, but they didn't. Its not like it would cost all that much
 -
Would you mind posting a link?
-
My only concern would be if it is too big and blocks the drivers field of view. Aside from that, I say go for it and be sure to post a pic
-
You might already know this, but using the USB drive to play MP3 will not be as clear as a CD if you saved your music files in a compressed format. If you are like me and purchase your tunes via Amazon or other online sites, be sure you save them to your thumb drive in optimal format settings.You will not be able to have as many albums,but with a 16gb drive, I doubt anyone here will have a complaint on storage amounts
-
Thank you all for letting me know. I plan to do my first oil change on my wife's Dodge J soon and will keep records of everything. Any suggestions on filters for the cartridge?
-
I have not heard this before. Are you saying that we must provide proof of oil changes?
-
Mobile 1 0w30 use it during the cold months
-
-
-
Front Air Deflector (do it yourself)
jontrip247 replied to deulyd's topic in Accessories, Modifications
http://www.amazon.com/gp/product/B001I9JKJ4/ref=oh_details_o03_s00_i00 Very simple install. There is a slight notch in the middle (deflector) you can use to align with the hood locking hook to get a perfect alignment. For those that require drilling, use auto 3M tape to hold the deflector in position while you drill pilot holes. the tape along with your screws will ensure a nice tight hold for years. -
I will be installing a backup camera with external monitor and backup sensors. I'll try and take the time to post a how-to video or pictures
-
What about 2012?