So right off the bat, I will apologize for the length of the following post, but I think it is worth sharing on the forum with all of you that are struggling with the apparently common “no heat from the passenger side heat outlets” issue. This is my no heat story...
I started into trying to address this issue by reading all I could find out about it both here on the forum and on other auto tech sites to try to get a understanding of the best way to approach this problem on my 2012 Journey SXT 6 cyl. SUV... Smokin hot air out of the drivers side outlets and barely lukewarm air out of the right. all three outlets... regardless of the control settings.
All the DIY info started me out with the pretty obvious RH heater door actuator replacement option. Since I was just starting into this it seemed a good way to begin since it was not too difficult or expensive to do the actuator replacement under the dash. Easy enough if I ignore the sore neck from laying on my side to get to it...
Rock Auto provided me with a new actuator and after replacing the old one, I disassembled it to find to my disappointment that the gears were NOT stripped out and that there was essentially nothing wrong with it. Accordingly there was NO noticeable change in the right side no heat problem. While I had the glove box out, I replaced the cabin air filter which was pretty jammed up with dirt and I think it made a slight difference in the overall air output, but gave me no change to the output air temp. While I was at it I messed about with the other actuators as well and determined that they were indeed moving the outside air and cold/hot mix doors in the heater box when the proper controls in the dash were selected.
The next issue down the list to address was the possibility that the heater core could be clogged, especially since my new (used) 2012 has 90K miles and the coolant/hoses all appear to be OEM installs, I figured that a total cooling system flush was in order anyway.
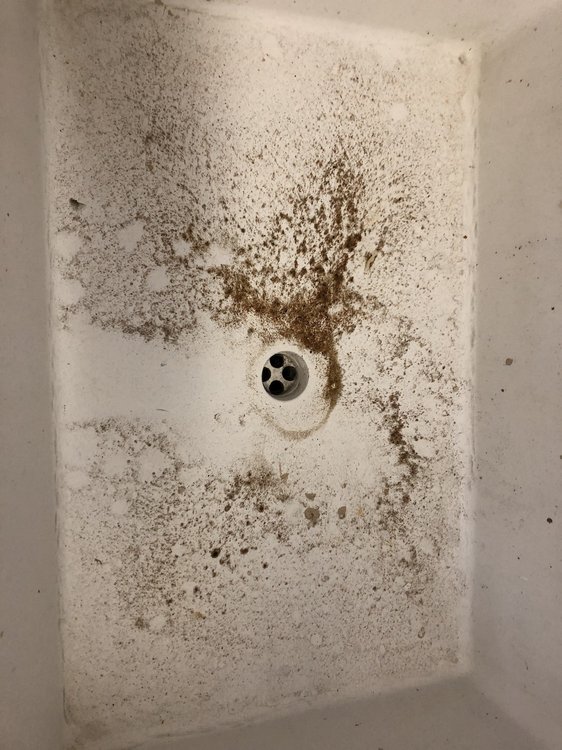
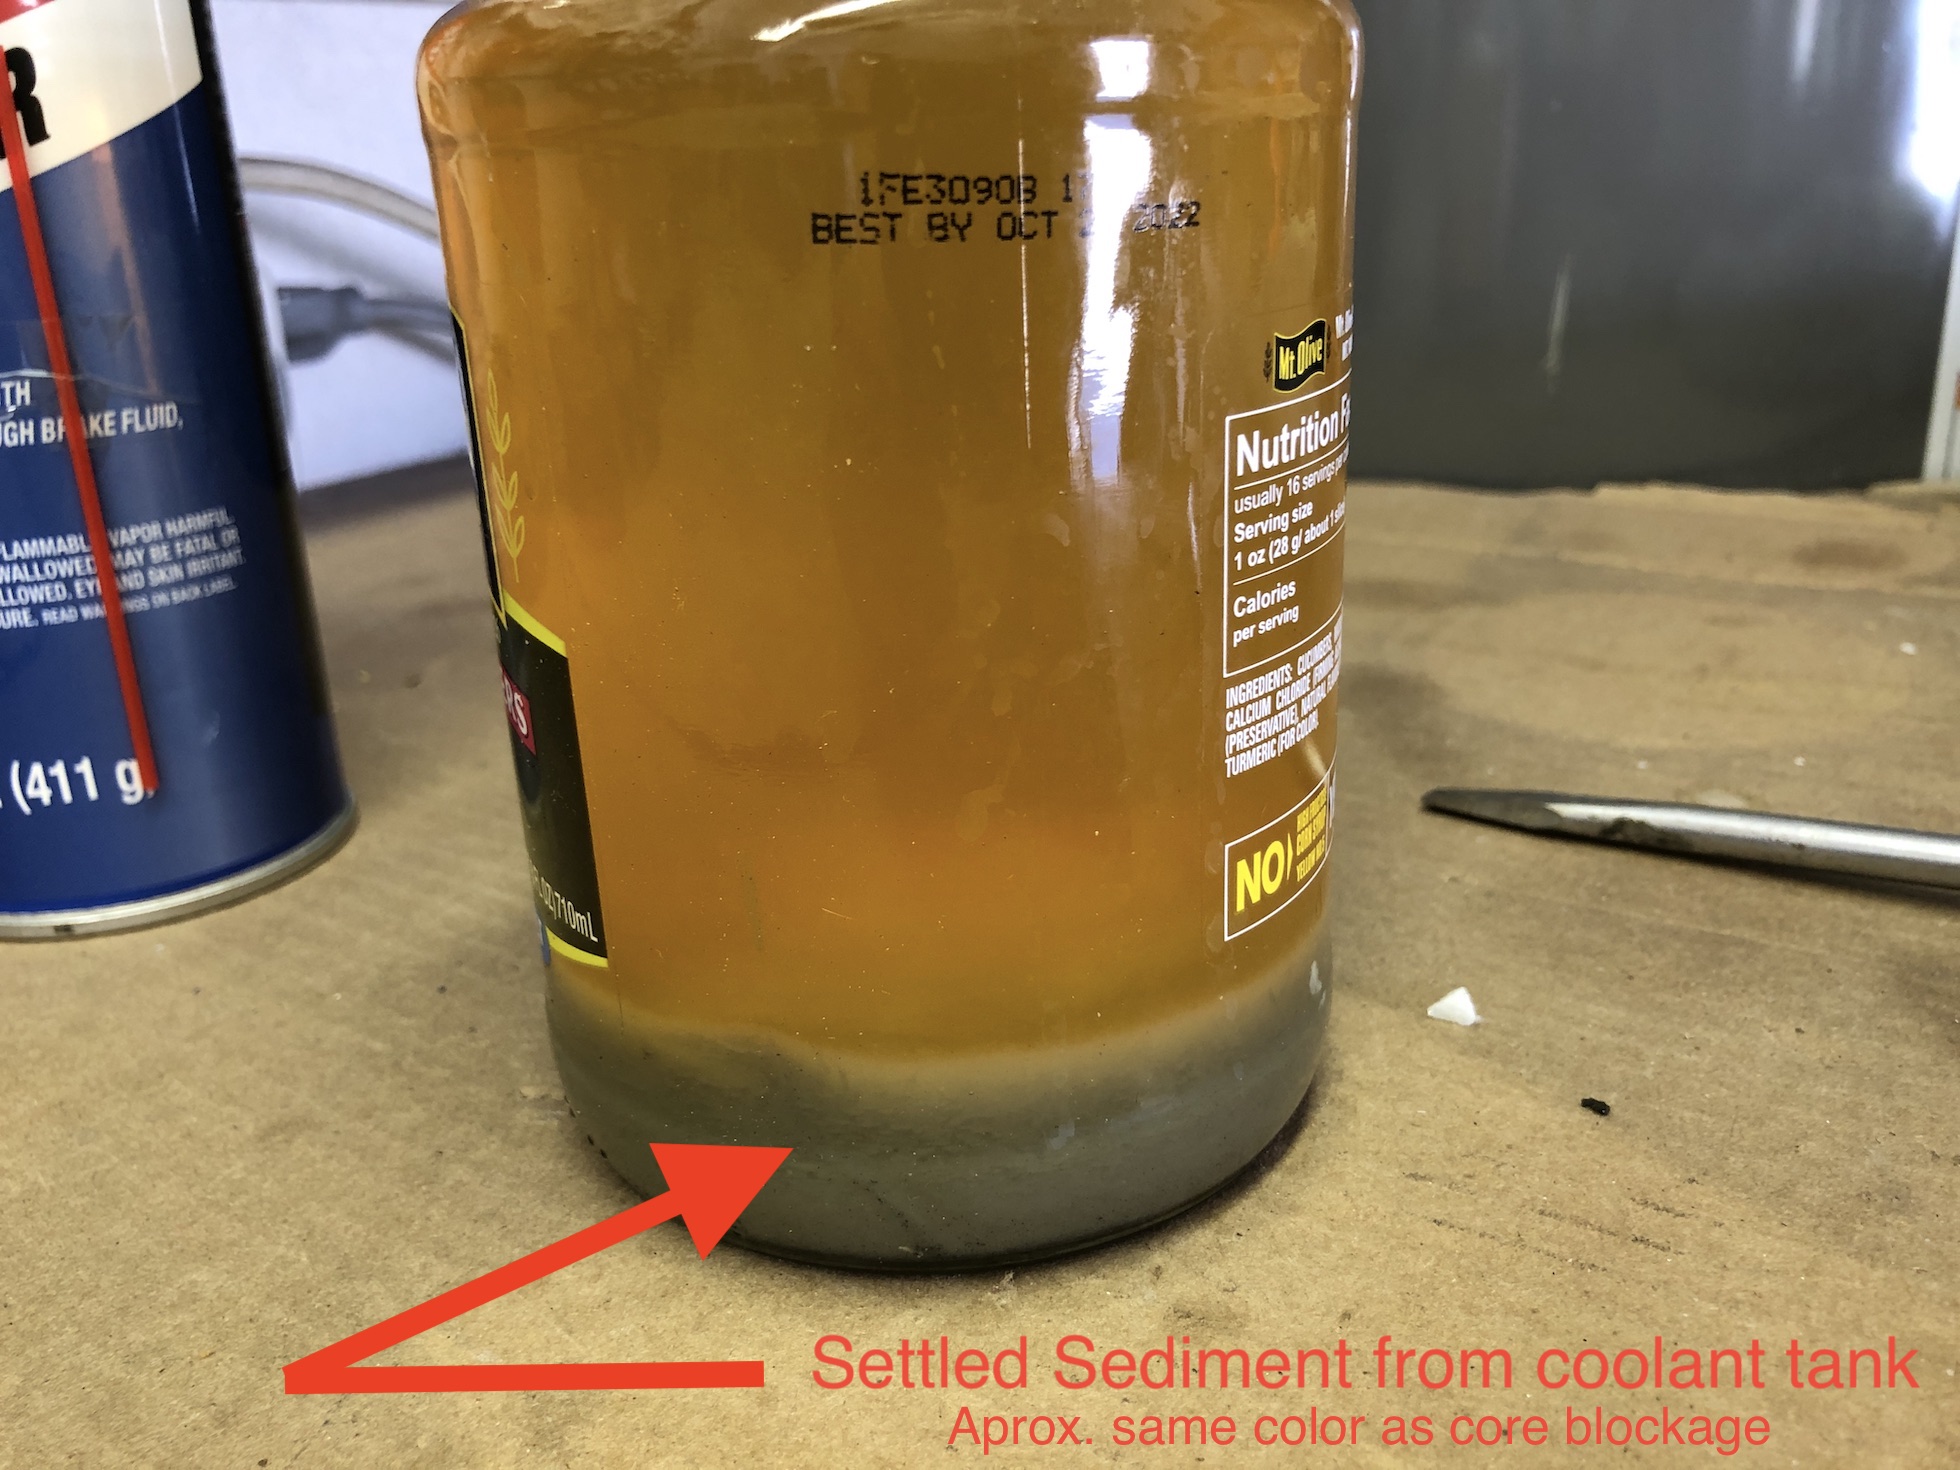
I put a big tub under the car in the area of the water pump and removed the thermostat housing/outlet and the lower radiator hose while trying to capture as much of the old coolant as I could in the tub. Since the coolant is the goofy brown HOAT antifreeze, I wasn't able to determine if it looked overly contaminated or rusty, but it smelled gross and and I was really surprised to find a lot of SAND in the bottom of the shop sink when I dumped the tub. (see picture 1). Anyway, I then did a back flush of the whole system thru the lower radiator hose and out the open thermostat recess (engine running) as well as the coolant reservoir. The reservoir was coated internally with brown ooze partly filled with crud. (see Picture 2, it clearly shows the stuff I sucked out of it that settled out overnight.) and I ultimately had to remove it from the car to take it to the sink to get at it with brushes, etc to get it cleaned out, it's practically impossible to clean. When done I reinstalled the tank and the thermo/outlet and radiator hose.
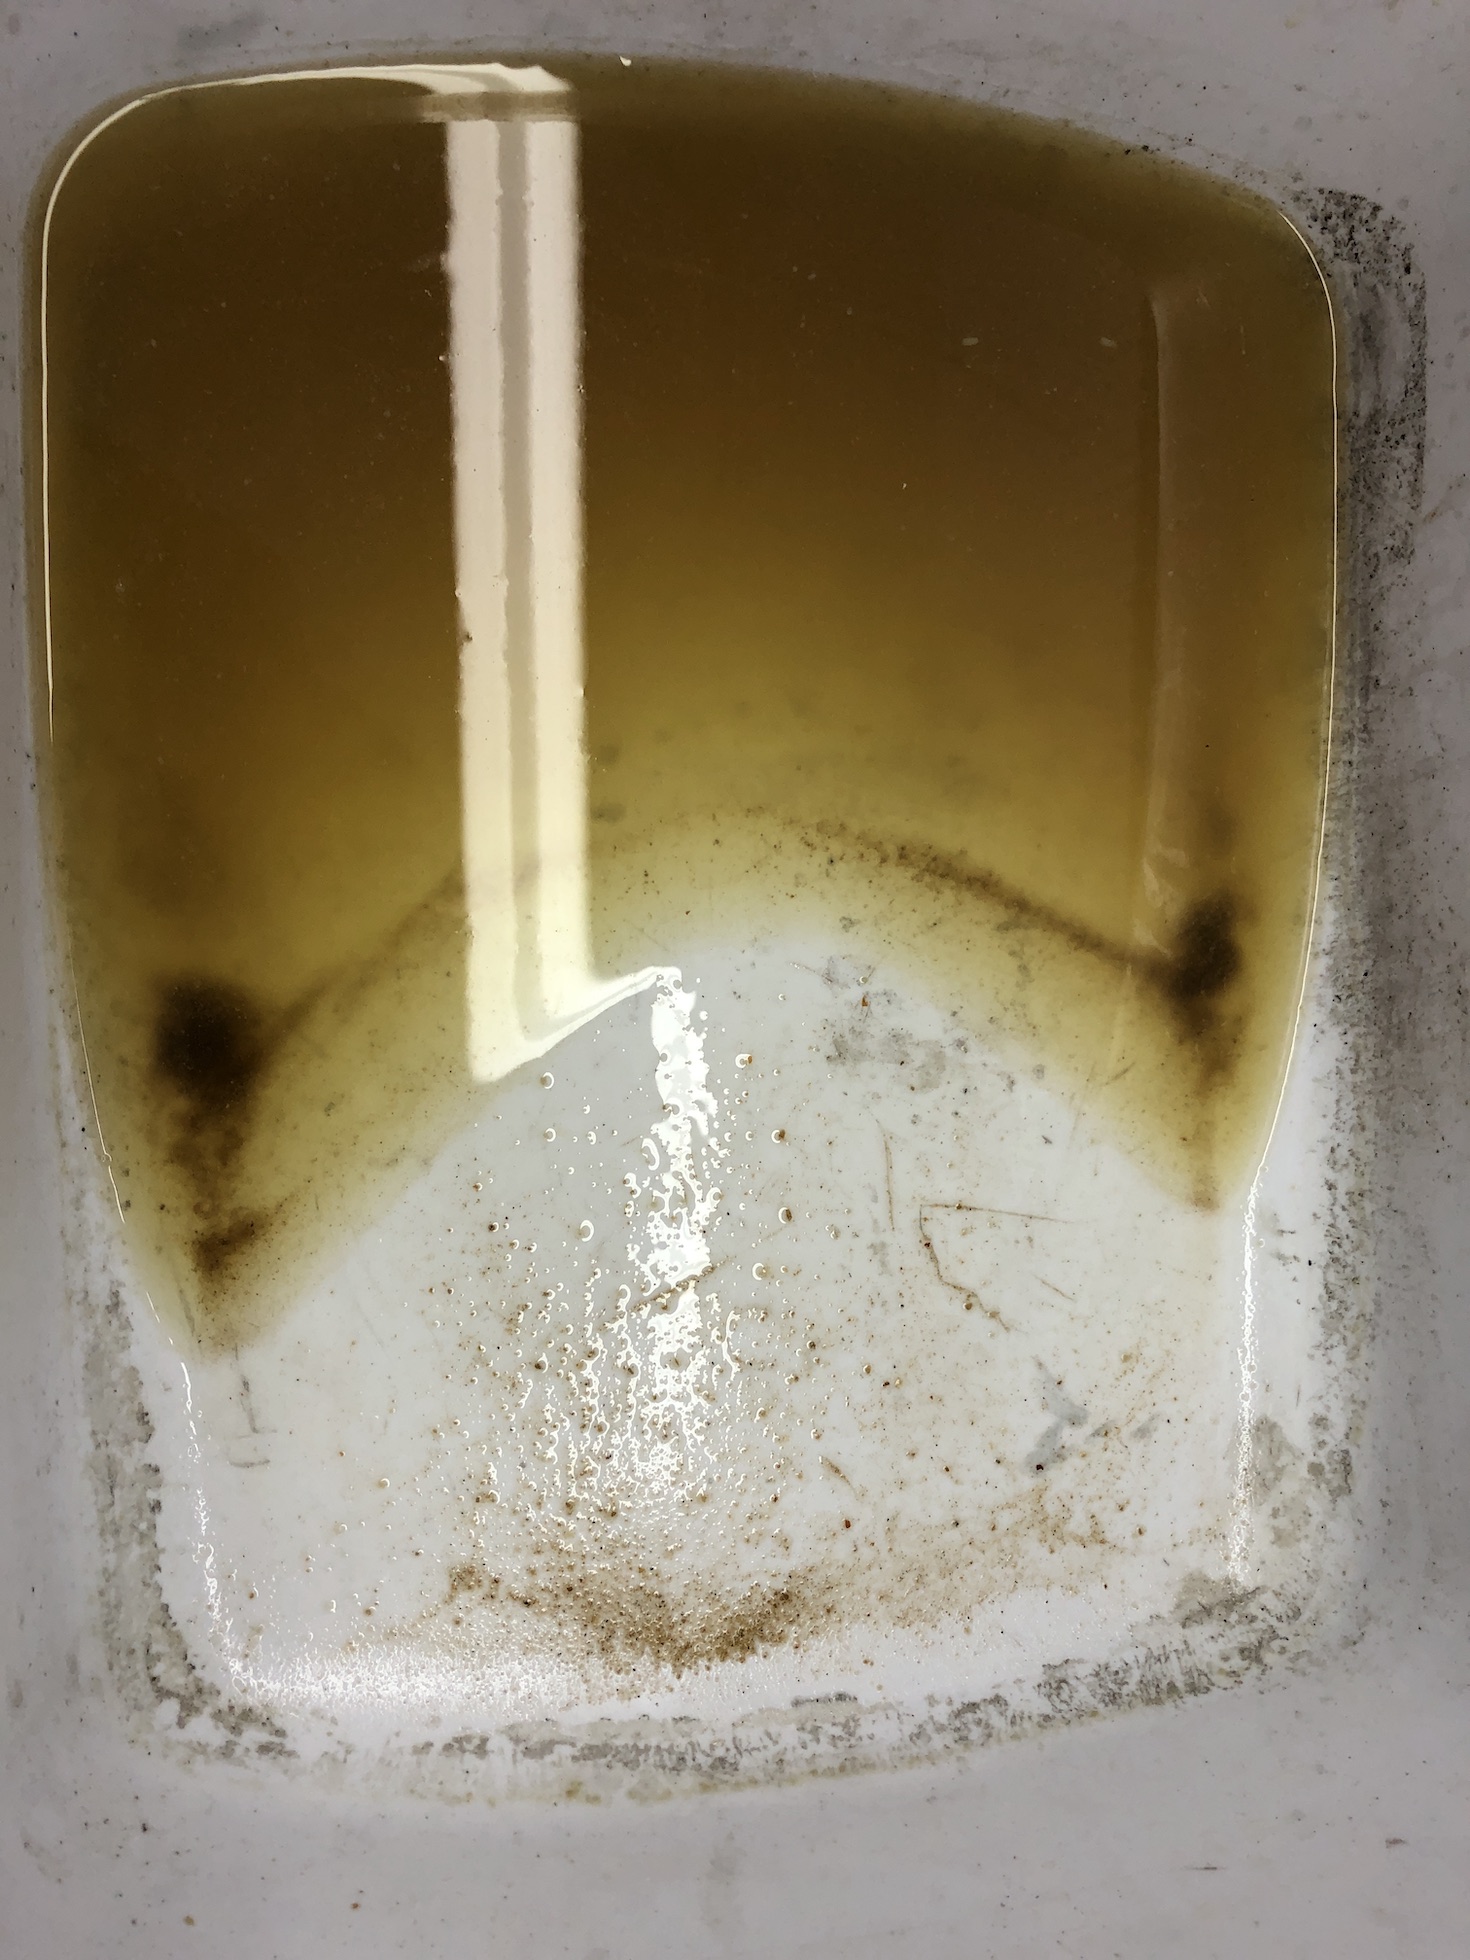
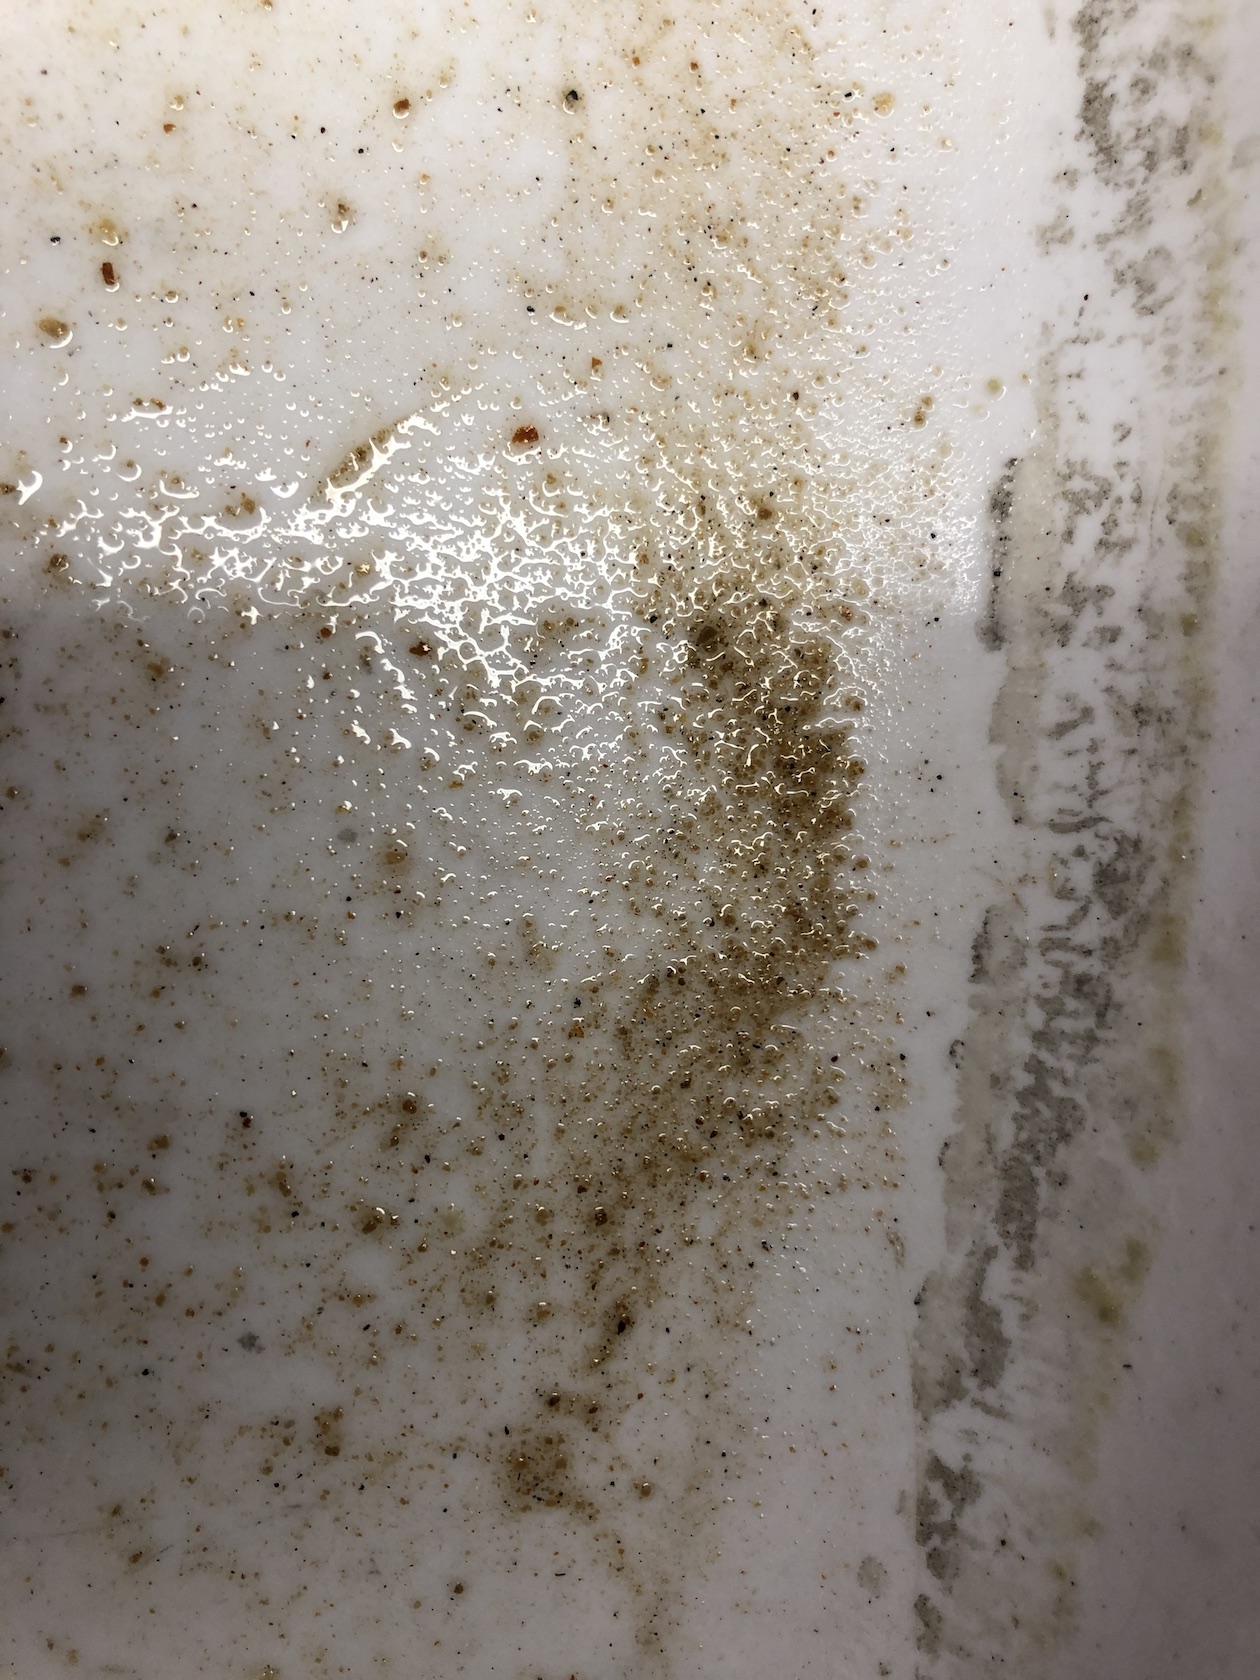
Filled the cooling system with plain water and went for a drive... When fully warmed up (210 deg) Seemed like there was minor improvement in the R/H outlets temperature, but still not nearly as hot as the drivers side. Accordingly I figured that maybe some cooling system flush from the local auto parts store might be helpful to further remove any debris from the cooling system/heater core. Accordingly I got some “heavy duty” cooling system cleaner and added it in. The instructions on the cleaner said that I could run it for a couple of days and then drain it out, so I drove it around town for 3 days and then drained it again. More SAND... (see picture 3) but not nearly as much as the first time.
So I found online that the 2012 V6 had a big service recall regarding problems with the engine block manufacturing CORE SAND not being totally removed from the castings when the engine blocks were made at the foundry. This apparently resulted in engines overheated and ruined resulting in total engine replacement in some instances... I am really sure that issue accounts for all the sand I found upon flushing as well (picture 3).
Filled it with water again and went for a drive... NO HEAT whatsoever from either side of the car....??? Checked the temp indicator and see that the engine is now only getting up to 145 degrees!
Back to the garage and removed the Thermostat housing/water outlet (again) and sure enough... Thermostat not closing at all (wonder if my radiator cleaner was to blame?). Back to the parts store for a new thermostat/housing and installed same. Upon driving again, engine temp is back to 207 degrees and the R/H air outlets are putting out even more heat than before, but unfortunately not as hot as the drivers side...
At this point, with my frustration level rising, I was reminded of the U-Tube videos I had watched showing the actual process for replacing the old heater core which apparently do often get flow restricted. Being sure that I didn't want to do that nasty job under the dash, I opted to try a direct flush of the heater core itself, which I had also seen on U-Tube. Not nearly as complicated... but a mess nonetheless...
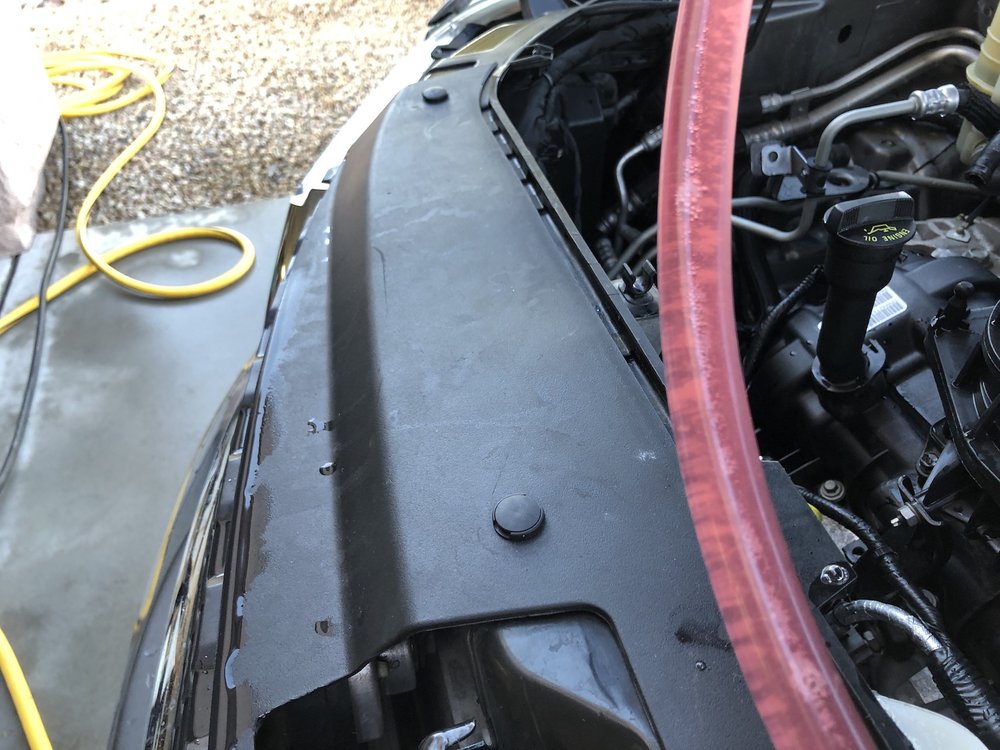
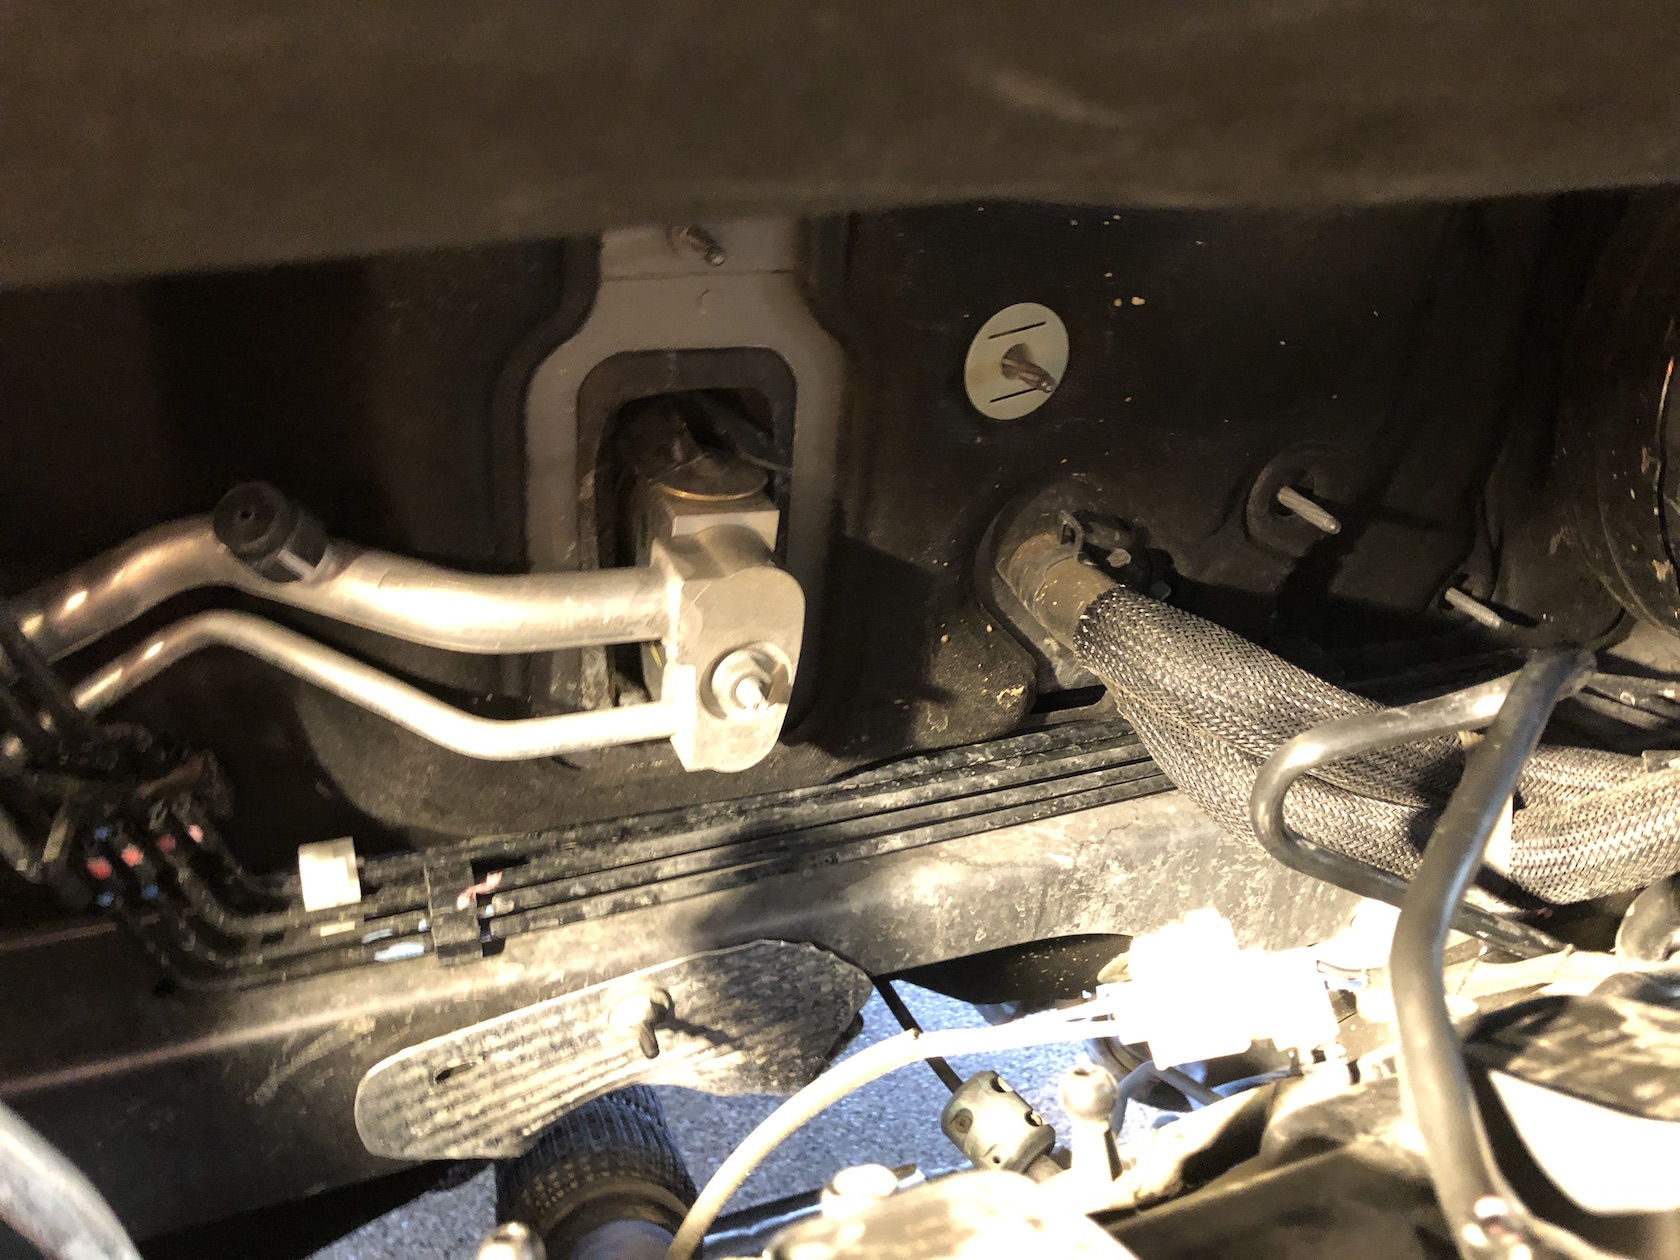
The vids I watched involved removing the heater hoses from the core inlet/outlet pipes coming thru the firewall (picture 4) and then directly back flushing thru the heater core by itself. I modified this plan to remove the hoses from their connections up front at the engine and flush them from there where I could get to them easier.
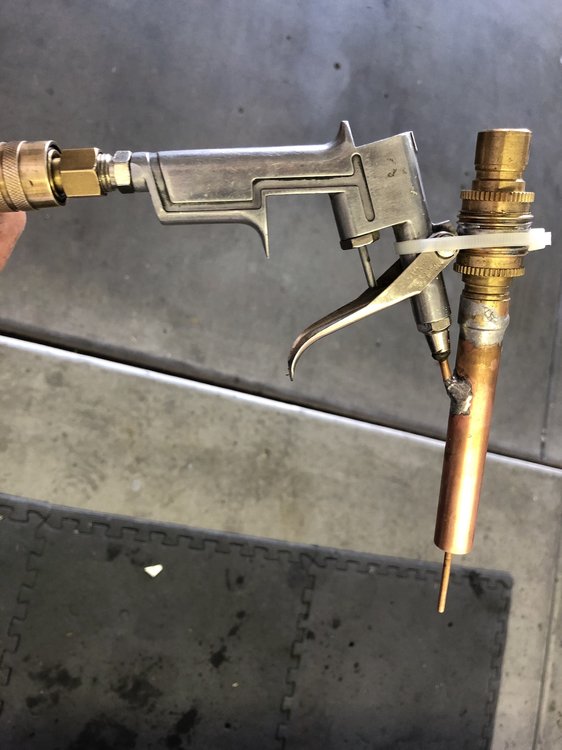
Realizing that whatever was still plugging up the heater core would require pretty aggressive flushing to remove, I opted to make myself a flushing gun so I could really force the water back thru the core to clean it out. (see picture 5). I used a old HFT air blow gun and added a copper tube and hose connection so I could force air/water thru the core and really clear it out. One of the vids also suggested putting some radiator flush directly into the heater core and letting it sit for a few minutes before doing the reverse flush process to to the core to loosen whatever is stopping it up. I elected to try that. Bought some 5/8 I.D. clear plastic tubing to use with the flush gun, disconnected the heater hoses and rigged it up.
This is where this story gets really stupid... In my garage I had a small plastic jug of CLR (Calcium Lime Rust remover) on my shelf with my other chemicals. Since I was only going to leave it in the core for a couple of minutes, I figured I could use that instead of getting more radiator flush from the parts store. The CLR is acidic but very mild, but even so I elected to mix it 25% with water.
The CLR was sitting on the shelf next to another identical plastic bottle, only it was phosphoric acid concrete cleaner... Yep, thats the jug I mistakenly picked up, mixed into my jar with water and poured it down the line into the heater core. Duh! I let it set for about 5 minutes and looked at the plastic tubes and you wouldn't believe the crud that was bubbling out. Lots of white looking flakes and globs of white pasty stuff (see Picture 6). Amazing there was any heat coming out of the heater at all. I drained the tubes of the gook and then hooked up the flush gun and gave it a gentle shot (don't hit it with full air/water pressure or you'll likely damage something.) with water/air and got more globs & white debris. Continued the flush for several minutes from both directions and when done, reconnected the heater hoses. Only when I had completed this did I realize I had used the wrong stuff!!!
Well, what a lucky break I guess... Refilled the system with water and I got heat on both sides now... Probably wouldn't have cleared it out without mistakenly using that super duty Phosphoric acid floor cleaner. I don't think it hurt anything but time will tell I guess. I refilled the system with good old green antifreeze because I'm tired of that orange HOAT stuff turning to brown guck and plugging everything up. I know, I know, its not supposed to be used but at this point I don't care. I'll see how it all works. Can't say I would recommend using that acid product to anyone else but the process seemed to work pretty well for me, and I'm really happy with how the flush gun worked. No to mention, I didn't have to do that nasty heater core replacement job...


 2late4u reacted to a post in a topic:
No heat passenger side...
2late4u reacted to a post in a topic:
No heat passenger side...