
khnitz
-
Posts
62 -
Joined
-
Last visited
-
Days Won
11
Content Type
Profiles
Forums
Gallery
Everything posted by khnitz
-
I'm working on this 2009 SXT 3.5L 62TE, trying to get some last issues resolves before it goes to its next owner (I'm selling it to a friend of my sister). I had a P0406 code (P0406-EGR POSITION SENSOR CIRCUIT HIGH) and replaced the EGR Valve. That code has not reappeared. Old vs. New EGR solenoid/valve shown below: After about a day of driving which allowed the learn/test cycle to complete, a different DTC appeared - P0401 (P0401-EGR SYSTEM PERFORMANCE). I haven't been able to find a clear path to resolving this one in the searching I've done - any suggestions? The new valve came with new gaskets, which were installed. I did remove and reattach the connection at the intake manifold that goes to the EGR valve - it may not be exactly centered in that opening/rubber gasket at the intake manifold, though - this is about the only thing I did/changed that I could think might be having an effect. Any advice here is appreciated! Oh, and is the correct term for this the EGR valve, or EGR solenoid? Or is it a combination Valve+Solenoid? Curious minds want to know...

-
I should have added the picture of it in my office's parking lot to my earlier post as proof of life (😄with a copy of today's newspaper on the windshield, too 😁).

-
I finished the work on the Journey over the weekend and drove it into work this morning - so far, so good! It was a balmy 11deg F when I reached the office 🥶 To resolve the P2764 DTC (Torque Converter Clutch Pressure Low), I replaced the Torque Converter Clutch (TCC ) solenoid. My drive to work is a mix of city and highway speeds. The transmission did not go into "limp" mode during the ~1hr drive, whereas during the drive last week (before replacing the TCC solenoid) it would go into that mode about once a trip. I checked multiple times during the drive that I could select manual shifting mode and it worked correctly each time. Fingers crossed, but this issue seems to be resolved 🙏 I also replaced the EGR valve to resolve the P0406 DTC. Here is a picture of the old and new EGR valves. It will take a few more trips to be sure, but this should resolve that DTC. The original EGR valve PN was 04593688AD, and it is now listed as 04593888AC. Lastly, I had to find a replacement lower transmission oil pan and install that as part of the TCC solenoid replacement. When I added the drain plug to the original pan, I observed some weeping at the joint where the bung was brazed to the pan (this was done on the outside of the pan). While making the TCC solenoid repair I had a friend weld the bung to the pan from the inside, as well. Unfortunately, there was still some seepage after the interior welding. I found a replacement pan in my local u-pull yard and installed that when I closed up the transmission - I wanted there to be no worry of fluid loss. I ordered a gasket for the front (solenoid pack) cover, instead of using RTV when reassembling everything. I used a gasket for the lower transmission oil pan, too. I'll drive the Journey through the week and make sure nothing else needs urgent attention, and then it will be going to its new owner in South Carolina in a week or so!


-
Yeah, it's the 3.5 with the 62TE. I'll start with that solenoid and see how it goes. It shifts fine otherwise (when not in limp).
-
The new(er) tires were installed yesterday and an alignment was done. The '09 is tracking straight and the engine performed well over ~100 miles of driving. The transmission, however, needs some attention. It occasionally goes into a "limp" mode, where it stays in 1st (or is it 2nd) gear and doesn't shift. If I pull the car over, turn it off, lock the doors, and then wait for the security red flashing light on the dash to go out (about 20s - this is probably the time for the CAN bus to go to sleep), and then re-start the car, the transmission goes back to normal operation. P2764 is the DTC that is read (I have a Foxwell NT510 to read and clear codes). From what I found, it looks like that is for the Torque Converter Clutch solenoid. So, I'll be draining the transmission again (good thing I added that drain plug to the pan) and replacing at least that. Any other BTDT experience/help is appreciated. Other than when it would go into that mode (it happens seemingly randomly, but like once per trip at some point), the transmission is shifting smooth and goes through all gears. When the lump mode kicks in, going into manual shift mode has no effect (and you don't see the current gear in the IC display.
-
I torques all the rear suspension bolts with the suspension loaded and the Journey is off the lift. The test drive went well, but boy the steering was off (not surprising, given that I replaced the inner and outer steering tie rods). Now it's time to get an alignment and have the new-er tires installed. Oh, and I'll put new TPMS sensors on, too.

-
After attending SEMA last week in Vegas, I was able to get back to work on the Journey this past weekend. I refreshed the suspension on the driver's side. I was able to avoid snapping off the trailing-arm-to-body bolts by pre-drilling access to the captive nuts and using an induction heater to heat up the bolt and then melting crayon into the threads. Once the post-repair alignment is complete, I'll cover the holes with butyl sound mat (like Roadkill or Dynamat) and re-install the interior pieces. Here is the completed driver's side rear suspension. I decided to buy the induction heater for this job and see if it lived up to the hype in the reels/ads that kept getting pushed into my newsfeeds. In short - it works! For the repairs I have to make, and being in the rust belt, this will help a lot. I also melted crayon into the heated threads (my first time trying this, too) and that seemed to help get the bolts out easier. One thing to note - even after heating the bolt or nut for 15-20s, it did not "glow hot" - but it certainly heated up enough to make it easier to remove them. Here's a video of the induction heater in use: https://rumble.com/v71hr3s-is-an-induction-heater-for-stuck-bolts-worth-it.html


-
During the course of working on it this weekend, I gained a better understanding (maybe even sympathy) for why some vehicles that don't seem that bad off wind up being junked, and also why some shops will turn down or refuse working on older vehicles (especially here in the rust belt). I thought about how much it would have cost - at shop labor rates - to do this job. Also, I'll need an alignment once this is all done. If an alignment shop would have to tackle this vehicle before all this work is performed, there's just too much risk in not being able to loosen a bolt or snapping it off to make it worthwhile.
-
I would call it about 4 hours of battling to get that broken trailing arm bolt removed. After locating the area above the captive nut, I cut a hole in the interior floor to access it. First I drilled out the remains of the bolt. Then I drilled out what remained of the captive nut. The new shock for that RR corner is assembled to the spring and mount, here's a view of the new vs. old shock. The new shocks are Monroe OE Spectrum. My evenings this week will focus on reassembling that corner and moving on to the LR corner. I have a bushing press kit due to arrive on Wednesday, so that should help with replacing the 3 bushings on the knuckle. I already pressed in the new trailing arm bushing yesterday.


-
Well, having lived its entire life in the rust belt, it was bound to happen... I started work on the right rear side. I've removed everything else and was working on the bolts for the rear trailing arm. I was able to get the inner bolt out, but the outer bolt snapped off near the head. So now I need to figure out how to get the rest of that bolt out and put a new one in. Any suggestions? Here's a picture of the old and new components, and another picture of the problem bolt area. I should add that I used an inductive heater on the bolt for a while before attempting to remove it. However, the bolt is so long, I don't think the heating had much effect at the captive nut in the unibody for the bolt.


-
I will be completing a comprehensive rear suspension refresh this weekend on the 09 Journey. A little over a week ago I finished installing new inner and outer tie rod ends and front sway bar end links.


-
As I was detailing the interior of our 2009 Dodge Journey this weekend, I noticed that the vertical louvers of the passenger side HVAC vent was not moving in synch with the rotating wheel (at the bottom of the vent) to open and close them. The problem was that the arm that ties all the louvers together and then connects to the wheel had broken. I was able to source another one of those from a local u-pull yard. Here are some pictures of the disassembly and reassembly. I had to add a couple of small screws (I think they were left over from a Gameboy I took apart at some point to use for parts) to use to strengthen the pivot points on a couple of louvers. I also added new foam to seal the vent with it reinstalled. And here's a video of it all re-installed and working again. https://rumble.com/v6y5k0e-repaired-2009-dodge-journey-passenger-side-dash-hvac-vent.html


-
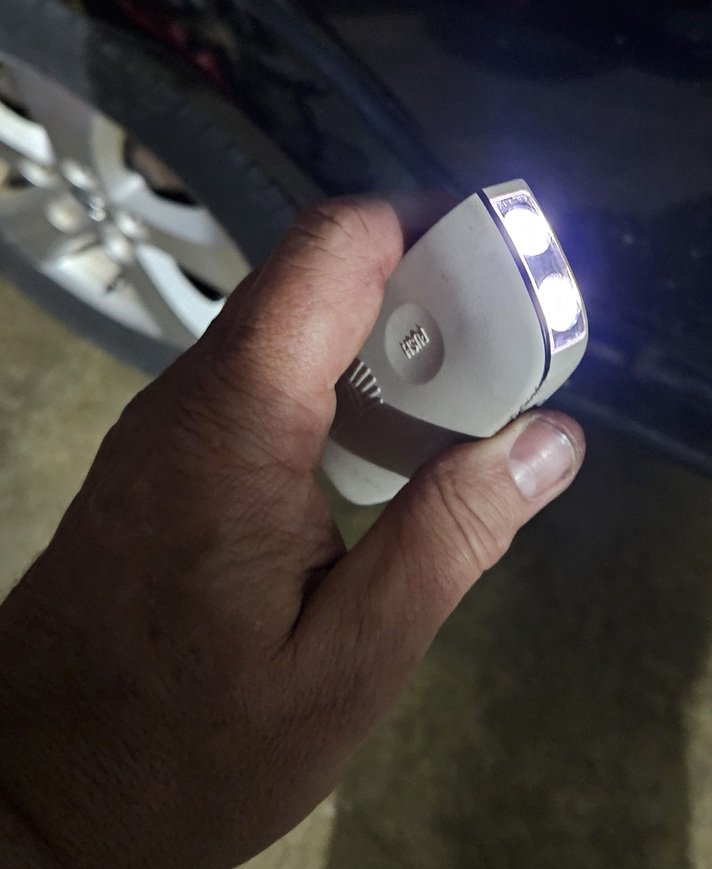
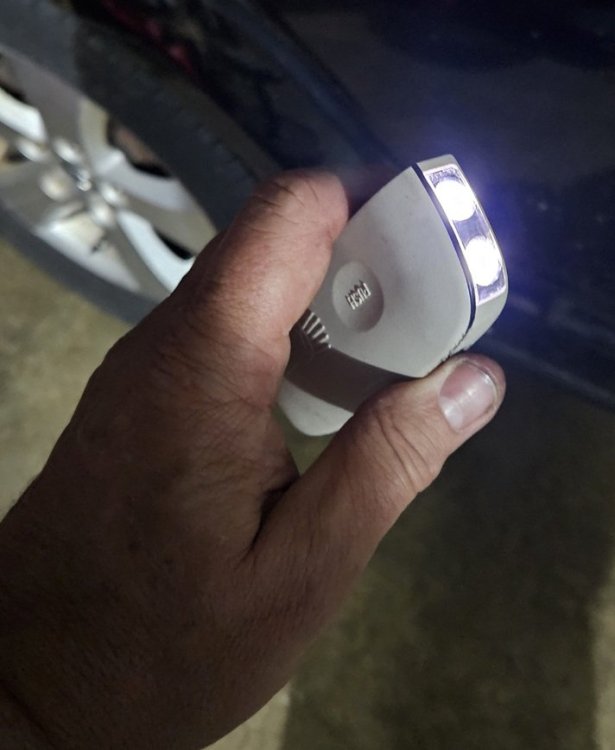
I bought a new battery for the rechargeable flashlight in the luggage compartment - the light is working great, again! I did have to clean up the contacts for the battery, though. I used a Varta V600-HRT battery from Amazon.
-
I finished installing the power steering lines this weekend, and then filled and bled the power steering system and filled the transmission to the proper level, too. I've made a couple of short (2-3 miles) test drives and everything is working well. The engine runs great! After reading through some of the paperwork my kids had in the glovebox, that showed that the vehicle had the headgaskets replaced at 132k miles (there is 166k miles on it now). At that time, the timing belt and waterpump were replaced, too, as well as the spark plugs. And, after all the reassembly and test drives - there are no leaks! I spent yesterday detailing the interior front to back and it cleaned up nicely!
-
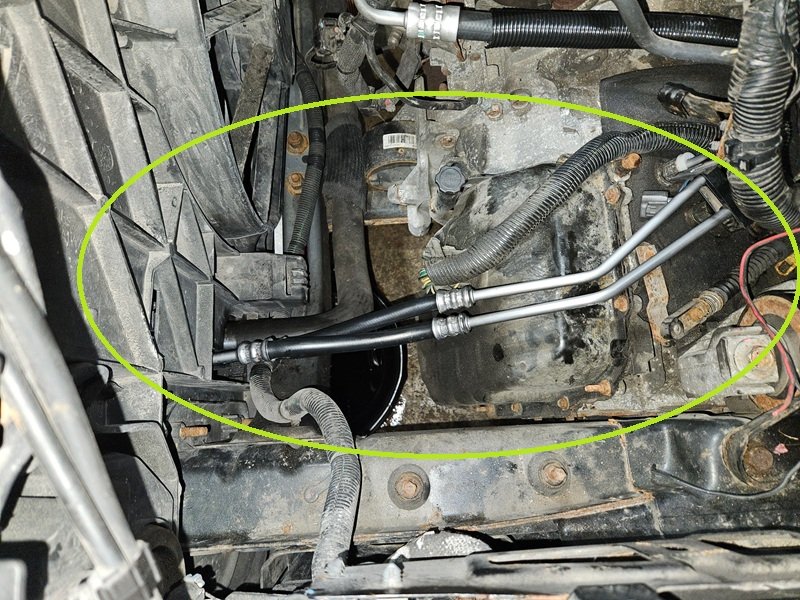
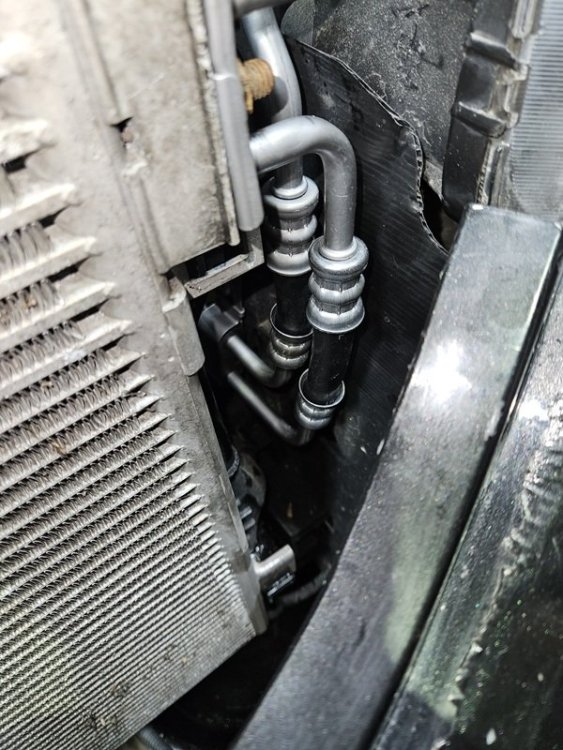
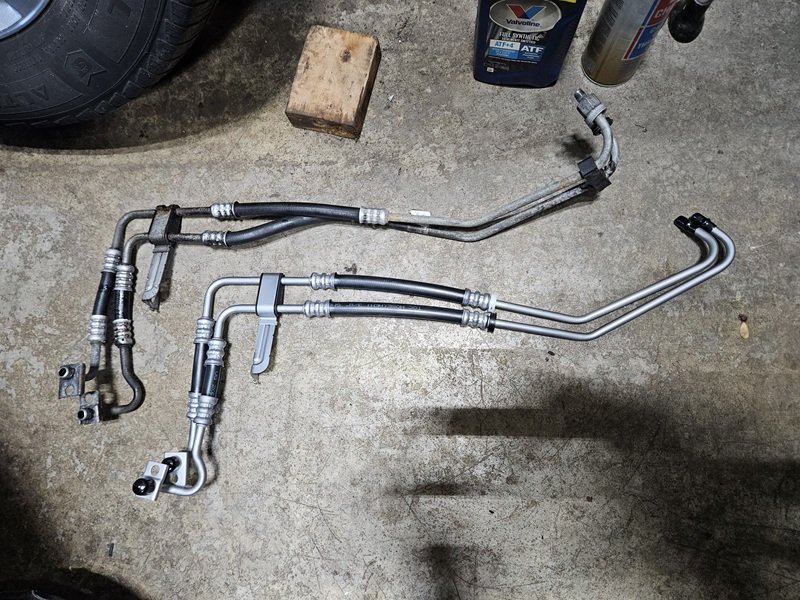
Added a drain plug to the transmission oil pan so that it is easier to drain the fluid and make less of a mess at the next transmission filter replacement service. My neighbor helped with brazing the drain plug bung onto the pan (I did the prep work). The new Wix transmission oil filter kit included a gasket for the pan (so I didn't have to use RTV), but 2 of the holes on the transmission housing for the oil pan bolts were stripped and could not be torqued to spec. I wound up tapping them one size larger (up to 7mm, from 6mm), and fortunately I had suitable size bolts left over from stripping down a Volvo last year. I also installed new transmission cooling lines. The old ones had signs of weeping/failure at some of the hose crimps.


-
Wow - I was the last one to post here, And that was a year ago ? Yesterday, I towed my next project home yesterday (it's 4th or 5th on the list). This is my oldest son's vehicle, but the transmission is slipping (2009 Journey FWD with 161k miles). I paid what the junkyard was going to give him, and we'll see if I can find a good transmission in the local U-pull yards to put it right.

-
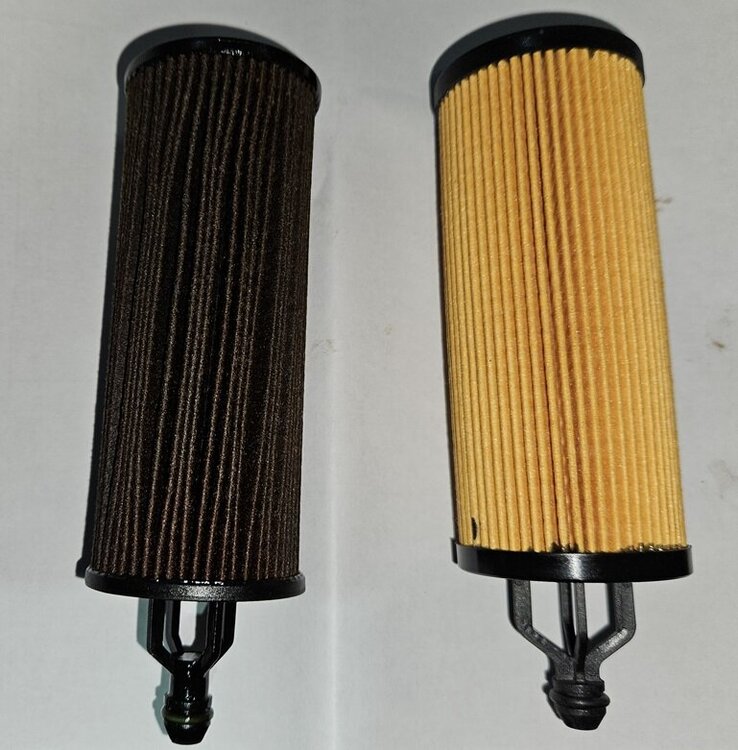
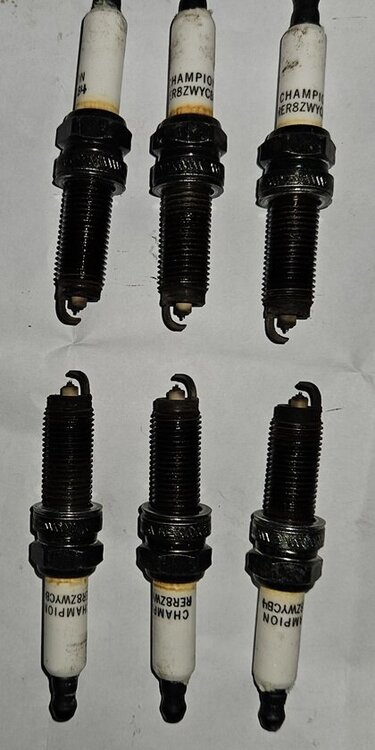
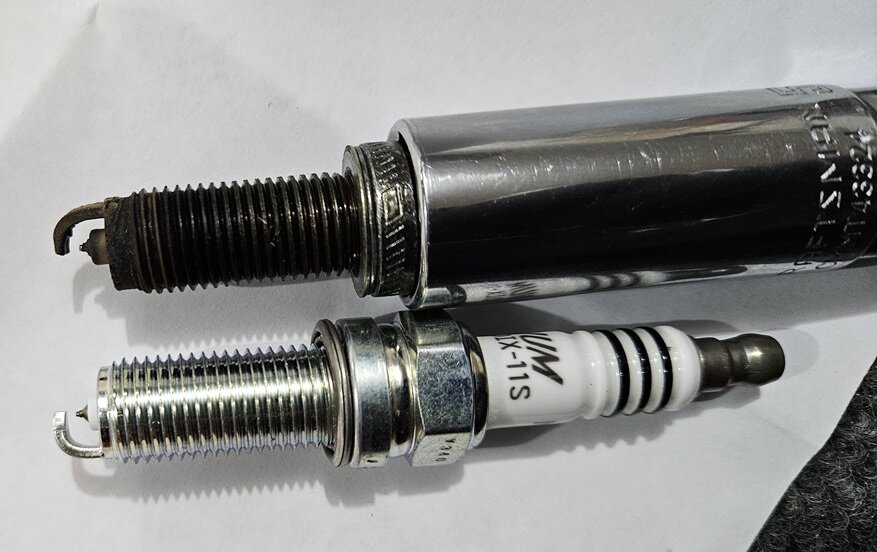
Some other details I made note of, but forgot to add to the summary post... The old spark plugs looked to be original, Champion RER8ZWYCB4. The new plugs I used were NGK Iridium LKR7DIX-11S . The air filter I removed (maybe it was original?) had 23 pleats and the extra debris (charcoal?) filter membrane. The new air filter was an AC Delco A3618C with 78 pleats. The oil filter that was removed was a Napa 2100010 with 48 pleats. The new Mahle OX1213D has 57 pleats.
-
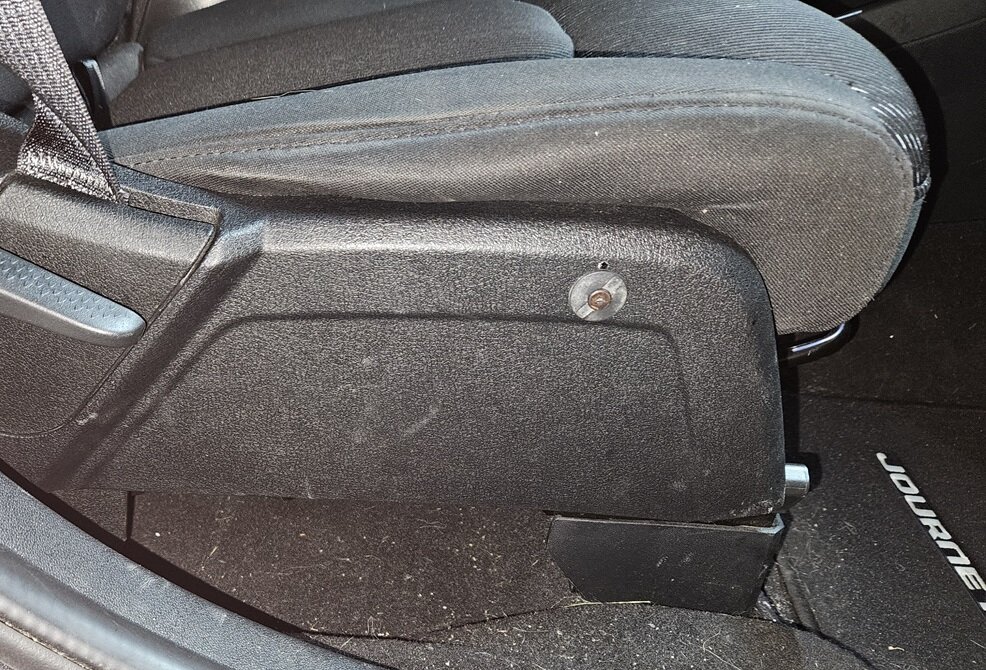
Here is a picture of the trim clip I used on the that passenger seat trim. Disregard the small hole above it - my aim was off when I drilled the first pilot hole. The trim clip is lined up with a hole in the seat frame behind it that is for a clip on the back side of the panel that cracked off (I think it was for a clip, as it's not there anymore because it was broken off). The hole size was close enough with a 5/16" drill bit to match the hole in the seat frame and fit the panel clip. The clip I used is one where the base is pushed in, and then the center pin is pushed into it to lock it in place (like a hollow wall anchor). It is solidly in place, now. There is a clip on the driver's side seat trim that is broken off, too, but I don't think the panel clip solution will work over there because of the power seat switches. When it comes time to fix that, I think I'll use a rivet nut in the hole in the seat frame, and then a bolt with a low profile screw head but either and integrated washer or wide flange to secure it. And, I'll also put a spacer over the bolt on the back side of the trim to hold it in the proper standoff position.
-
Indeed ? I finally got to put one in about 2.5yrs ago and it has made a world of difference. To be able to work on brakes while standing up is sooo nice. The installation saga for mine is documented here .
-
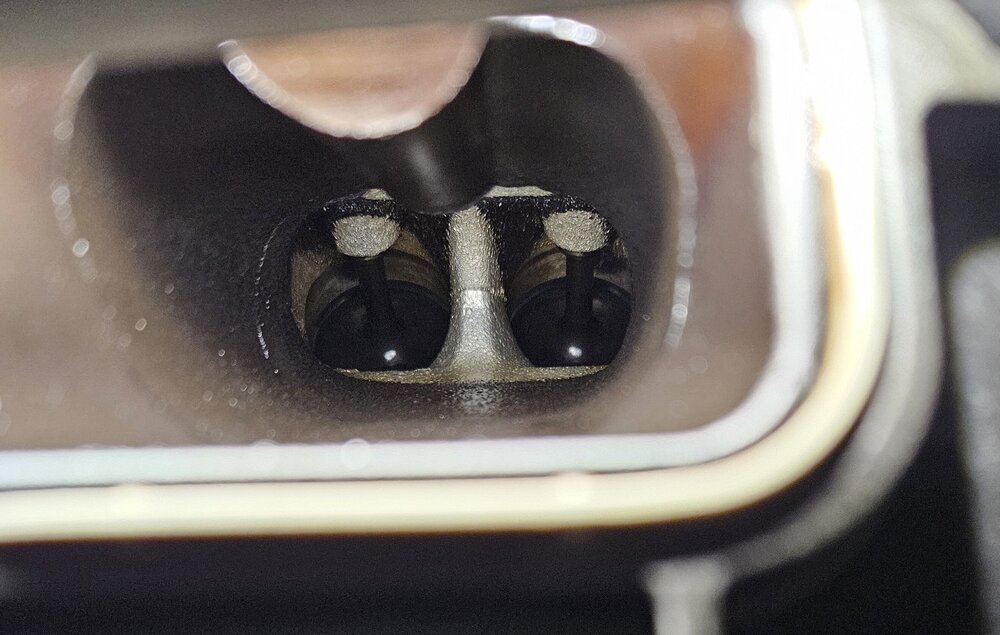
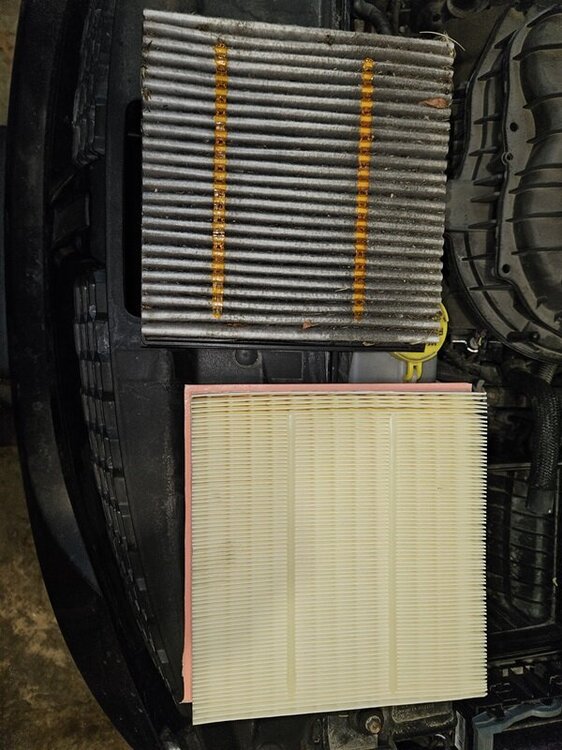
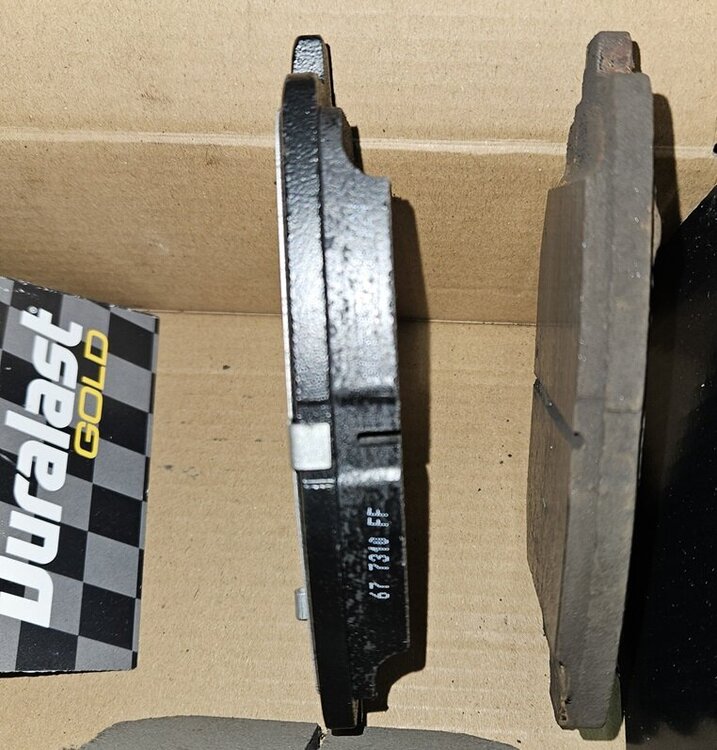
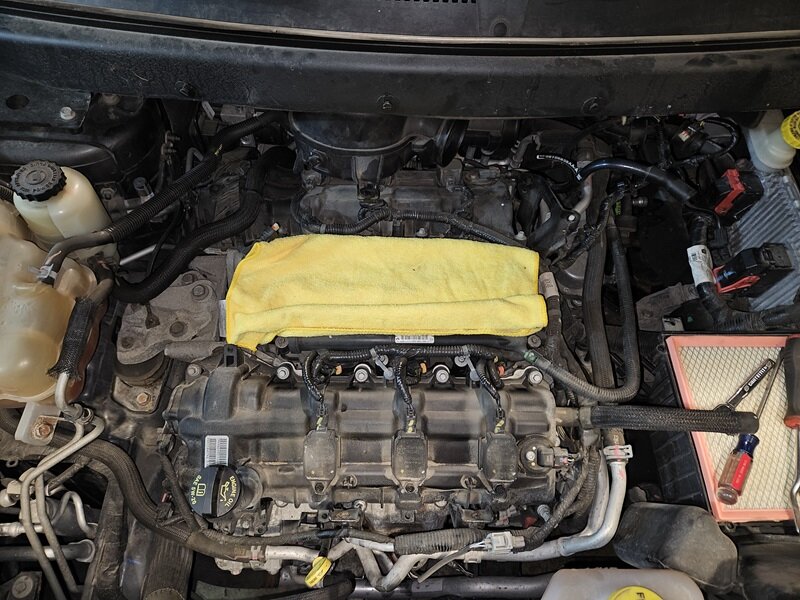
I completed the maintenance work over the last couple of days and the 300+ mile drive back to IL went without a hitch. I average 23.3 mpg at, let's just say *quick* speeds, (according to the Fuel Economy reading on the IC) on the last 200 miles - I reset it after my last fill-up. That was about 2mpg better than I saw on the drive from IL to MI before all the work. Granted, that's a small sample size for comparison. Here are some pictures of what was done... Old vs. New air filter. I couldn't read the make of the old (original??) air filter, but the new one is an AC Delco. I like the additional pleats vs the old one. In looking at how-to videos on removing the upper intake manifold to access the spark plugs, the ones I found talk about completely removing the rear intake bellow (somewhat under the cowl, between the throttle body and the upper intake manifold) first, and having to remove coolant hoses, etc. to make room to slide it out. I actually found it easier to move that bellows off of the TB and move it just a little back to access that last upper intake manifold bolt that is hidden by it, and then remove the upper intake manifold first. Then that bellow comes out easily and completes access spark plugs on the rear cylinder bank. The spark plugs were the OE Champion, and I used NGK Iridiums as replacements. Here are the old plugs, and a comparison of an old and new plug. I also rotated the tires and bled the brakes. While bleeding the brakes, I noticed the rear brake pads were getting low, so I went ahead and changed them. While I had the upper intake manifold off, I took a picture down of the back of the intake valves. They look pretty good/clean. Again, my in-laws' Journey had ~57k miles on it at this point. I also removed the platform running boards they had on there (they are hurting, more than helping, access at this point of their mobility). Let's see, what else...I topped off the coolant and power steering fluids. Oh, and I replaced the serpentine belt, its tensioner and idler pulley, as well - with the car being 10yrs old and the belt being original, it was just a preventive measure at this mileage. Another item - the lower seat side trim piece on the passenger side had been broken loose from repeated entry/exit to the seat. I found a way to use a hole on the seat frame and a trim panel clip to drill a 5/16" hole and secure that trim piece. Aside from having to live with the appearance of the trim clip, it holds that plastic piece securely and works for us. I'll get a picture of that later today and post it.
-
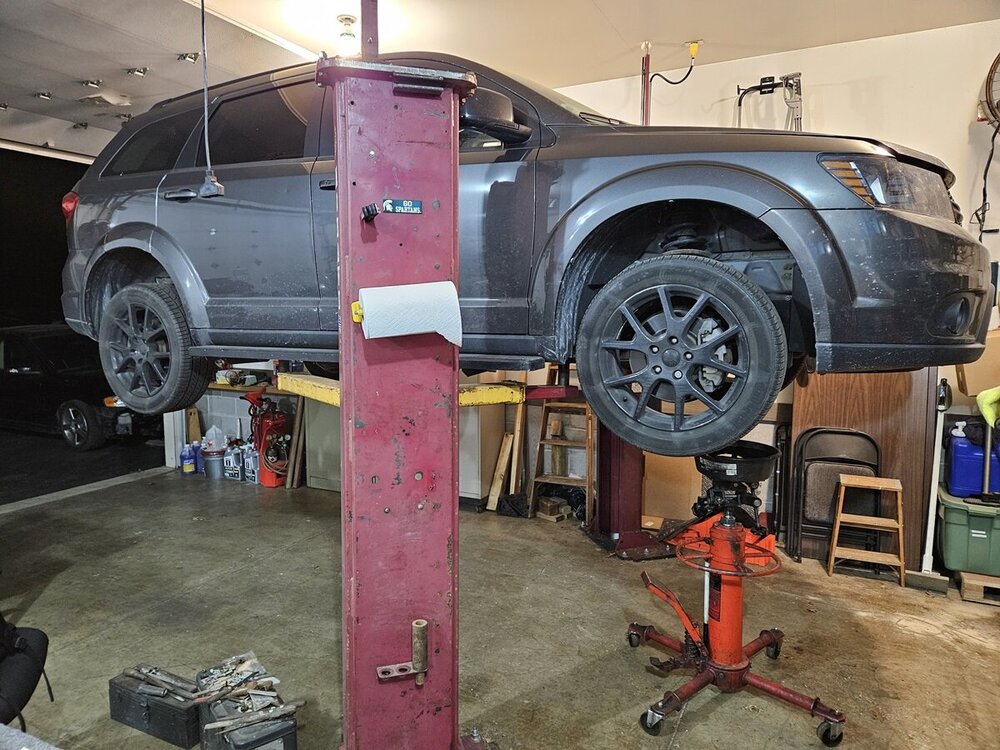
I'm performing some maintenance on my in-laws' 2014 Journey this week. The last bit of service I did on it was in 2022 (replaced LF wheel bearing/hub) while on the road at their home in IL, but this time I brought it back to my house in MI to tackle the work. On the to-do list: Oil & Filter Change Bleed/flush Brakes Rotate Tires New Serpentine Belt, Tensioner and Idler Pulley New Spark Plugs New Air Filter Remove the "wings" (large-platform running boards) Install a Panavise mount for a phone holder There's just under 57k miles on it now, so this should give it a nice refresh.
-
Thank-you. I try to help them where I can At least this wasn't as bad a repair as the 2 engine replacements I did on my son's Chevy Equinox
-
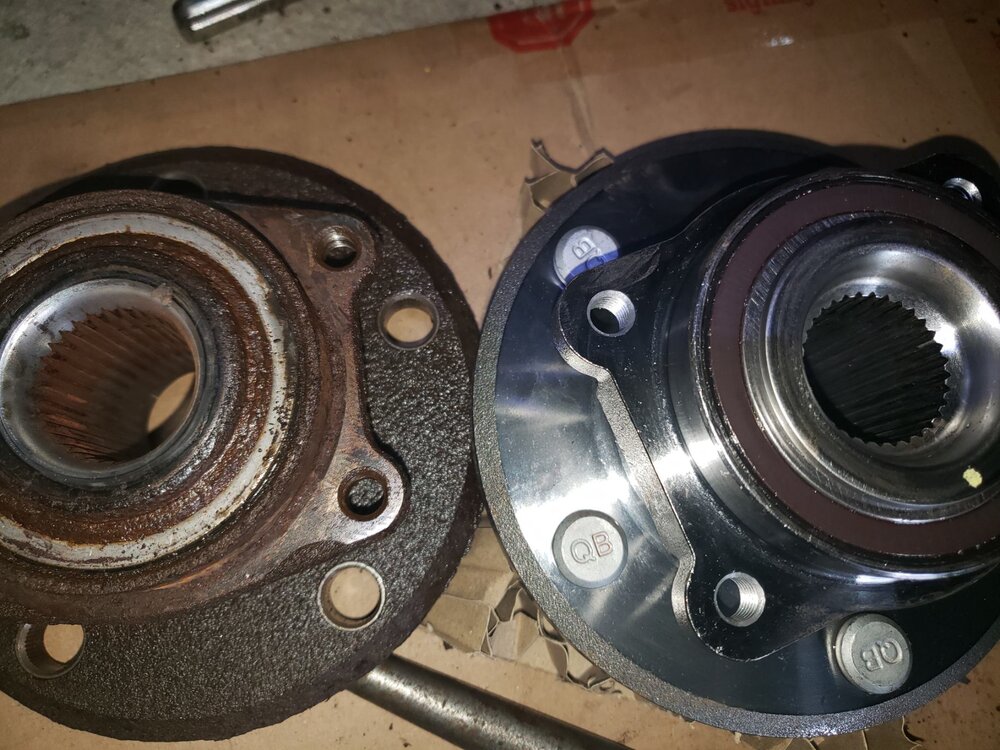
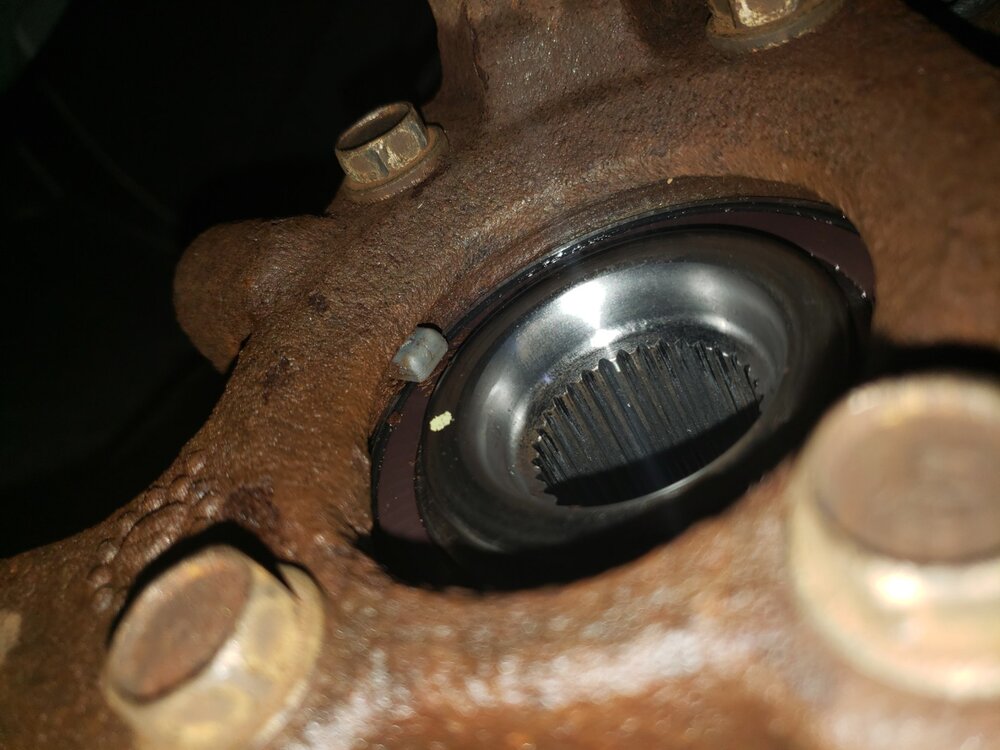
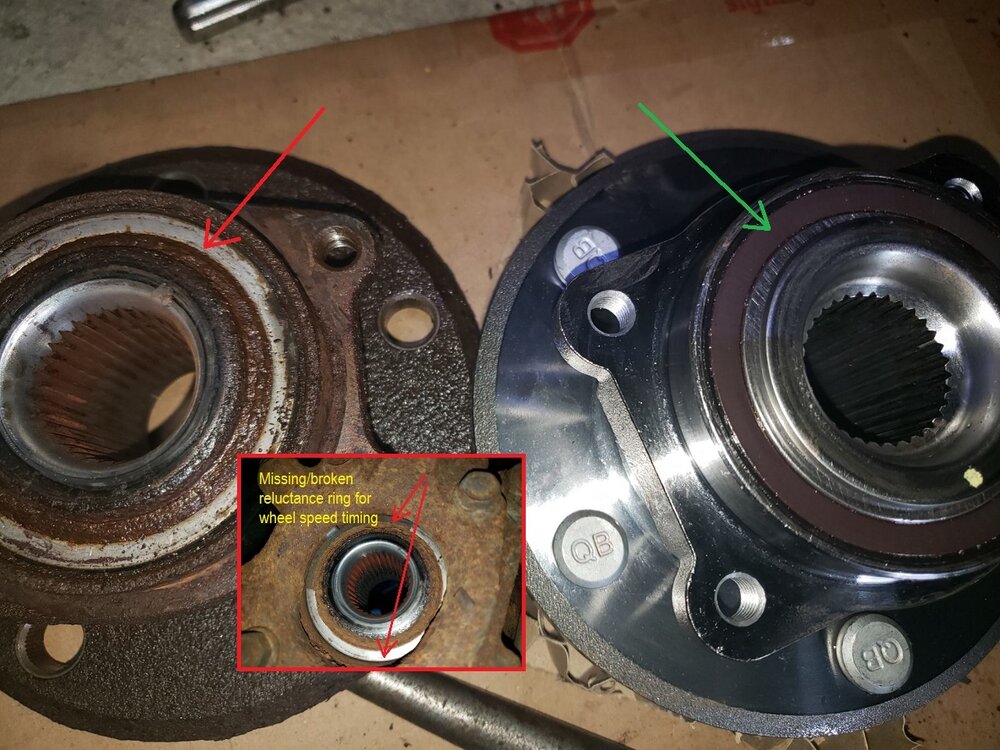
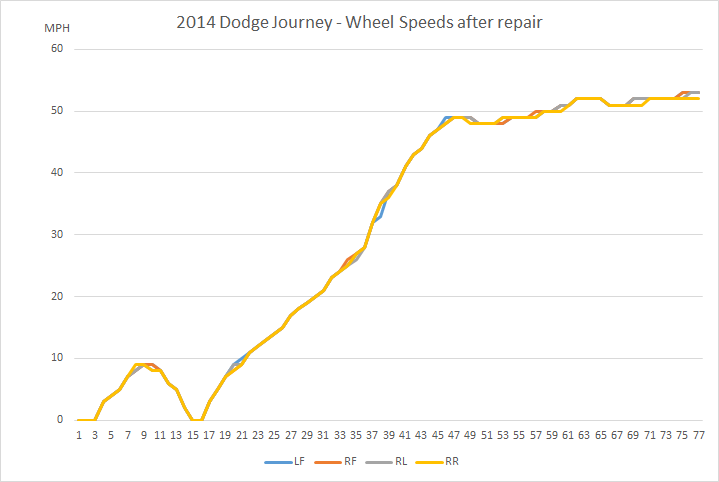
So, just a few more images to close this out... Here is the picture of the old vs. new wheel hub, but trying to explain what was broken. The picture shows the back of the wheel hub/bearing. The "reluctance ring" used for the wheel speed timing was decayed and broken off in pieces (the remaining pieces are shown in the inset image, but I had cleared away those parts in the larger image of the old hub on the left). I'm trying to highlight that in the picture below. The green arrow is pointing to the timing ring on the new wheel hub. It looks like the seal for the wheel bearing, but it's actually the reluctance ring and it is not a seperately available part - it is press fit to the back of the wheel hub bearing. And here is a chart of how the four wheel speeds tracked over a test drive I made. They all tracked essentially together, with slight differences related to the timing of the measurements by the diagnostic tool as I was changing vehicle speed, or while going through curves in the road. Thank-you for all the help offered here in the forum as I worked this repair to completion for my in-laws. Hopefully this thread will help a next person trying to diagnose and accomplish a similar repair!
-
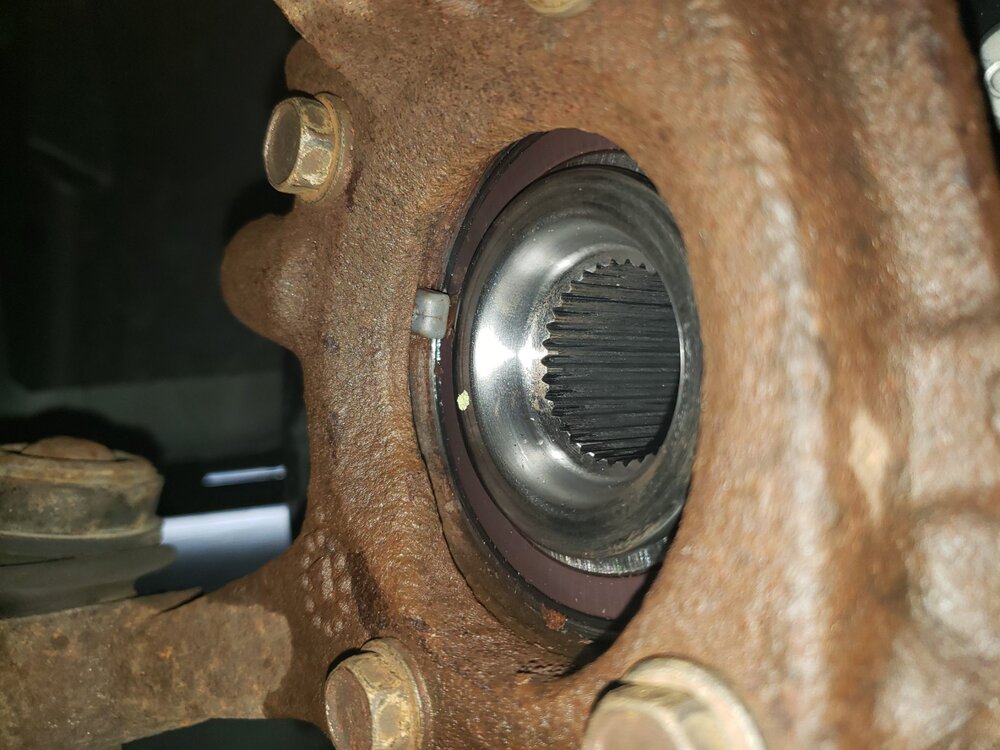
I'll post a more detailed wrap-up/summary when I get back home tomorrow. But, as a quick update: this is FIXED! That is the timing / reluctance / tone ring at the back of the front wheel hub, and everything is working correctly. I put about 10 miles on it this morning: all warning lights are off and all the wheels are reporting correct speeds. So, we all know the wheel speed sensor installs into the spindle on the fronts, but it is clearly understood now that the tone ring is part of the wheel hub assembly as a reluctance ring at the back of the bearing. It is integral to the wheel hub/bearing, and is not a separate part. It is also NOT part of the CV axle, so you DO NOT need to replace the CV axle to fix a wheel speed issue on our Journeys. Somehow, this info should be part of the part descriptions at RA, AZ, and elsewhere, but it's not...yet.
-
Everything is back together. Turning the hub by hand and having my son watch the wheel speed readings on the diag tool, it seems to be tracking fine and not jumping around. We had my in-laws driveway sealcoated while I was finishing up the repair, so I'll get a test drive done in the morning and will post up the final results then. Here is a picture of the old and new wheel hub: And this is an image of the new wheel hub installed. The sensor tracks nice and close to the black timing/reluctance ring: And another shot of the reluctance/timing ABS "tone ring" and sensor: I noticed the little bit of rust flakes there, and took a q-tip and some rubbing alchohol to clean out the rest of the flakes before reassembling everything.