
Evlmarine
-
Posts
60 -
Joined
-
Last visited
-
Days Won
7
Content Type
Profiles
Forums
Gallery
Everything posted by Evlmarine
-
I'm actually changing the color of the insert in a couple of weeks and trying to convince the wife to add an LED bar on it...
-
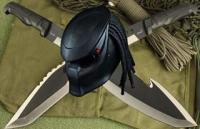
just wanted to share with you guys my WIP as it comes along, if you have any questions let me know and I will try to help out as much as I can. Will be writing some DIY procedures for some of this as I go along. Any input or constructive criticism and comments are welcome. blakced out lights, debadged and plasti dipped letters http://www.dodgejourneyforum.com/gallery/image/2145-blacked-out-lights/ plasti dipped grille and plasti dipped insert (blue) http://www.dodgejourneyforum.com/gallery/image/2147-grille/
-
From the album: Blue Journey
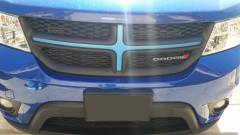
plasti dipped grille (4 coats) with blue plasti dipped insert and bottom lip plasti dipped (5 coats). Didn't really like the gray in the middle of the bottom bumper.- 7 comments
-
- 1
-

-
- black grille
- plasti dip
- (and 3 more)
-
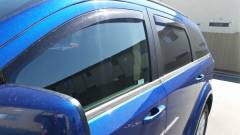
Weather Tech In-channel Wind Deflector
Evlmarine posted a gallery image in Dodge Journey Member Albums
From the album: Blue Journey
These are our in-channel wind deflectors, they really help when its raining or the windows are fogging up on long trips. -
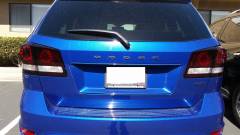
From the album: Blue Journey
view of the DRL only during day time, they are still visible with 3 coats of Nite Shades. -
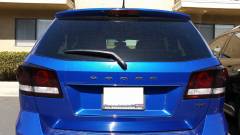
Blacked Out tail and high mount lights
Evlmarine posted a gallery image in Dodge Journey Member Albums
From the album: Blue Journey
debadged, plasti dipped, blacked out DRL, stop and high mount lights. -
I just went and bought a pack of drying cloths and pay my kids $5 to dry it... lol
-
To remove any type of "lamp shades" you can use acetone with a cotton make up applicator pad and it will remove the paint and will not scratch the pastic. After you're done, just rinse the palstic with soapy water and you're done. ******* Update ******* Here's a picture of mine after being cleaned with acetone and alcohol, no damage to the plastic at all and its still very shiny. http://www.dodgejourneyforum.com/gallery/image/2145-blacked-out-lights/
-
These are some of the places the Journey has taken us a couple of times...
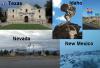
-
The Journey is a great vehicle to drive cross country, have gone from San Diego to Texas three times and from San Diego to Idaho about 4 times with no problems at all. will post some pics later on.
-
DIY Crossroad-like Tail Lights
Evlmarine replied to bigunclejethro's topic in Accessories, Modifications
You don't need to sand your tail lights if you're using niteshade, all you need to do is thoroughly clean it with alcohol. After it dries apply one thin coat on the tail light and let it get tacky (takes about 3 mins) then spray two more coats 5 - 10 minutes apart depending on the humidity and it should be good to go. Niteshade will last up to two years on your lights even if you pass your car through the automatic carwash once a week. If you get stopped by the police and they ask you to remove it, you can easily remove niteshade with coton and finger nail polish remover without scratching your tail lights.
