

bigunclejethro
-
Posts
99 -
Joined
-
Last visited
-
Days Won
1
Content Type
Profiles
Forums
Gallery
Everything posted by bigunclejethro
-
It doesn't look to me like the inner "ring of fire" lights above the b/u lights do much of anything. Has anyone considered wiring them up to come on with the outer brake lights?
-
LED on low beam
bigunclejethro replied to EricLeRouge's topic in Glass, Lighting, Mirrors, Sun Roofs & Wipers
I haven't experience this myself, but I have been advised to stay away from direct drop in LED's as they get hotter than standard bulbs and can melt connectors. Those look great though, and I hope I'm wrong! -
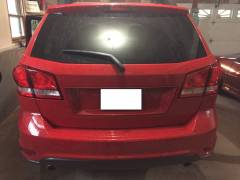
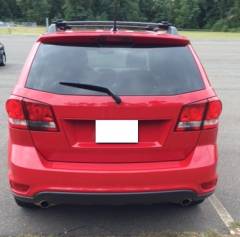
I spent some time this weekend removing the remaining VHT Niteshades. I had a small set of lights I had tinted a while back way too dark, so these were perfect to test on. First I tried mineral spirits. This did absolutely nothing. So I moved onto Good-off. This works great, but really dulled the lights and seemed to almost eat the plastic on the backside of the reflector. I'm glad I used this on a set of junk lights first as my DJ lights would've definitely been ruined. There are many videos of people using Goof-off to get VHT off and it works, but it will ruin your lights! I decided to take a much safer approach with my actual tail lights since the LED version cost nearly $150 per light (ridiculously expensive). This is the passenger reverse light before doing anything. You can see the dark spot just under the clear part and less noticably at the top of the light as well. I had some Mcguires ultimate compound and just a hand applicator, but I went at it and it all came off really quite easily. I can see this being a major pain if you have them really tinted, but even with a rotary buffer this is easily the safest route. Here is the end result. Good as new! Now I just need to make it through winter and decide what to do with em.
-
From the album: ECV
VHT completely removed -
From the album: ECV
-
From the album: ECV
-
From the album: ECV
-
 I drive my car really hard and I struggle to get below 20. I have very little highway in my commute and I usually get around 22.
 -
Let us know how the aftermarket resonator works out. It is quite a bit louder without one, but removing the stock one gave it a much deeper and more aggressive tone. Finding a balance between noise and tone would be nice.
-
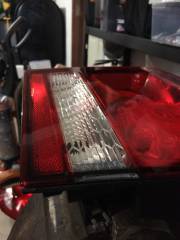
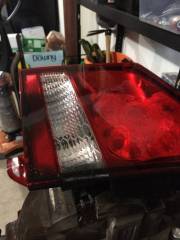
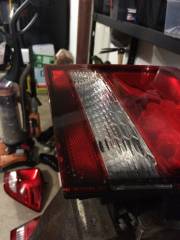
This is what my lights turned out to after trying to buff the VHT. I kept buffing until I got them to shine. I clearly did something wrong along the way and I wasn't able to get any shine until I was all the way through the tint. If I had to guess, I probably used an incompatible clear coat. You can see there are some spots on the two backup lights that didn't come off with buffing and I think it looks bad. I want to clean it all off and have them tinted with film instead. It sounds like mineral spirits are safe on plastic, so I'll give that a shot this weekend. Thanks for the feedback Lobitz68.
-
From the album: ECV
Quick shot of my 13 SXT after removing most of VHT with buffer -
I've read many different responses with varying warnings, but I'm looking for advice from people who have done this with their cars. My attempt with VHT Niteshades didn't go as planned. In fact, most of it came off when I tried to buff them after clear coat. I couldn't get any shine so I just kept going at it. There are a few dark spots that are clearly still tinted and I want a safe way to remove it without fogging up my lights or eating through the plastic. So far the best solutions I've read about are goof-off or mineral spirits. It sounds like mineral spirits may be safer with plastic, but may not be strong enough. I've watched many videos where goof-off was used, but the manufacturer does not condone use on plastic. I won't wet sand my lights, but I'm open for any suggestions/constructive feedback. I do not have easy access to a buffer, so any solutions that avoids this would be appreciated. Thanks all.
-
Resonator delete is the way to go. Deeper, more aggressive but somewhat raspier sound. I have flowmaster clones on my Journey with resonator delete and its a bit loud on the highway. I can't say it drones, at least not real bad, but I can see it getting annoying for more than a few hours of driving. I've heard magnaflows are much better at managing the drone, but are not as aggressive sounding as flowmaster. I'm thinking of switching mine out but only for the right price. Have you noticed any vibrations inside the cabin? Like plastic pieces vibrating at certain RPM's? Maybe it's just my exhaust. I can't hear them anymore with the resonator removed but I certainly could before.
-
I'm looking for anything, pin stripes, hood/fender stripes, whatever. I've tried a few patterns with plastidip on the hood, but nothing stood out yet. I might try the hash marks this weekend and see how that comes out.
-
2016 Dodge Journey front
bigunclejethro commented on HarryT.'s gallery image in Dodge Journey Member Albums
 I'm sold! That's an awesome ride!
 -
Anyone have striped on their DJ? I'm looking to add something but can't find many pictures out there so post em up if you have any!
-
I would only consider a centrifugal style supercharger as there should be plenty of room for that. Turbo would also be a lot of fun, but the 3.6 seems to make most of its power near the top of its RPM range, so a supercharger would really be the best to even out the torque curve. Who wants to take the plunge and show us how it's done?
-
Good call on the warranty dhh3. I will definitely look into that. I would get a separate set of wheels and tires for winter but my other car seems to empty my pockets before I can do anything to my Journey. I've also been thinking about dipping them maybe clear just to protect from salt and chemicals for the winter.
-
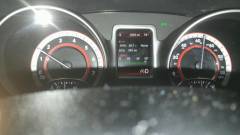
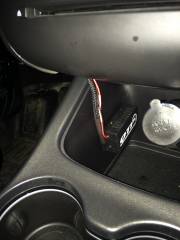
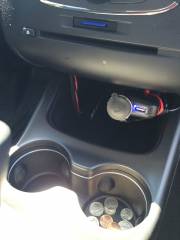
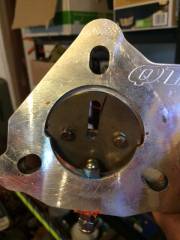
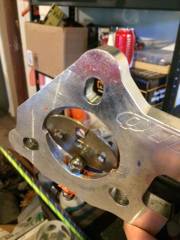
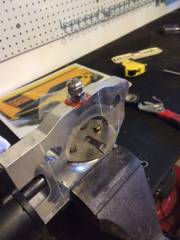
Here are some pictures of what I did. This is what I started with. I removed the resonator a few months ago and clamped in a piece of straight pipe. I didn't know if I would like the noise or not so I filled all around the tube and clamps with a high temp liquid gasket (orange stuff) so I could put the resonator back if I wanted to. I purchased a QTP 2.5" ECV with wireless controller, and wired them up through a cigarette lighter extension (so I didn't have to splice into the cars wiring). This way I could also easily remove everything if I decided to. I put the controller under the heater controls and hid the wiring behind the dash. I cut a section of straight pipe and welded flanges on to match the ECV (don't laugh at my welding, its a bit rough but I don't hear any leaks). This was the first test fit up. Because this is typically used as a cutout, it seals pretty darn good when it's fully shut. So I came up with a relatively simple way of keeping it cracked. I drilled and tapped for a 1/4-20 bolt in the bottom of the valve. I then put the assembly in the car and was able to tune how much restriction the valve caused by bringing the bolt up and down in the ECV housing. I found my happy medium, took the whole thing apart and thread locked and sealed all the threads. This is the result. Not the greatest looking but it can be refined later if needed. I don't have a picture of it but there is one control wire that runs from the controller to the valve. I ran this out through a grommet behind the dash where I think the parking break cable goes, and under the heat shield all the way back to the valve. I'll take a picture of the setup under the car and get some videos in the next few days hopefully. Not a huge difference, but I get between 10 and 15 dB reduction across the board with the valve closed. Still makes a good noise but is much more bearable for long hauls. This will rarely be closed, so I don't expect to see any major differences in fuel economy. Hopefully you can view these pictures, this is the first time I've tried to post any. If not, everything can be found in this album: http://www.dodgejourneyforum.com/gallery/album/285-ecv/
-
From the album: ECV
-
From the album: ECV
-
From the album: ECV
-
From the album: ECV
-

From the album: ECV
-
From the album: ECV
