Dodgems
-
Posts
47 -
Joined
-
Last visited
-
Days Won
8
Content Type
Profiles
Forums
Gallery
Everything posted by Dodgems
-
From base to loaded in _ _ simple steps!
Dodgems replied to Dodgems's topic in Accessories, Modifications
Hands Free Works !!!!! Factory Bluetooth can be installed!!!! It's not easy but so worth it for my peace of mind. I did the whole harness but looking over the wiring diagrams you do not have to do the same. I believe with the module, mirror, male to male usb cable and connectors you can wire it in yourself. You may need the black connector for the radio as well. If you have the backup cam you should already have it. Grabbing the dash harness would be nice but not at all required. I installed the hands free mirror and headliner harness for the mirror and humidity sensor. Ran power to the fuse block. Activated hands free present in two places with Alfa. Just type "hands free" in the search box and alfa will show the 2 settings that need changed. And... It would not connect. Journey showed the phone icon. It said it was in pairing mode. The car appeared to work as it should. Our pixel phones could not see the uconnect system. I checked AlfaOBD on my pc to see if there was another item to change. I noticed uconnect showing up there as a bluetooth device but not on our phones. After some Google Fu I downgraded the bluetooth drivers in our cell phones to 1.4 and they now work as they should. It can send and receive calls and it appears to be factory installed. The UCI USB is a diagnostic port for the usb system. That is why I didn't remember where it went. It didn't go anywhere. You can ignore that connector at the module all together. -
From base to loaded in _ _ simple steps!
Dodgems replied to Dodgems's topic in Accessories, Modifications
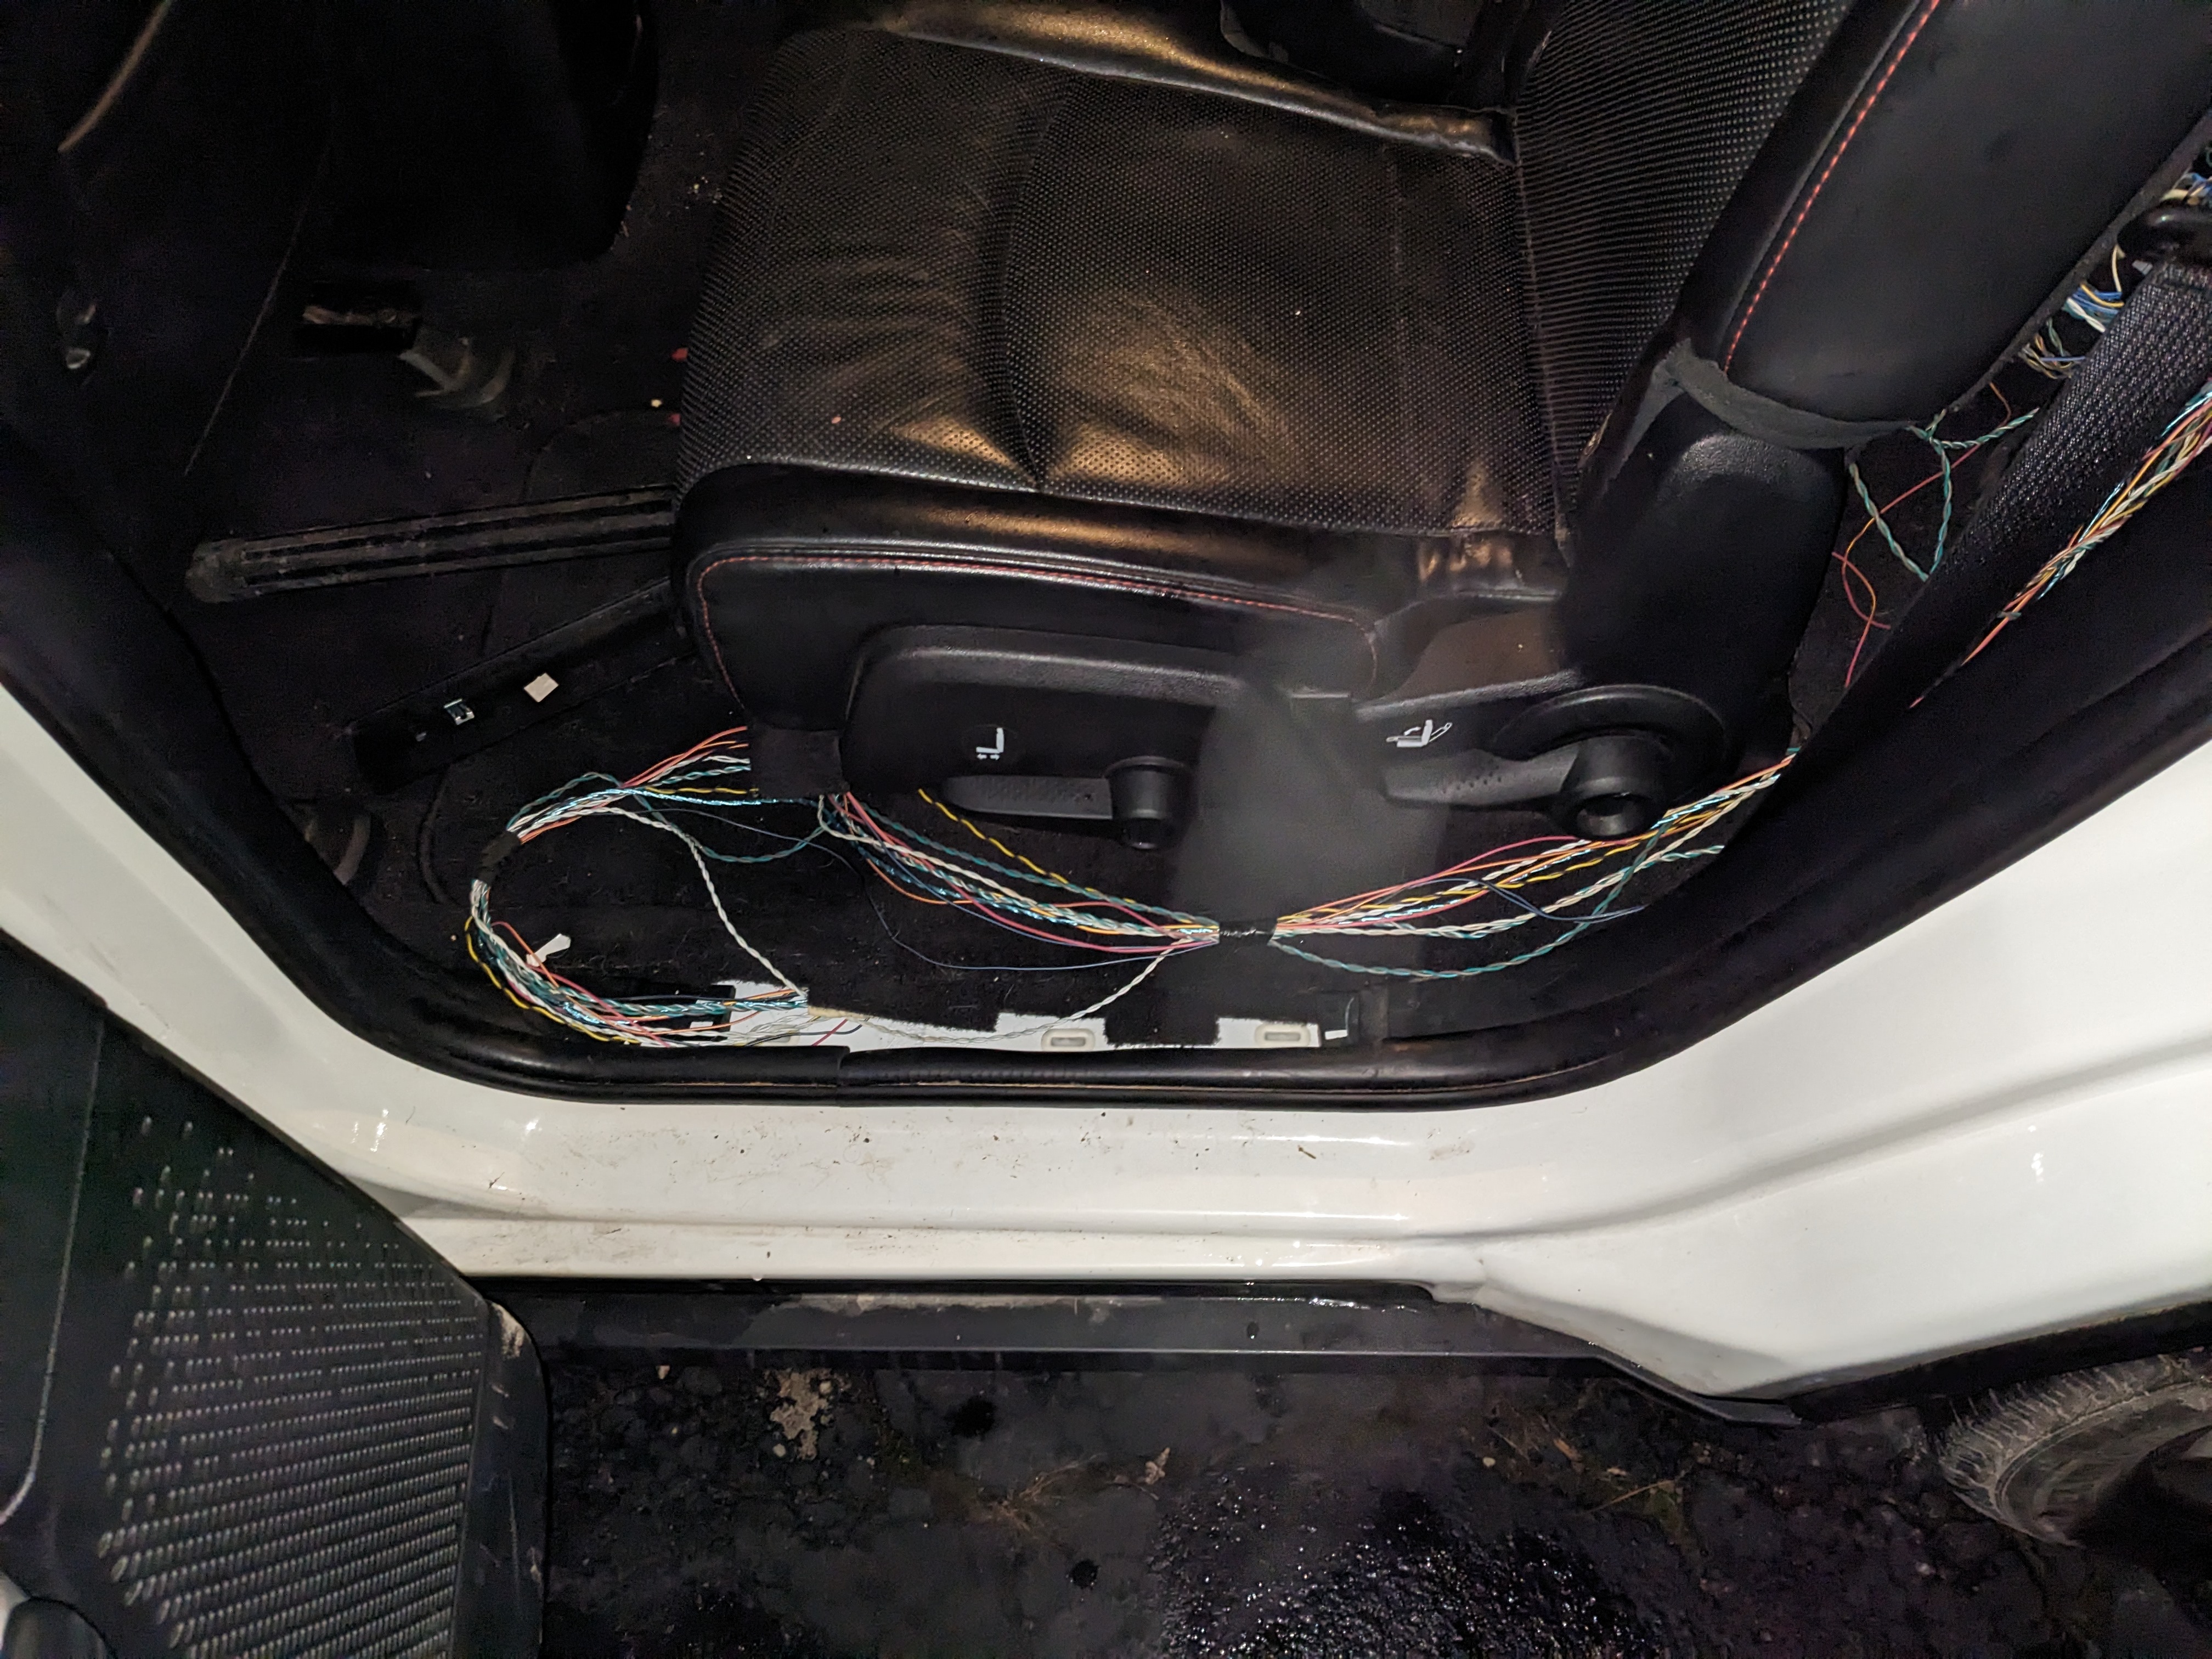
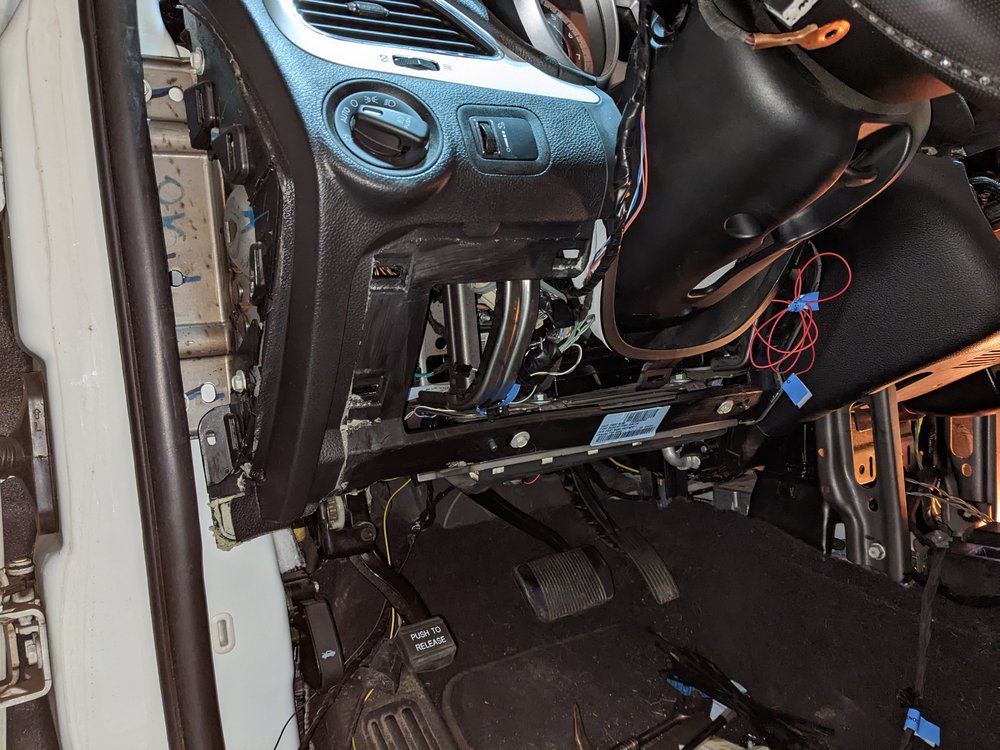
Had a few hours this weekend to run wiring. My poor knees are not happy. My back is pissed. Spending a weekend crawling under the dash and kneeling was not kind to this old bag of bones. I have the body and dash harnesses in place. The stereo is now converted to the factory alpine system. I used the donor radio harness. I connected the amps speaker wires to the factory speakers behind the radio. The bolts to mount the amp are present under the passenger seat. I plugged the radio CAN wire into the star connector. To get the monitor to come on I had to tie the radio telematics CAN wiring to the donor harness. I did this behind the radio as well. I depinned then plugged the amp B+ wire into the factory harness at the fuse block. I used Alfa to set the bcm to amp installed and it works as it should. Steering wheel controls work. I can not find any difference between a factory setup and what I have frankensteined. The backup camera is not a success story just yet. It is wired in. I changed settings via Alfaobd. When in reverse the display comes on but looks like a 60's tv station at 3 am. A lot of snow. Looks like the vertical hold is afu. Image goes mostly red. Then back to snow. I can see the backup lines superimposed but they roll with the image. being used parts off a wrecked vehicle I ass-u-me the camera is bad. I rechecked my wiring a few times and it appears correct. There may be an issue along the harness or the 12v I used is not providing enough power but reading other posts I am going to replace the camera and see what happens. I swapped over the center console. The usb being way down in the front cubby was a pain in the buttocks. It's now inside the console. This also provides the provision to have the 120v inverter working. It is installed and wires are at the bcm. I zip tied the inverter to the metal frame for the dash. There is a lot of room for activities on drivers side of dash. The hands free module was placed on top of the knee air bag just under the steering wheel. It functioning was not a priority this weekend but will be next time the wheel of Ka comes around. I still have to install the mirror and run that harness but I have the donor harness ran to the drivers A pillar. I will have to tie it into the fuse panel and figure out where to get 5v usb power. For whatever reason I cannot find the 4 wire connector in the harnesses. I have the wire attached to the module but I cannot find where it plugs into the vehicle. The factory wiring diagram is not very helpful. It points to a connector near the obd port but I have yet to find it on the car or the donor harness. The diagram shows it plugs into the Datalink Connctor USB. The circuits are labeled as UCI usb ports but the connector is a 4 pin non usb connector. I will spend more time looking into this next time I have the car for a few hours. There is no wiring present in the vehicle for the auto climate control. I will have to add the temp sensor and humidity sensor wiring. This will be after I get the camera and hands free working. My better half doesn't really care but the 22 degree bug is annoying to me. One word of caution. Be extra careful if repinning the white radio connector. I either do not know how to use it or it's a poor design. I pulled the power and ground from the factory connector and placed them in the donor connector. They would feel tight but when plugging the connector into the radio they would fall out the back of the connector. It took me a few tries and several fuses to discover pushing in on the wires while connecting was the only way to get them seated properly. They don't come out from tugging on them now but they were a pain to get right. Some progress pics. Rats nest to just dirty and needs vacuumed out.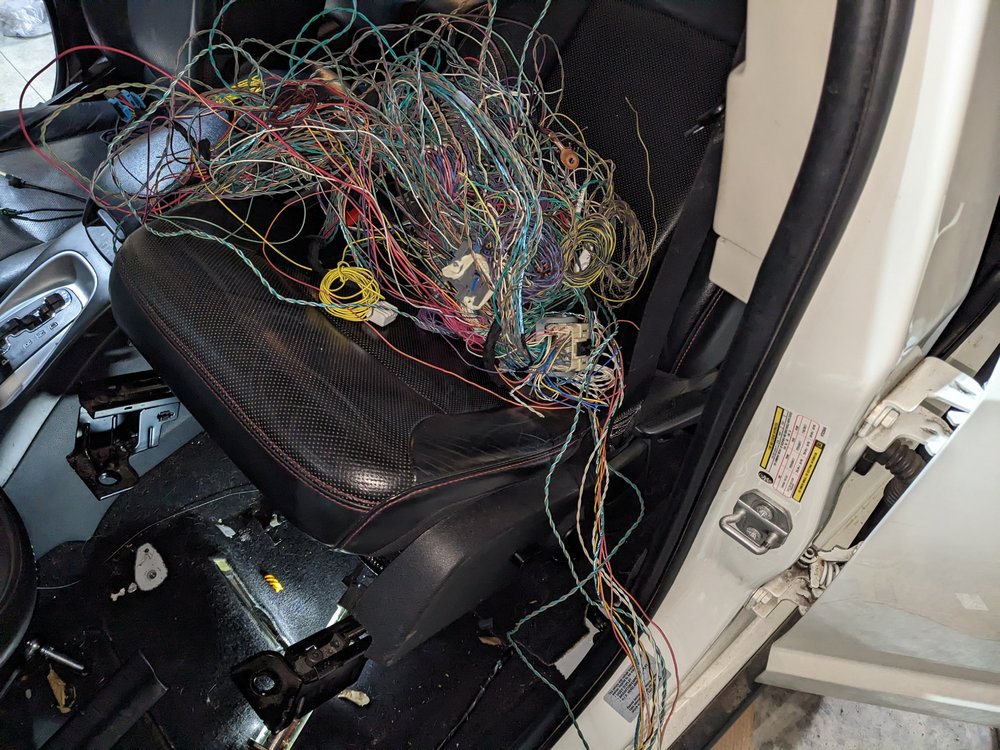
-
I will second the WTF. Do we have a motion to carry?
-
There is a white connector inside the left D pillar cover. There are a total of 3 connectors there. On my 17 there was a 12v wire there that is used for the factory backup cam. I used it to power the camera.
-
They are all over. Both front kick panels have nice grounds. If you have rear hvac I am sure there is a ground in that area. The Left D pillar has one just above the 12v outlet. You may be able to access it from the pillar panel but the larger interior panels may need removed. The plastic interior quarter panel covers come off fairly easy. You have to remove the third row seat to get them off but it's only a few bolts to get the seats out. There is a hidden screw at the c pillar in that molded in handle area. The square anchor points cover pop upwards to revel a screw and then the one round netting anchor comes off. The seat belt anchor is a T50 torx bit.
-
rear back up camera wiring
Dodgems replied to DJ_genpogi's topic in Audio, Infotainment Navigation, MyGig, UConnect, etc.
There is a step by step guide floating around here somewhere. I am doing similar using a factory camera and wiring taken from a wrecked journey. It took a couple hours to run the wires. I did other things and bs'ed with my son. It should only take an hour if your just doing the wiring. I pulled the left rear seat, Left quarter panel interior panel. Left D pillar cover and ran the wires down the left side of the car. The hardest part was getting the wires through the rubber grommet/ boot at the hatch. I removed the boot from both ends, used a long skinny screw driver, taped the wires to it and pulled it through. The fit is tight. I did it dry but I imagine some wire lube or baby powder would make it easier. Just be careful. I have read some posts where the wires in the boot get chaffed and start causing issues. I used the ground located on the D pillar and grabbed 12 volts from the white connector in the car just before the harness goes into the rubber grommet. It is for the backup camera. Since the car did not come with a camera it was unused. I would advise not going overhead. I have read some posts where people fished the wires over the headliner. I have not seen any issues from that route but I did not want extra wiring floating up there with the side curtain air bags. I doubt the wiring would affect it's deployment but I am not taking that minimal risk. The left rear most seat is easy to remove. The middle seats stay in place. You need to remove 4 10 mm bolts in the cubby behind the seats where the jack is stored. The cubby comes out exposing the seat back bolts. The bottom cushion pops into place up front and slips over a hook at the rear. You can see the hook with the cubby removed. That seat back is bolted in with 3 18 mm bolts and 1 18 mm nut. You will need a torx 50 bit to remove the seat belt anchor on the D pillar. Get a decent quality bit. Those anchors are tight. Use blue loctight when reinstalling the anchor bolt. The plastic covering just slips over the anchor. Rotate it forward and the cover slips off the back. There is a hidden screw in the quarter panel plastic. It is under the grab handle like indention waste high at the C pillar. Right about where the door latch is. The other screws are under the 2 square anchor points and the round button for the netting. -
2010 dodge Journey battery dead if the morning
Dodgems replied to Jeff Harmon's topic in Electrical, Battery & Charging
Just adding onto John. Sometimes their is enough juice to crank but not enough for the pcm to operate. Today's cars will throw all sorts of weird issues at you if one cell is bad. In our Neon when the battery was weak the gauge cluster would freak out and all kinds of warning lights would come and go. First time it happened was on the highway at 65mph. Should have had plenty of juice from the alternator. Even restarted a few more times so I knew it had to be something expensive. Nope just a battery wearing out. I worked at a gm dealership for a while and we never left the ignition on for more than a few minutes on late 90 to mid 00 vehicles. Even a good battery will drain enough in 20 minutes to not start. They will crank for a while but if the pcm is below 12 volts it will not fire the injectors. You can remove the battery on my old Mustang II and it will keep on trucking as long as you don't stall it. Modern cars will not tolerate that. -
The display is just that. A display. The nav is in the "radio" unit behind the heater controls. To get nav you need to upgrade to an RB5 "radio". The display stays the same. I am installing a factory backup cam but found an aftermarket one from emerald integration for $90 on ebay. It includes the wiring and adapter for the 8.4 radios. Backup cam does not have a module. The 8.4 nav and non nav are setup for it. You either tap into the connector or get a harness with an rca plug for the aftermarket ones. You will need to have the dealer reprogram the bcm, of get alfaobd and do it yourself.
-
From base to loaded in _ _ simple steps!
Dodgems replied to Dodgems's topic in Accessories, Modifications
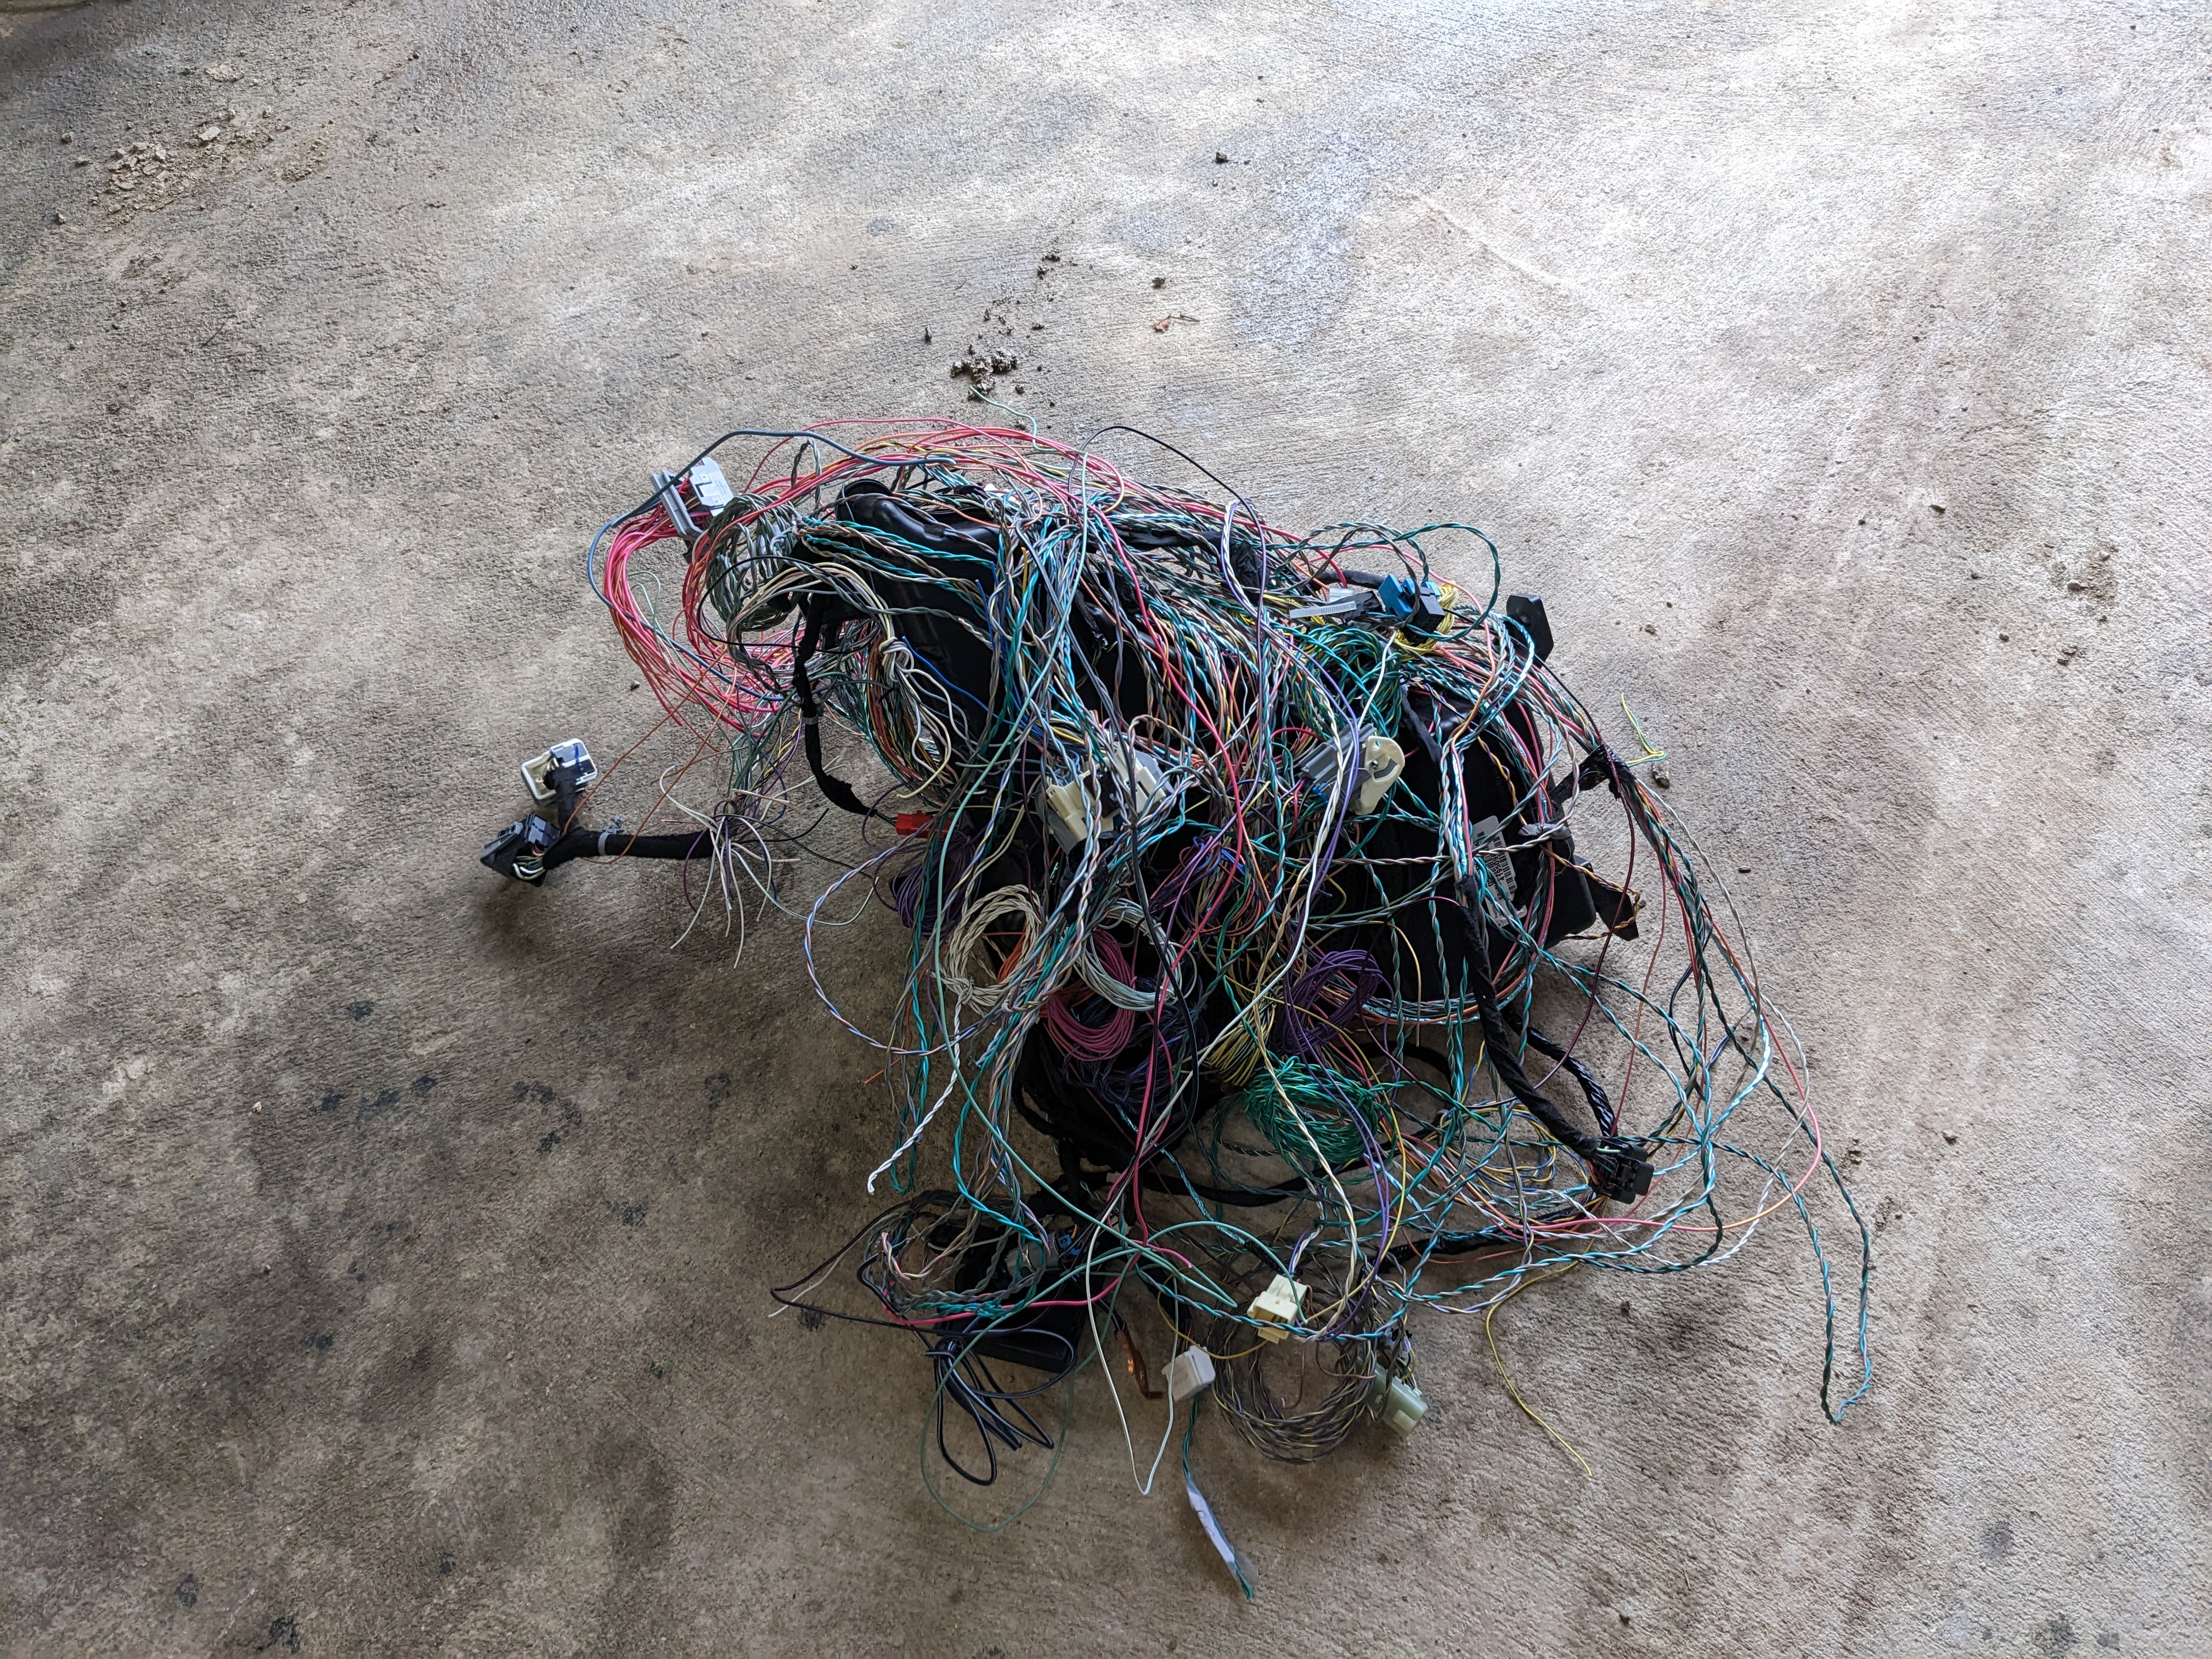
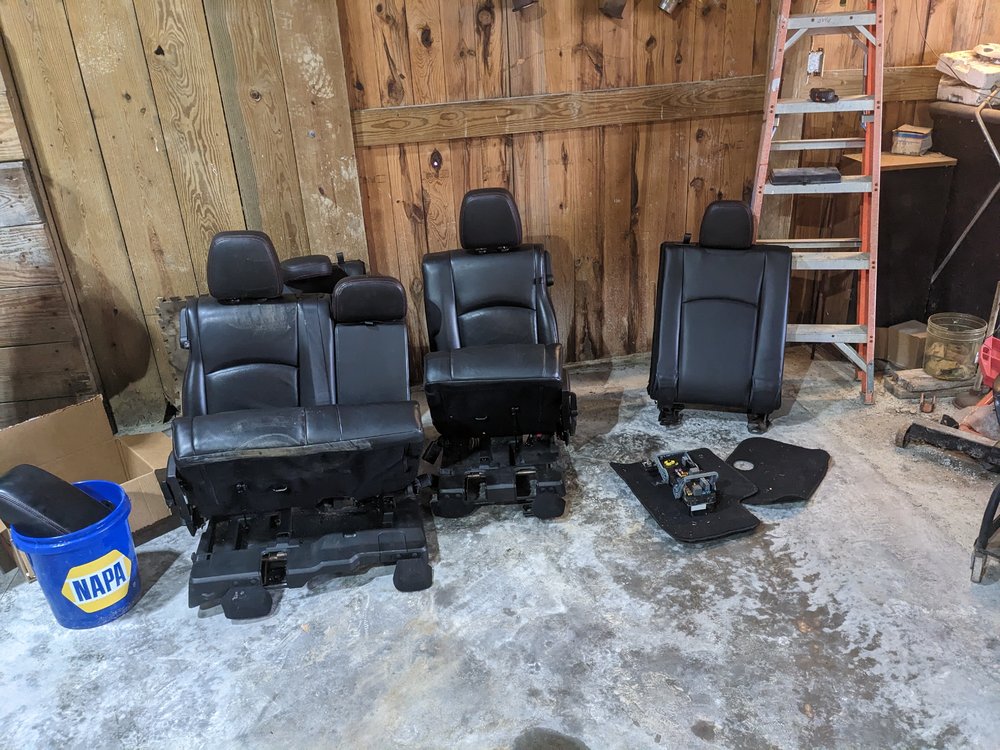
The dash harness is a lot more involved than the body harness. I am waiting on tech authority usb for wiring diagrams. That way I am not redoing work. It should be here well before I am ready for it anyway. First 2 pics are the current stopping point. That bundle is mostly the amp and associated wires. The large connector will be gone. I want to repin the existing connector but time will tell how that pans out. The coiled wires are most likely not needed but there again I am waiting to tie it all together just to be sure. Last pic is the lucky recipient or victim. Which one it turns out to be is yet to be determined.

-
I just went through this a few weeks ago. All the ebay seller needed was a pic of the label on the radio. He needs the part and serial numbers. I did not give him a vin. Not from the donor nor the vehicle it went into. I believe the dealership wants them to cya in case it was stolen and they get dragged into a legal fight. Their software may even require it but the pin is based on part and serial number. Not the vin. I recommend having both vin's just in case but do not stress if you do not have the donor vin.
-
From base to loaded in _ _ simple steps!
Dodgems replied to Dodgems's topic in Accessories, Modifications
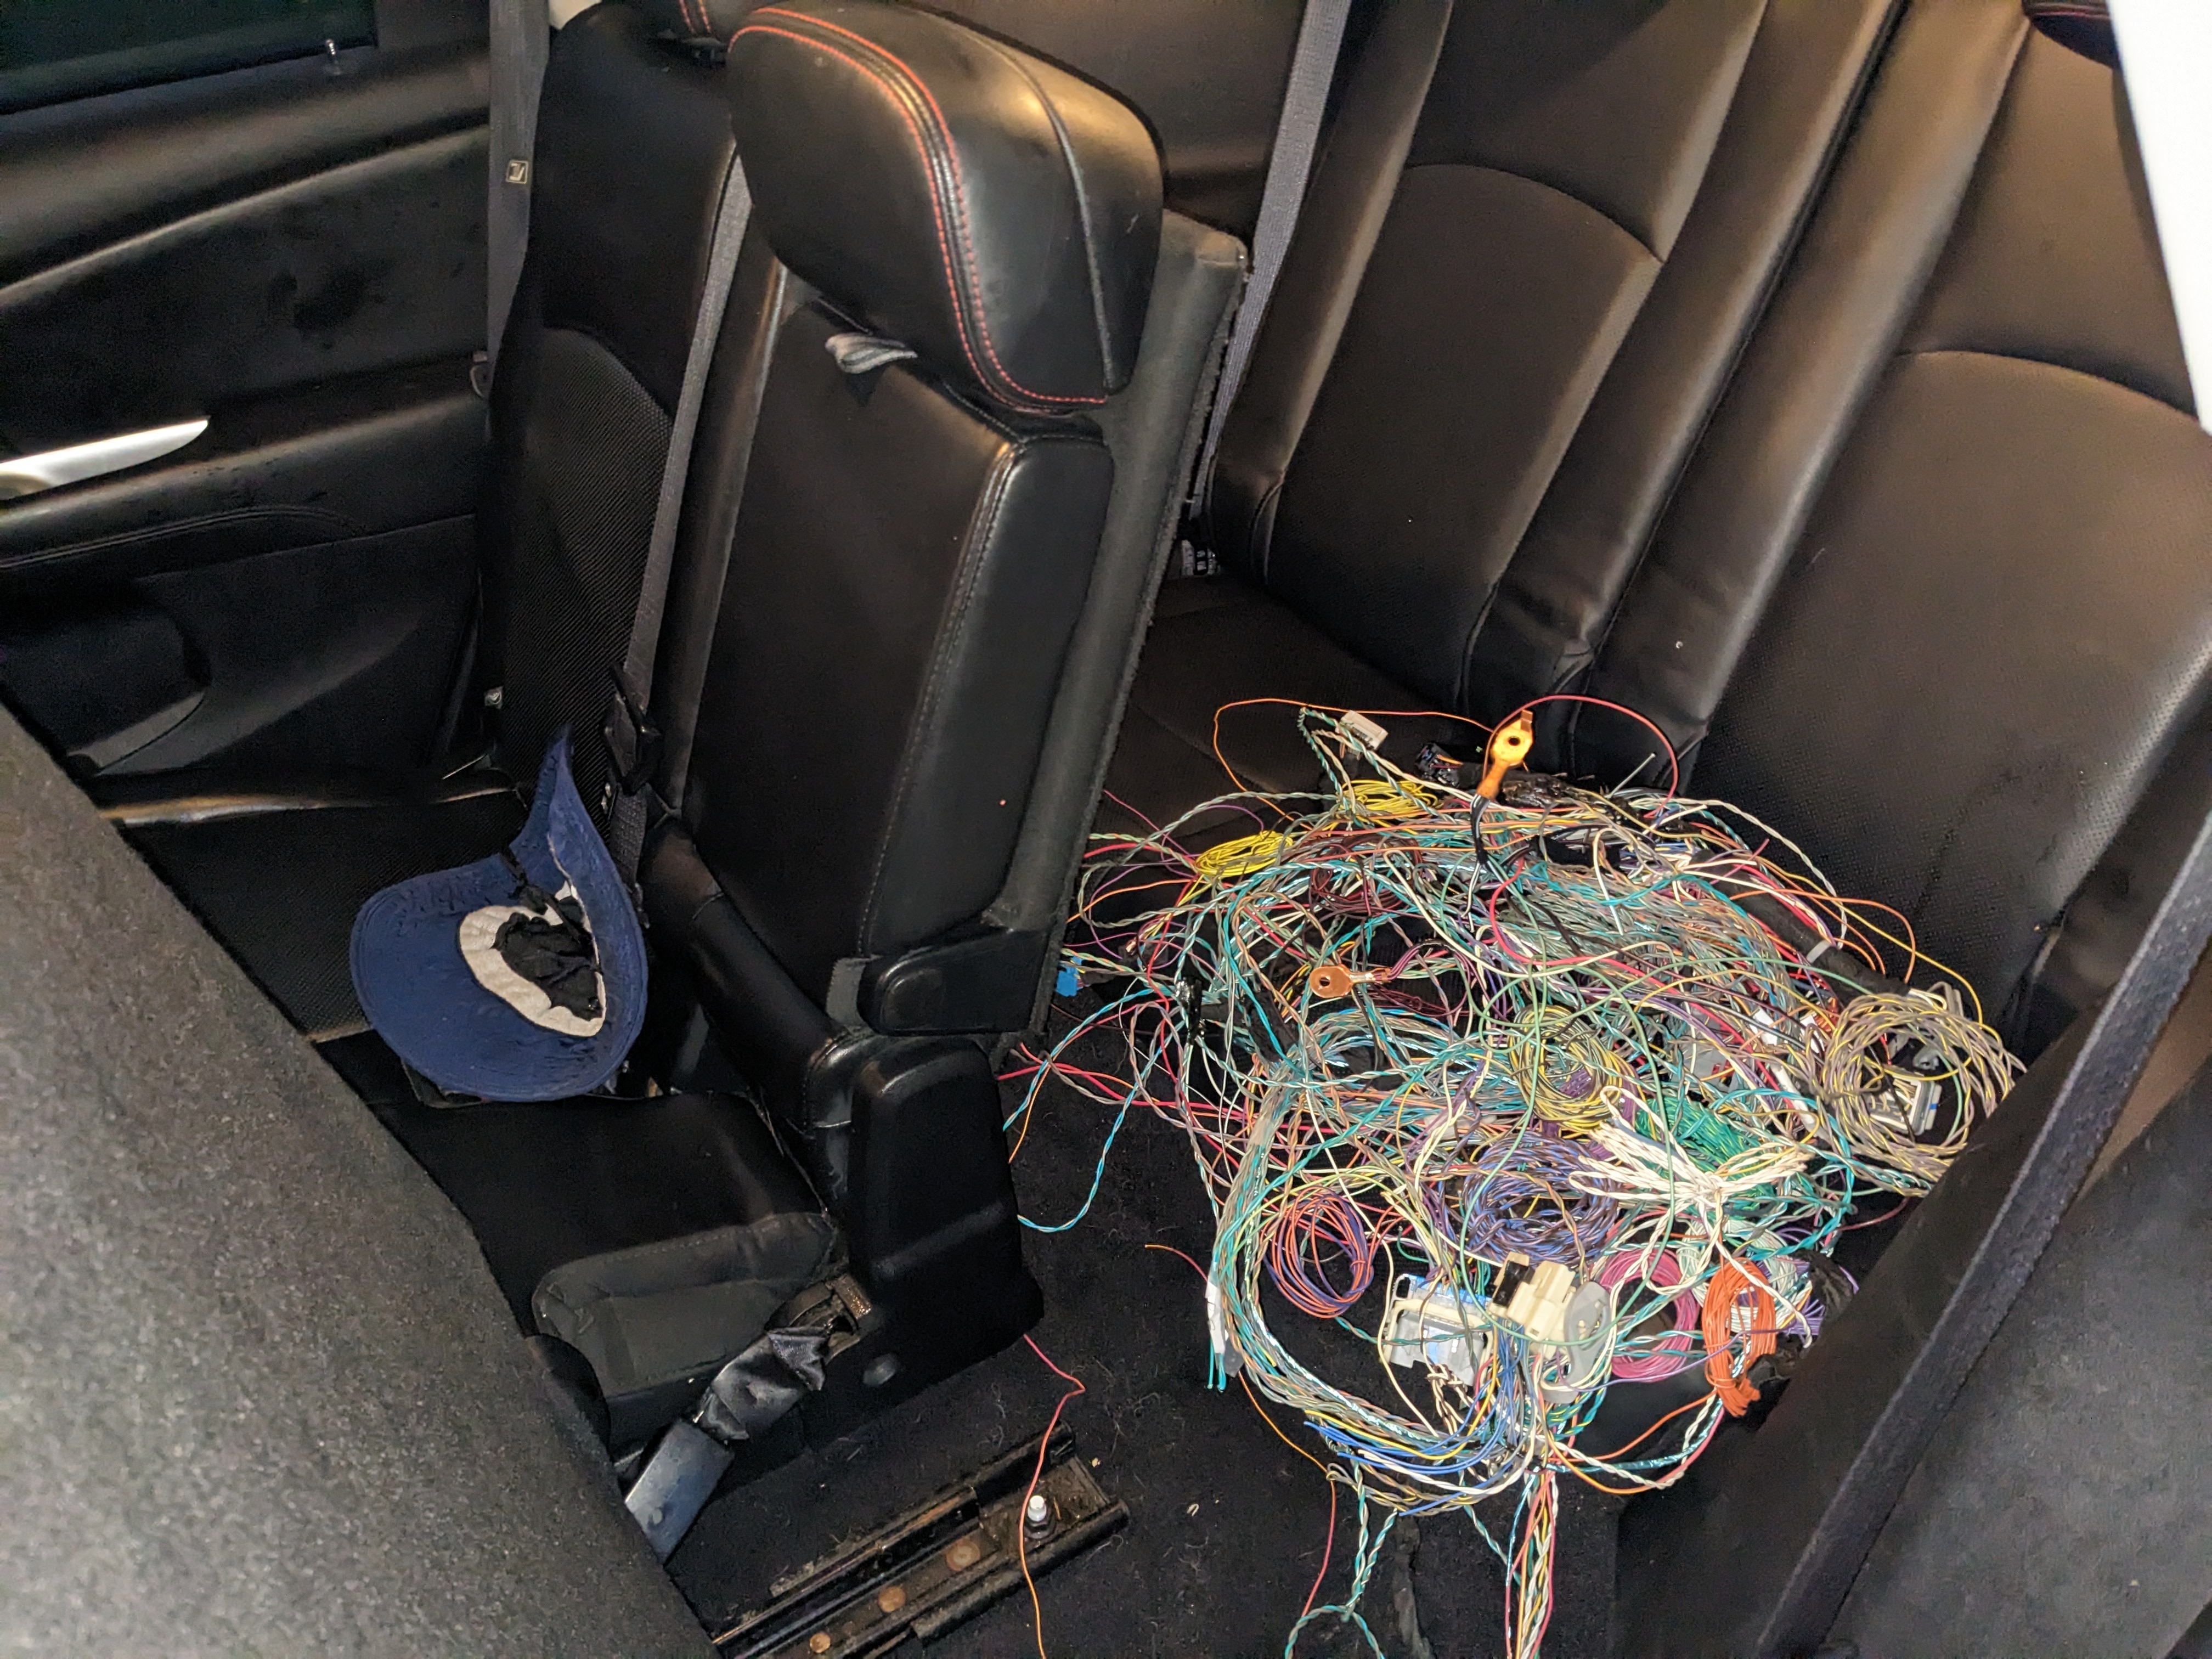
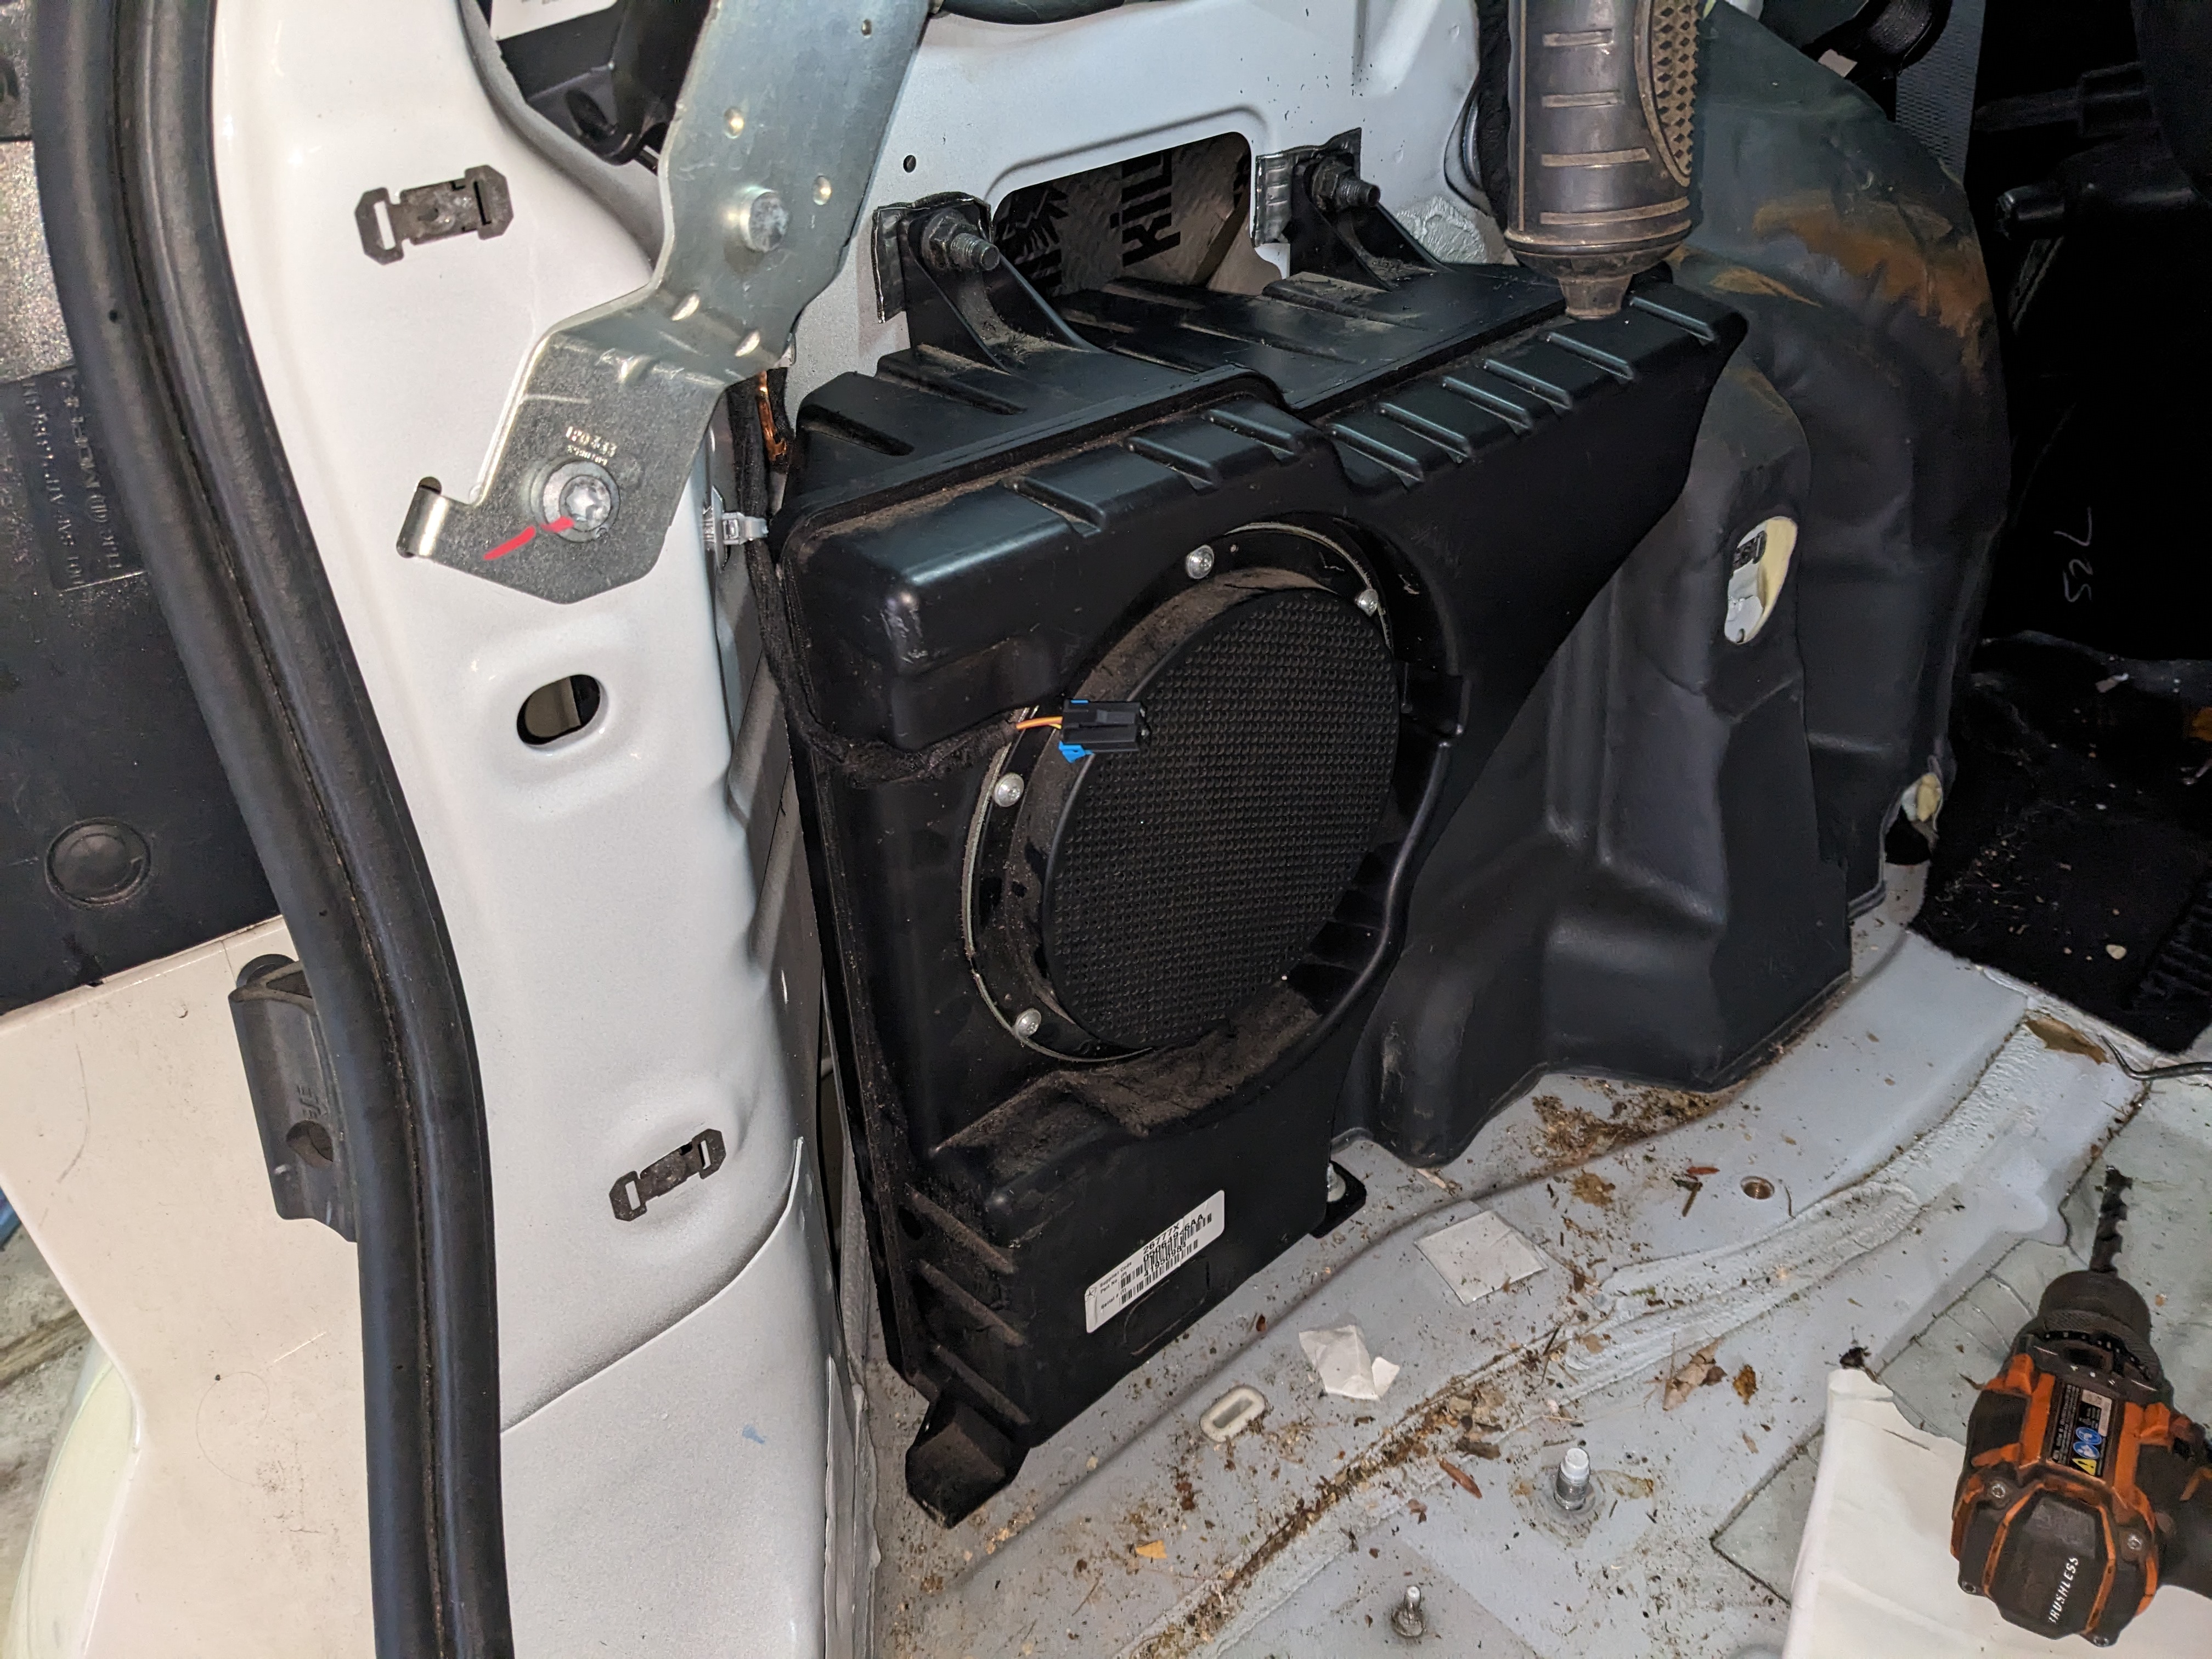
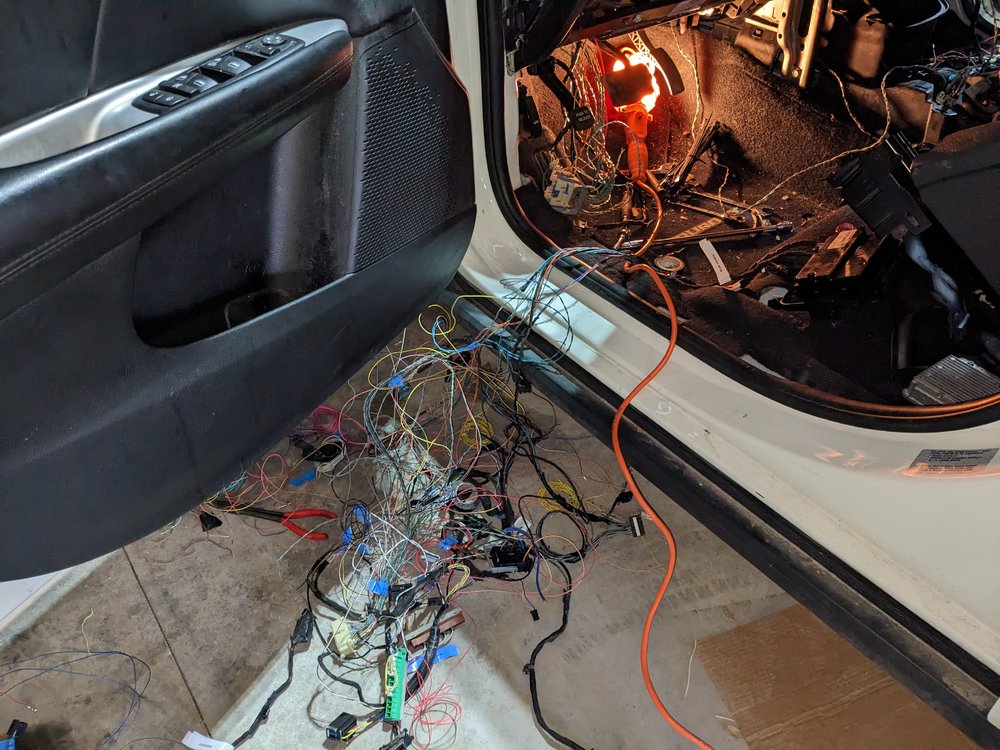
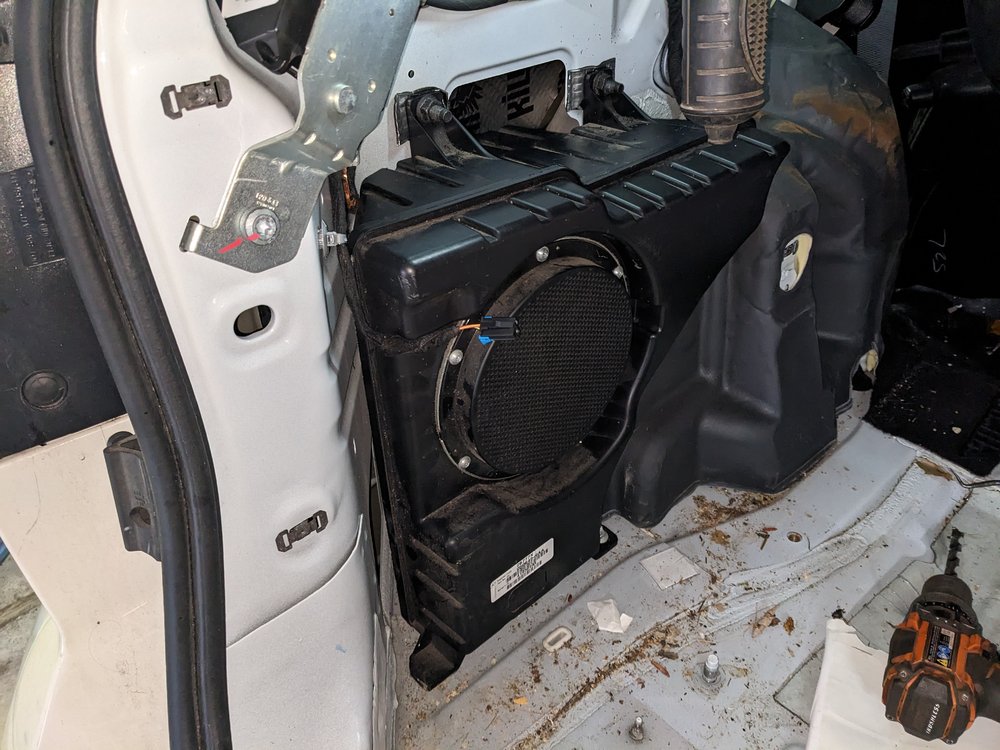
My fingers hurt like hell. Pulling from the car wasn't bad. It's pulling the clips and tape off the harness that sux. The wires are so tiny I don't feel comfortable just cutting the tape away. So I just pick at an end to get some tape loose and unwrap it. I have had a few back surgeries so I can only sit on the floor an hour or so at a time. My surgeon will be mad again if he finds out what I doing. I am no longer working and have to keep busy somehow. It's wet and cold here so this is a great winter project. I have rebuilt a few older vehicles. These wires the thickness of a human hair are a bear. Give me a test light and a pre obd car with 16 gauge wire and I am good. This can bus stuff can do a lot but really isn't meant for what I am trying to do. Modern cars are disposable. It's going to be rare to see modern cars on the road in 30 years. First pic is the rats nest before going back in. This is the stripped body harness and sub just before install. Second is sub after install. I used killmat behind sub and a small piece where the feet of the sub mount. Next time I pull the rear seats I will add noico and killmat under it. They both want warmer temps for better adhesion. The seat bottom is the only insulation back there. I imagine road noise will improve as well as interior sound.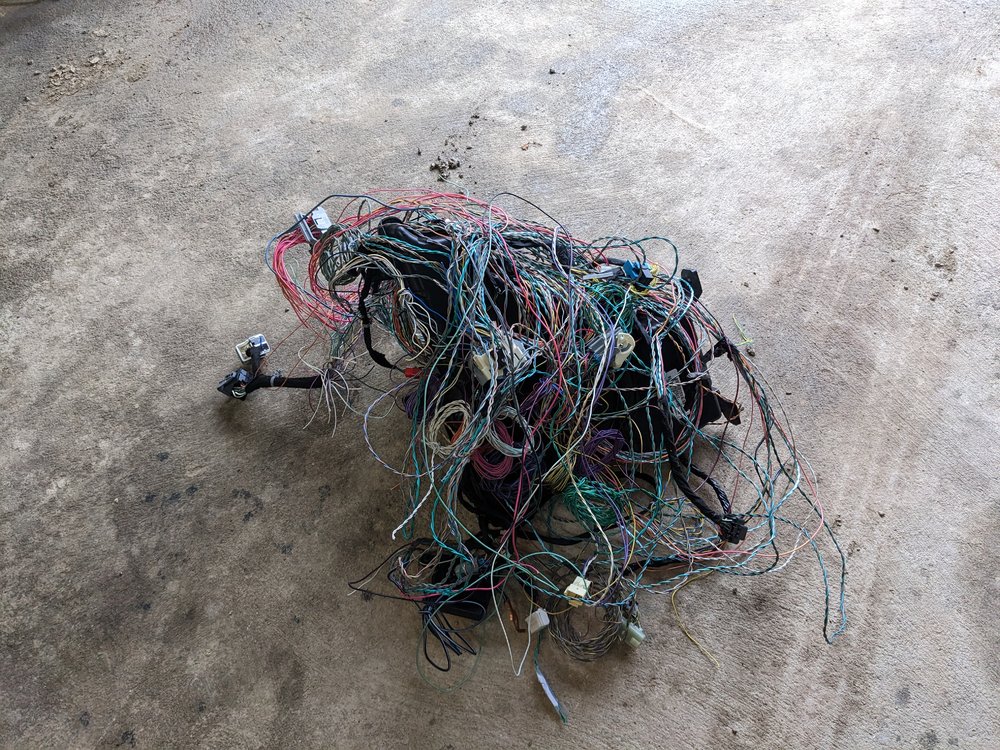
-
From base to loaded in _ _ simple steps!
Dodgems replied to Dodgems's topic in Accessories, Modifications
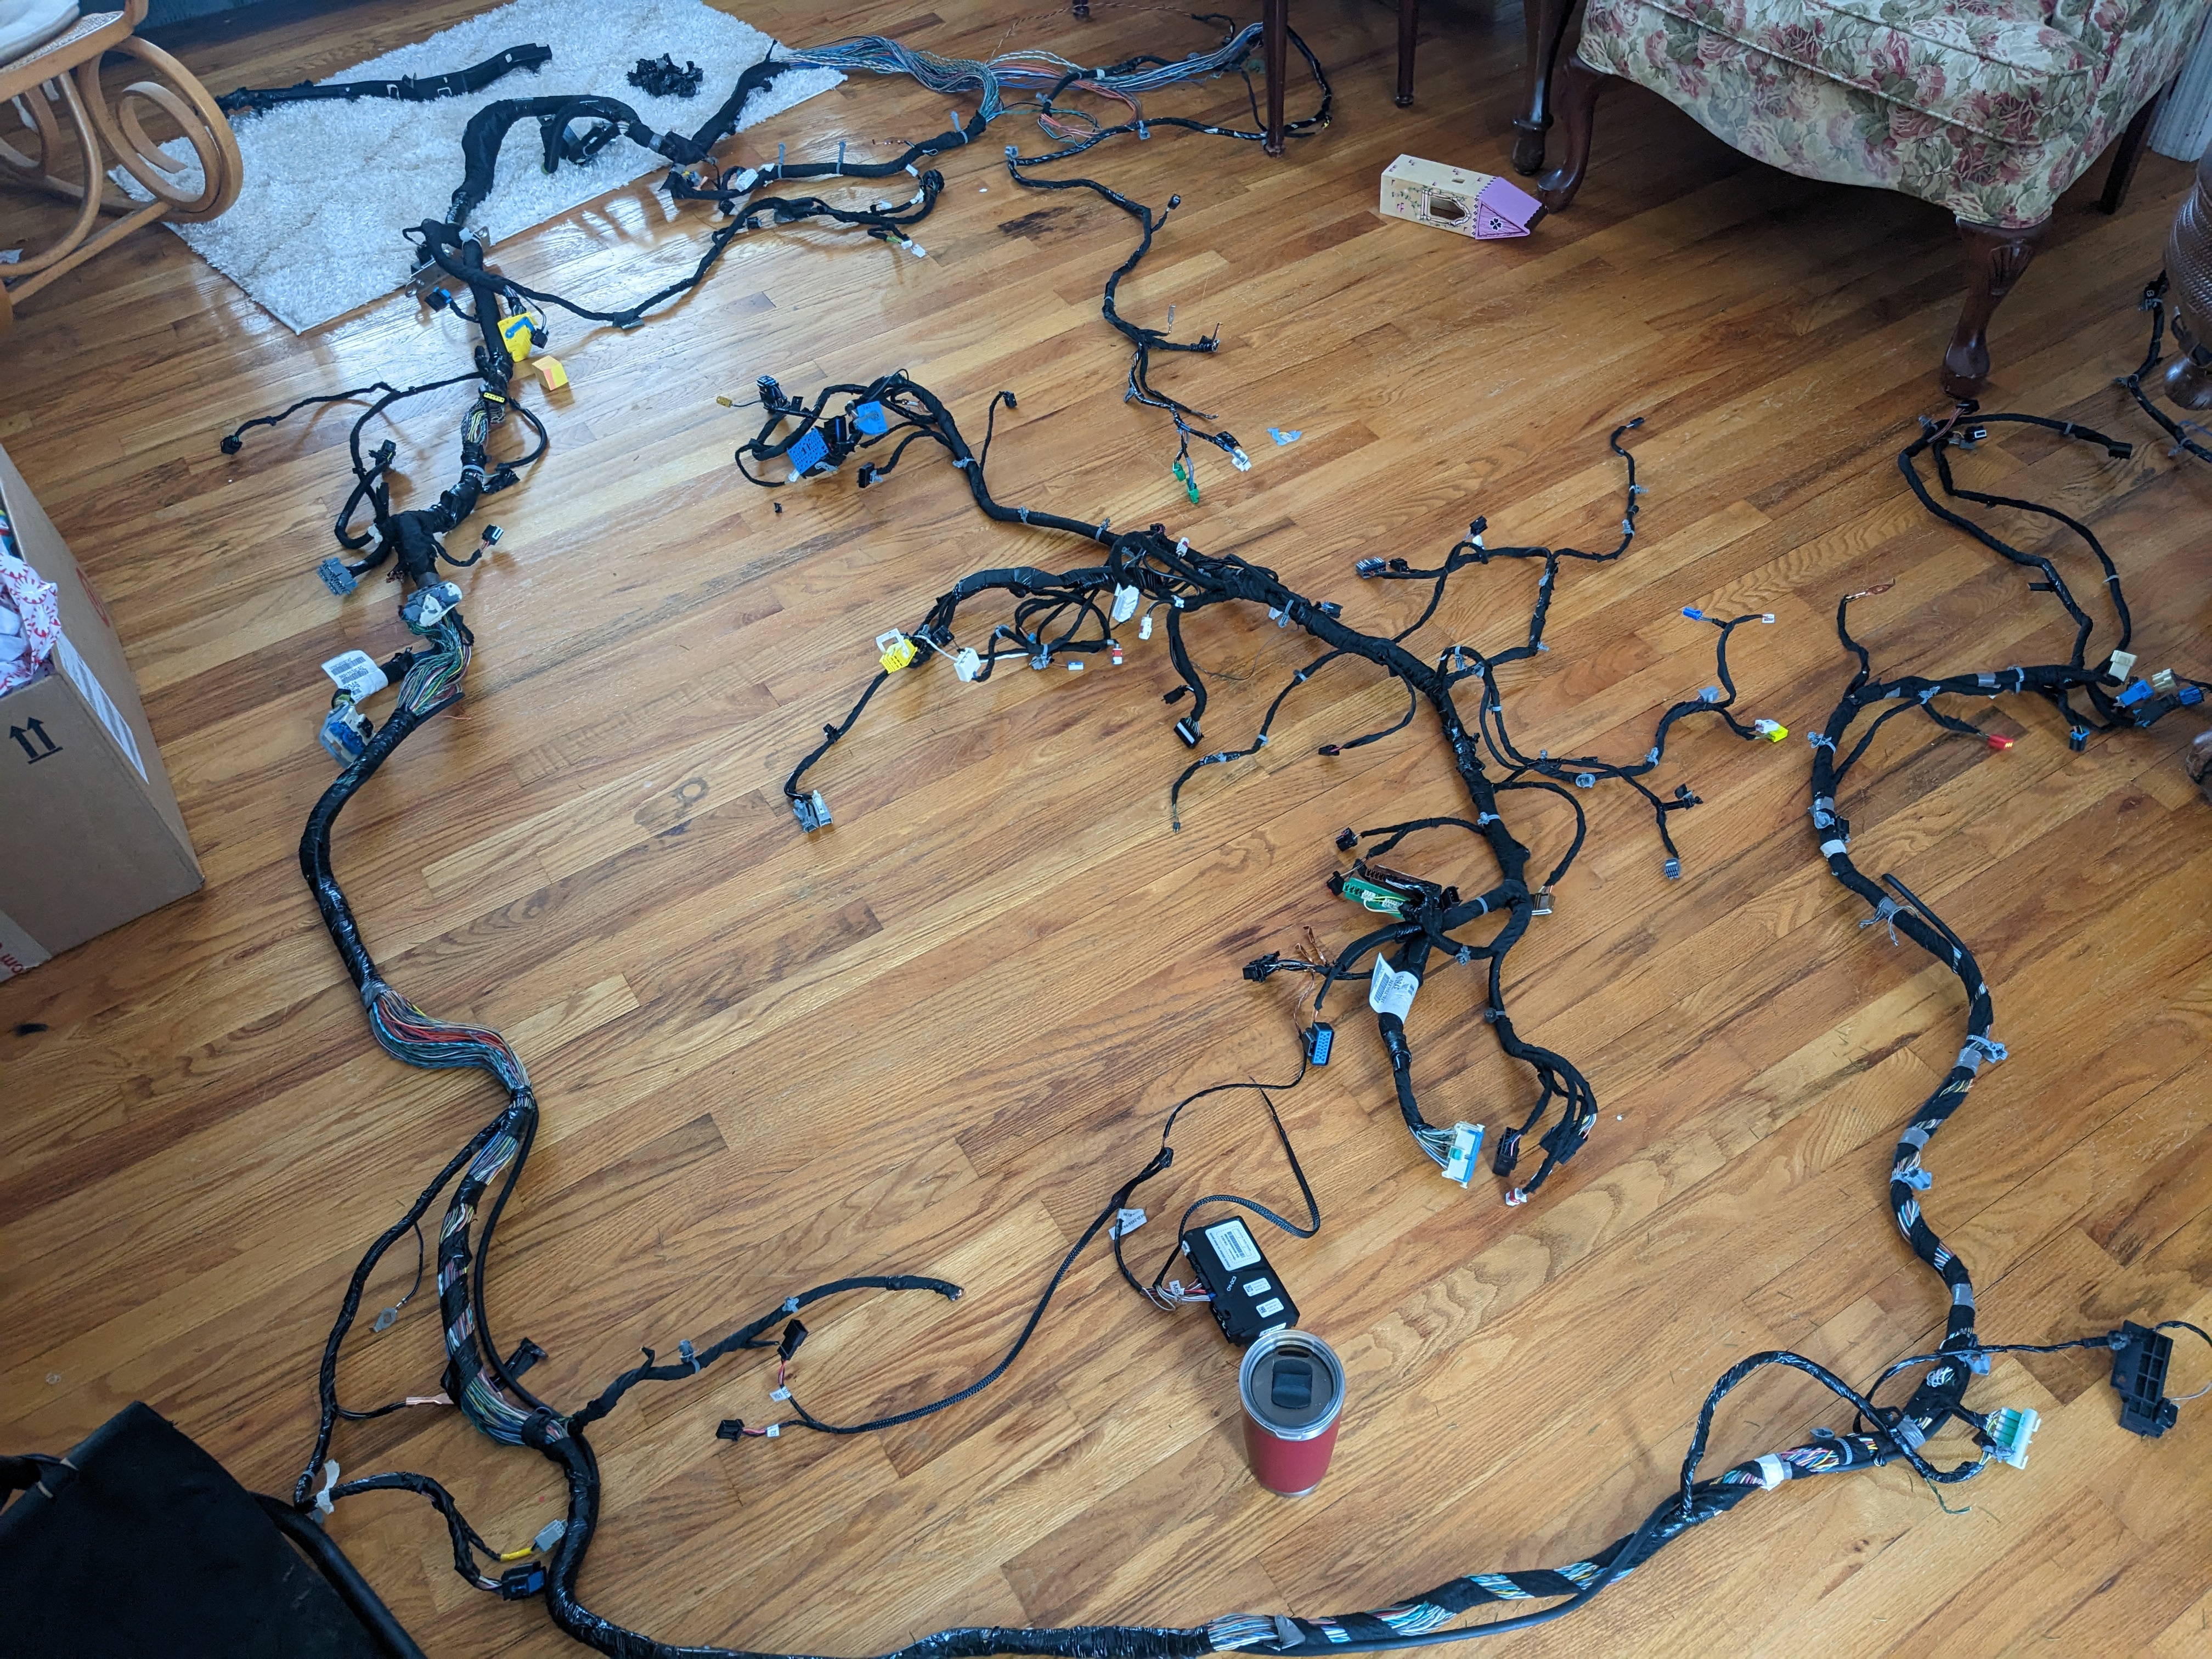
First pic is the body harness circling the dash harness. Second is the in progress culling. I had most of the interior electrical items. I plugged them all in and started cutting. Nevermind. Site will not let me do second pic due to upload limits. These two pics are 4 megs each. Will only let me do one. Mods... How do you prefer I do the pics. I belong to another car forum and we post larger pics so they can be zoomed in on as needed. If these pics are too big please let me know.
-
From base to loaded in _ _ simple steps!
Dodgems replied to Dodgems's topic in Accessories, Modifications
I guess I hit a 10 mb upload limit. I have some pics of the body harness before and after. I removed all the air bag, lighting and heater wiring. That was about half the body harness. I still have to get serious with the dash harness. Without a diagram it will be a little more difficult. I may break down and get one but that will a couple weeks. Seems Mopar is proud of the service manuals. I will remove one wire at a time from the bcm and fuse block connectors and merge the two dash harnesses. I hope to have just a handful of power connections and a few bcm connections. The body harness was easy in comparison. Since I have entire systems to add I think it's going to be problematic at times and will need some... well a lot of patience. The outcome will be a nicely equipped car to replace her old car. If it all works as planned. I had half a day today with her car and spent it installing what I could. I placed killmat behind the amp. I used seat bolts to bolt the top of the amp. If you remove one from a donor get the clips that hold the top bolts from the body. The stud was already present for the bottom mount on the sub. It took longer to feed the wires through the grommet between hatch and body than any thing else. I finally used a thin long flathead screwdriver and taped the wires. Then slowly pulled them one at a time. Baby powder would probably have helped but I didn't think of it till now. Maybe next time. I have all the rear seat work done. I will need to pull the front seats next session. run the body harness up next to the firewall and then down to the right b pillar to catch that door speaker harness. Then connect review camera. From there I will wire up what I can when I can. I added the SRT pages and really like the added gauges. They will be nice if a problem arises down the road. I changed the fog lights to stay on as well with brights. That has always annoyed me with modern cars. -
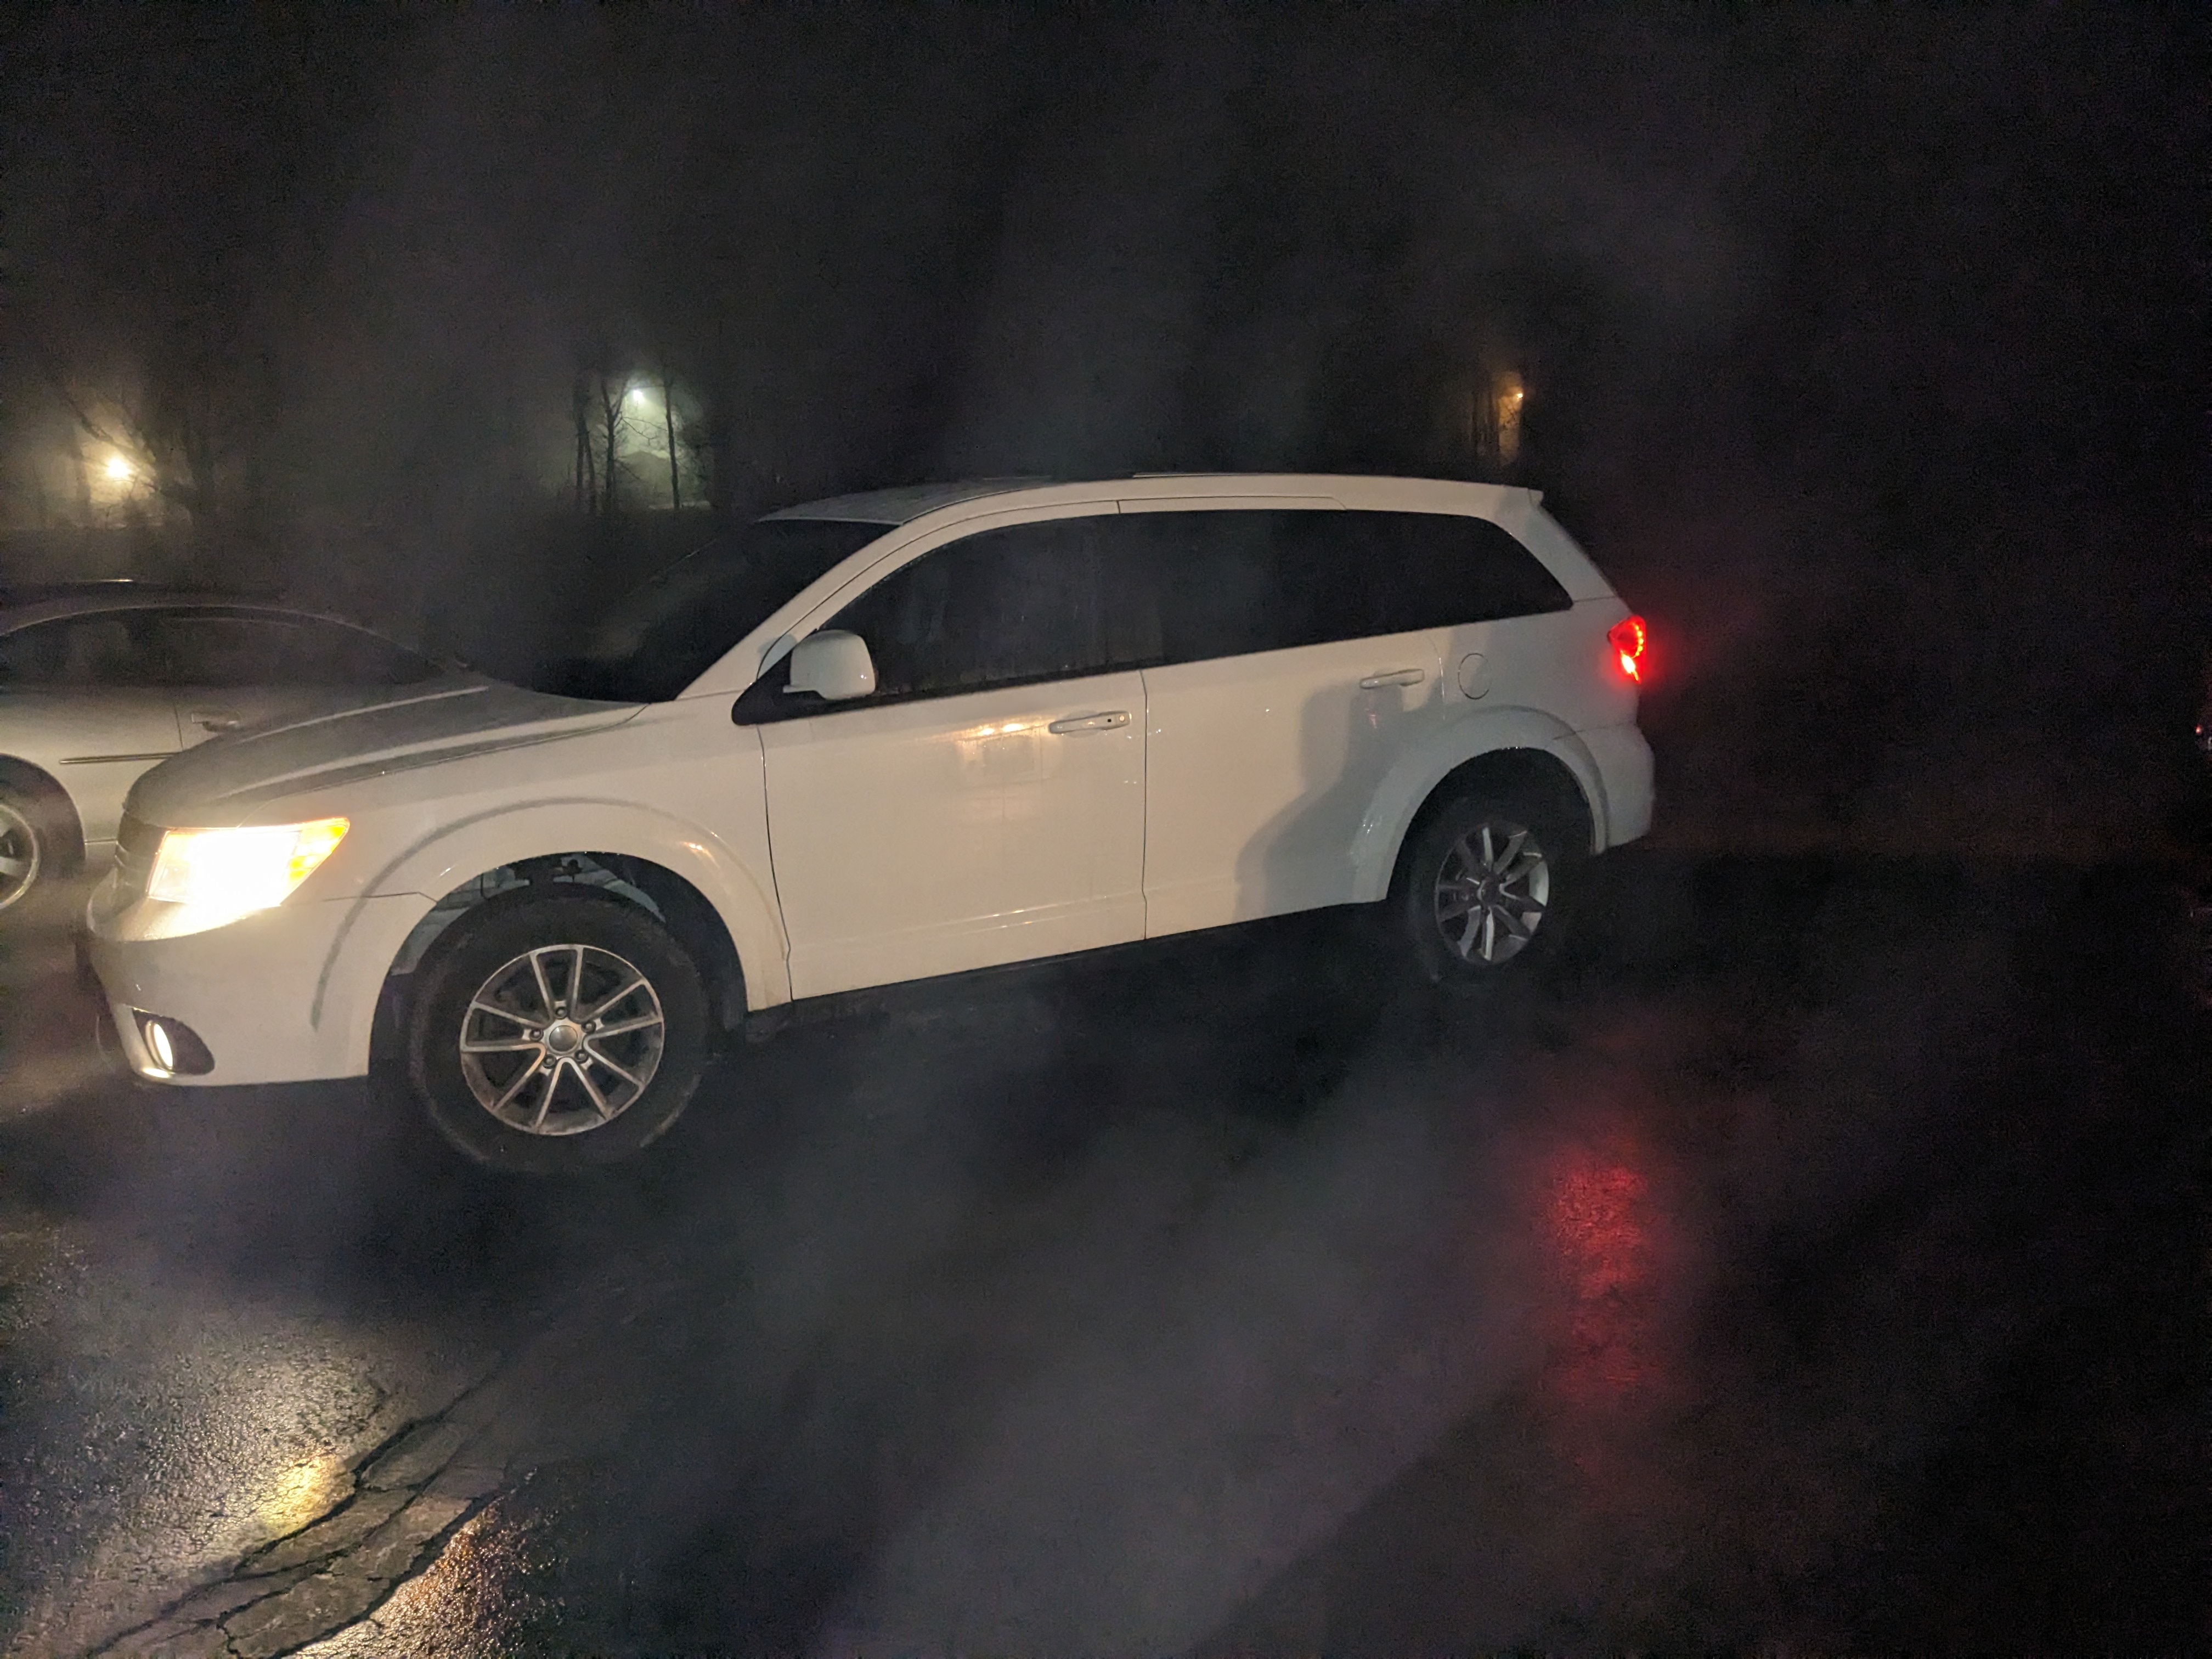
From base to loaded in _ _ simple steps!
Dodgems replied to Dodgems's topic in Accessories, Modifications
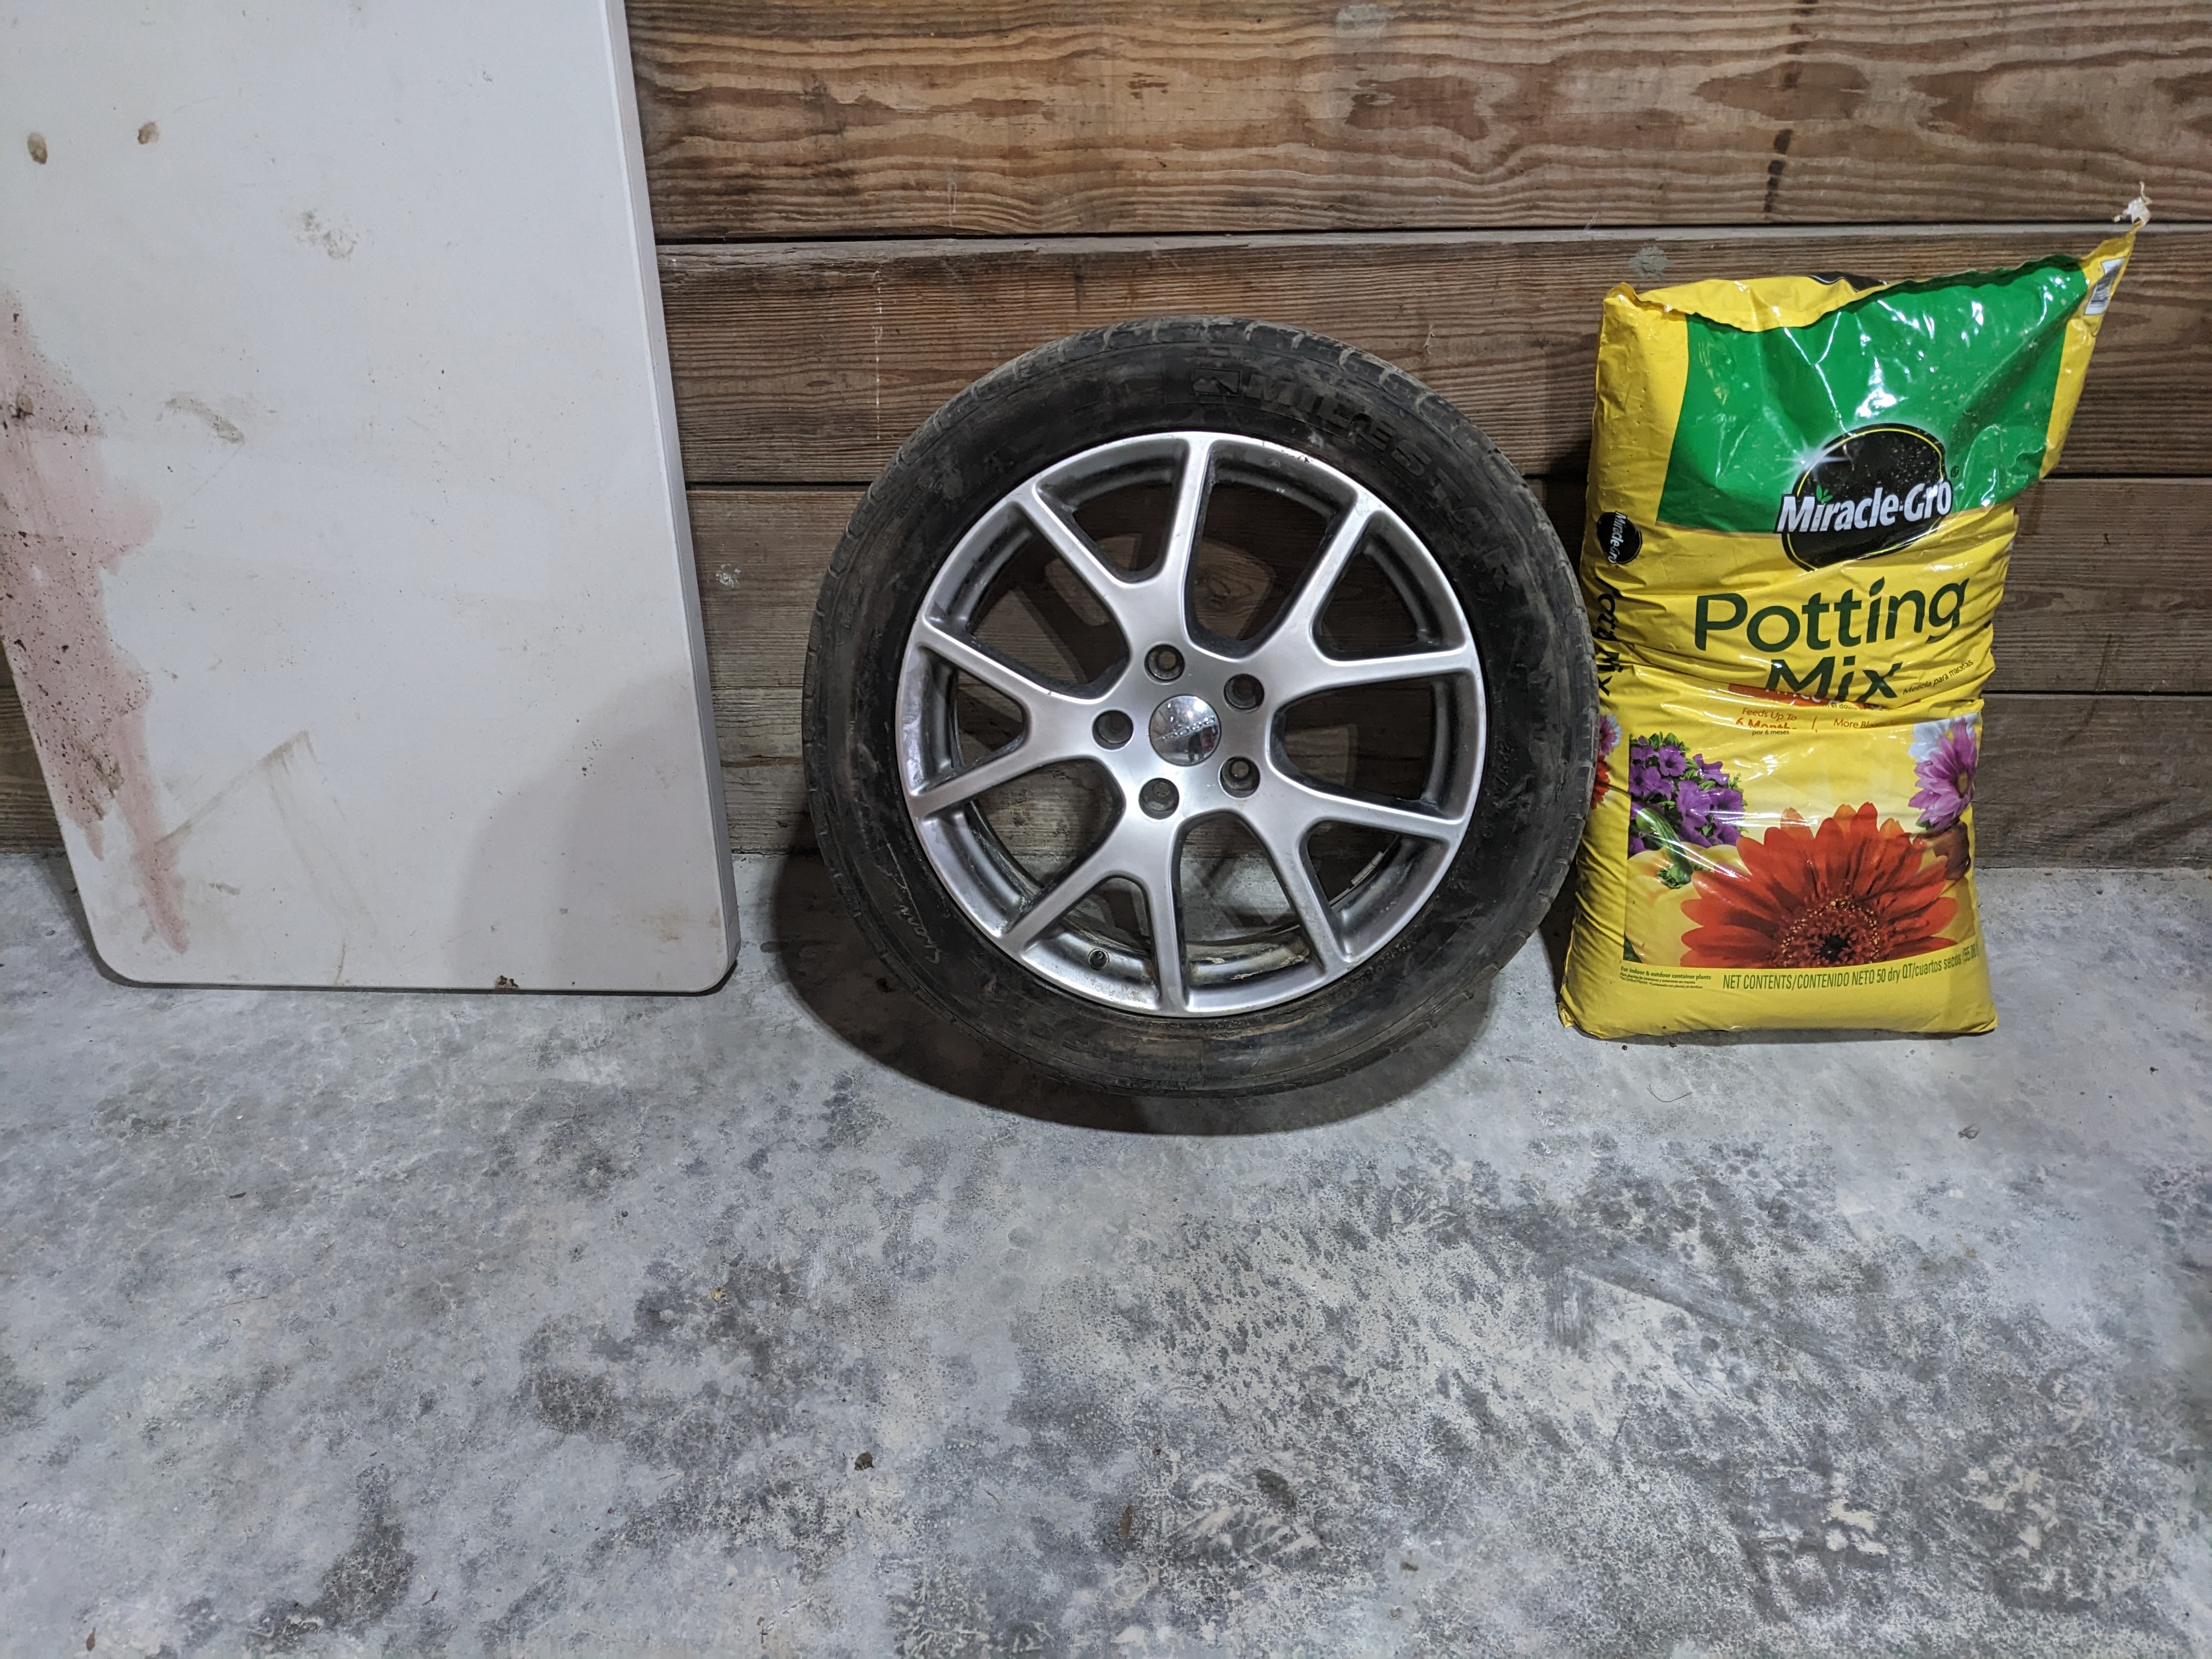
Here is the old and new display. The back seats and wheels I will be installing. I am waiting on new rubber for them.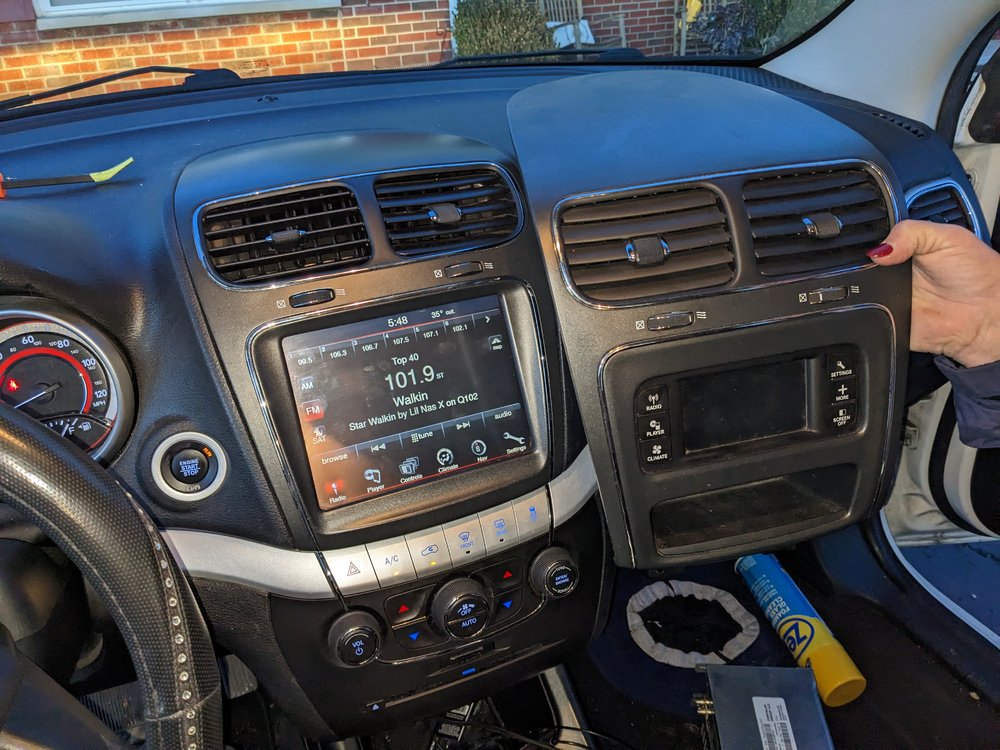

-
My wife totaled her 2012 Mazda 6 just before Christmas. It was loaded with sunroof, leather, bluetooth, backup cam and sensors. Nice car but had a lot of miles. 5 days before her crash I bought me a 14 Ram to replace my 94 Ram. The month prior I was buying parts for my Mustang II as well as getting Christmas stuff for the grandkids. Our car budget was shot. Insurance gave us a pittance for her car. A family member basically gave us a 2017 Journey SXT. It has 82k and well maintained. I know the history from new. Great condition overall. Needs tires and has a wiper washer issue. The bigger problem is it being a much larger vehicle to my wife. It is fairly basic. Cloth, 4" screen. No backup camera which is a must. The goal started out as just adding a factory like backup camera. I worked out a deal with a local junkyard and was able to get the 8.4 with trim panel and heater control for $100. I called back to get the backup camera and was told I can have the complete interior for another $50. As well as a set of 19" wheels. All from a crashed 2016 r/t. We grabbed my go bag of tools and high tailed it to the junkyard and stripped that interior. Here is where my wife will tell you she wishes I did not have a habit of making a minor project balloon into a major overhaul. I was adding the bigger screen to give her a backup cam. The junkyard basically giving me the interior changed that. I now have a heated leather interior. Everything down to and including the wiring harnesses. With sensors and modules attached. I even grabbed the TIPM and found the original window sticker. My new goal is to convert this car into a loaded model. I plan to correct the 22 degree issue by adding the complete auto temp control system. I will add the bluetooth system. Since I have it I will add the alpine system. The r/t came with remote start but has an aftermarket installed. I did not get the rf hub module so factory remote start is out. This thread will document my progress. This is her main transport and cannot be down any length of time. She works 10 to 12 hrs 6 days a week. I will have to do the project in small chunks. This prevents me from doing a complete harness change. I have culled a lot of the body wiring harness. I will overlay what I am adding and then tie it all into the existing harness. I installed the 8.4 first. It is plug and play. Takes about 20 minutes on a cold day being very careful with trim pieces. The old radio had sirius so no need to replace the antenna. Booting it up it has the cannot unlock maps issue. Otherwise it works as it should. I installed open maps and the nav mostly works. I had 2 maps on the usb drive but it only loaded one map. Northeast map loaded but midwest failed. We live in the midwest. I am now having reading usb issues. I will get back around to this problem at a later date but the nav mostly works. It cannot find every address locally but works well enough for now. I still get the cannot unlock maps prompt but pressing okay it works. I then installed the heated leather front seats. It is plug and play wiring wise. I have not checked but assume the fuse block comes with heated seat fuse even when not equipped as I did not touch the fuse block yet. I used Alfaobd to set up the heated seats. Let car sit for 30 minutes and they work like factory. The dash airbags deployed on the donor so I was concerned the seat air bags might be an issue but they work fine. No airbag lights. The heater activates when it's below 40 degrees on startup. Today I installed the sub, rear seats and rear backup camera. Changed out the rear cloth for the leather seats. I have the wiring harness run from the camera to behind drivers seat. I installed the side panel from the r/t which has the built in flashlight and sub opening. The backup sensor module is in the factory location. The wires to the sensors are cut where they penetrate the floor, I will eventually finish installing it after getting sensors and the wiring harness for them. I did not have access to the bottom of the donor car. I could not get the parking sensor parts outside the interior. I found 12v switched power in the connector that would carry the camera wiring. It is in the white connector at the c pillar. I re-pinned the connectors at the c pillar to match. The hardest part of today was feeding the wires through the rubber tube between hatch and body. I will keep this updated as I make progress. I hope to have everything working within a month. The only part I know I need is a clockspring for the heated wheel. The donor had melted wires at the airbag.
-
I just did the 4 to 8.4 conversion. It's fairly simple. Takes 20 minutes. Only special tool needed is a plastic pry tool to prevent marring of your trim pieces as well as torx bit set. I believe it was a t15 but may be t20 size. I was very lucky and made a deal for a totaled car. Check around local junkyards. I called or showed up to about 8 yards before finding one with a Journey they had not inventoried yet. Don't just call. Show up and ask. Yes alot of them are rude but if your able to bs a little you will have much better luck. They deal with cheapskate idiots all day. Be easy going but persistent and you may luck out. See if you can pull from the car yourself. I was able to get the radio, display, trim panel and hvac controls for $100. I then talked them into letting me strip the interior for $50. Heated seats, radio, wiring harness, rear camera, heated steering wheel and door panels. Entire interior. First thing is does your 4" have sirius? If so you have the correct antenna. If not you will need to swap in the correct antenna. You will need the radio, screen and trim panel. The auto heater controls are optional. It gives access to the sd card slot. That's all it does unless you get more items and complete the auto temp control install. The manual control has enough open space to install over the sd card slot if your never going to use it. If you get to pull parts grab the harness for the humidity sensor. it plugs in behind the left a pillar and runs up to mirror where the sensor is mounted. Grab the knee bolster panel or at least the temp sensor attached to it. Grab the hvac module. It's on passenger side behind glove box. Look up what it looks like before heading out. All these can be obtained with the torx bit set and patience. A pick or small flat head screw driver is nice to get connectors to disconnect. You may need a 10mm socket for hvac module. I cannot remember for sure. You will have the 22degree bug. It seems there can be different manifestations but the bottom line is the screen is useless for temp control. You will have to use the hvac control panel for temp changes. Otherwise it functions as normal. On ours I can adjust where air comes out. Change recirculating all from the screen. Only temp doesn't work right on the screen. It works fine from the hvac panel. You will need a 4 digit pin to unlock the radio. I went with a seller on ebay. He charged me $3. It took all of 5 minutes for him to get me the code. You only need the radio part number and serial numbers. I recommend getting the vin the radio came from but uconnect updates and obtaining the pin can be done with the radio part and serial numbers. There is no programming necessary for the swap. Still I highly recommend getting Alfaobd and the correct obd adapter. Do not buy the genie or whatever it's called. It does a fraction of what Aflaobd can do for a similar price.
-
The part number on both should be checked. I don't know them as I had a Journey to take from so it wasn't a concern for me. The original sticker was in the glove box so I knew from that I had the right radio. Check the uconnect thread. It should have part numbers. If you have the donor cars vin you can run it through uconnect or the chrysler vin decoder to tell you what it should be. Remember not all displays or units will fit a Journey. Some mount differently. My RB5 is P68283417AA. The aa at the end does not matter. aa indicates first iteration of that unit. If it has ab or ac ect that just means it's a newer version. The display is just that. A display. I do not think it contains any functions. From my understanding the 18 and up have android auto and more capability. As to them being installed oem or fitting a Journey I have no idea. The only swaps I have seen of them were in Rams. The prices I have seen are insane for those units. I would not say to never buy a 14 to 16 unit. The memory issue was only certain units. There is a fix for it. One of the radio repair companies has the repair listed for $250. If you have decent google fu and some patience you can get it working on your own. Our nav works but we get the error on startup. Click okay and it functions. Open Source Maps has maps formatted for garmin systems. Just have to be careful as I have not figured out how to delete maps. Pick the map you will most likely use. Do not play around with multiple maps. If you already own a garmin you can use true garmin maps. One thing I noticed yesterday was using the screen to adjust the temp caused it to go cold. It was the first sub 30 degree day since install. Moving the slider up or down the temp went down. I tested it last week when I installed it it was blowing hot air out the vents when slid to warmer. Using the heater control panel it still works as it should. I honestly believe with alfaobd, the harness for and the humidity sensor as well as cabin temp and sun sensor this thing should work. I did grab the hvac control unit and will install it once I have the other auto ac parts installed and changed sales codes to auto temp control. There is a charger thread where he replaced the hvac module and had the slider working. As an aside. The heated seats are really nice. The better half was very happy having a warm tushy. They plugged right in. Added codes to tipm and it works.
-
I am in the same boat you are. Wife had a smaller car with backup camera and sensors. Journey we now have has neither. She is terrified of hitting something or running over someone. Over the past couple weeks I picked up a 8.4 rb5 setup for our 17 Journey. The donor was a 16. It was plug and play. We had Sirius on the 4" so it was as simple as it can be. Takes 15 to 20 minutes to swap them out. No programming needed. I picked up the auto hvac controls but from what I have read the only thing it adds is access to the sd card slot. We have the 22degree bug but it's a non issue. You will need a pin. I purchased mine from an ebay seller for $3.00. Took all of 5 minutes. He even asked me to try the pin before paying him. I wrote the pin onto the radio for future reference. If you can try to avoid the 14 to 16 rb5. They have corrupted memory issues which cause a locked maps issues. Ours has it but I installed a new set of maps from open source maps and have it mostly working. I still get the error on startup but then it works. If you go this route only add one set of maps. I added midwest and northeast usa maps and it only loaded the northeast maps. I will get back around to it but it works well enough for the time being. I have not added the backup cam yet but have ordered one for $90 as well as pulled wiring harness and factory cam from the 16. I will try to get factory setup working. If that fails I will use the kit. You will need to program the vehicle for the cam to work. Dealer can do it but I would get Alfaobd and an adapter. If your handy it may be worthwhile to talk to a few junkyards and find one who will work with you. We sold them a totaled car and they hooked me up. $50 and I was able to get anything I wanted from the crashed Journey. I pulled the entire interior from the donor. I have heated leather seats installed and working now. Eventually I will add the bluetooth, remote start and alpine system as well.
-
I have read over multiple posts and only found the 1 thread where the guy could not get the dealer to program the auto climate. He is the only one I have found to have actually installed the parts for the the conversion. He did not mention alfaobd. I think his postings ended before alfa was a thing. We just picked up a 17 sxt with very few options. It was a family members who gave us a deal I couldn't pass up. The wife's old car was loaded. It was totaled. I had to arrange disposal of it. The junkyard I took it too has a 2016 r/t with front end damage. Dash air bags deployed. Floor buckled where the built in coolers are. Clock spring was damaged so I will need a new one of those. Otherwise interior is intact. I made a deal and have access to anything I want from the car. I already have the leather seats, rear view mirror, heated steering wheel and rb5 conversion. I have the 19" wheels and TIPM as well. In the next few days I will be removing the dash harness and all the bluetooth system as well as climate wiring and sensors. I may also grab the alpine system with rear sub and amp. The backup camera as well as remote start are on my list to remove as well. I emailed the Alfa developer and he indicated a used tipm is doable. Alfa can program a different vin to the tipm. With this in mind I will be using the 16 tipm as the 17 has wiper and washer issues which the dealer diagnosed as a tipm problem. The way this has panned out I am going to attempt a full conversion. Having the tipm should make programming easier. If I am successful it would indicate the only thing stopping the auto climate was the dealer. Shocking. I will not remove the harness from the 17 but will add the missing wiring and components. Similar to what the other poster did. It's going to be a few months to complete the conversion. I will need time to go through the harness and cannot take her car out of service except when she is on vacation. I will keep this thread updated as to what steps alfaobd made possible or could not accomplish. I tried to save a few bucks and bought a Vlink MX+ to use with alfa. It connects to my pc but will not connect to a pixel 5a. I tried my wife's 5a as well without success.
-
On my old Durango that's was caused by a bad clockspring. Have you noticed it happening when turning the steering wheel?
-
I was able to use the 10 digit code found in the about screen. Our Journey did not come with the rb5. I used the garmin express software and followed their upgrade steps. I was able to upgrade from ctp16 to ctp17.
-
Hi all. Due to a totaled Mazda 6 we needed a new car for the better half. We lucked into a great deal on a 2017 Journey sxt. My wifes Mazda 6 was loaded. The Journey is not. I have already picked up the 8.4 upgrade. It's installed but has the cannot load maps error. I am reprogramming it now using Open Source Maps combined with info I picked up here. Our local junk yard gave me a great deal on the radio parts and I am eyeing the leather seats and heated steering wheel as well. I have a few other project cars with build threads on another forum. I have driven Mopars since the 80's. First car was an Omni 024. I wanted to say thank you for the help so far and hoping I can contribute