

carritt11
-
Posts
107 -
Joined
-
Last visited
-
Days Won
5
Content Type
Profiles
Forums
Gallery
Posts posted by carritt11
-
-
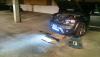
So I decided to order a 24" LED light bar to add a little more of a rugged look while giving me more light when actually out in the sticks trying to avoid deer. There are a couple ways it could be done. I know one member installed a 20" light bar behind the lower grille but I wanted it visible to add to the look. First think I did was remove the lower plastic engine guard from underneath the vehicle. For my Journey(2015 Crossroad) I had to remove several rivets from fender well, along bumper to the next fender well. Next I crawled underneath and noticed that the lower grille was held in by tabs so I grabbed one end with one hand and held the bumper in place with the other and started pulling the grille off from one side to the other. It was much easier than I had expected. One thing to note is that there is a small sensor attached to the lower grille, be sure to pull this off before removing the grille so you do not damage it.

After I had the grille removed I positioned the Light bar with assembled mounting brackets in place to see where I could mount to get the desired affect. I came up with 2 options. 1). Not too far above the opening is the metal bumper. If I were to attach there I would have needed to make my own brackets to bring the bar down low enough to be useful and it would also be back further than I wanted. 2) Attach to plastic portion of bumper by drilling holes to mount the brackets.
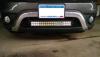
I did not want to take the time to design and fabricate special brackets to mount to the metal bumper so I chose option 2. What I originally wanted to do was drill the holes, place 1/4" thick metal strips along the top of the plastic portion to give it extra stability. After wedging the light bar into place where I wanted I realized that the upper part was not taking a lot of weight. The light fit into this space so well that it rests on the bottom portion as well. If i had replacement bolts long enough I would have used the metal strip idea for extra support. Being mounted only to the plastic proved to be a pretty solid fitment. The bar is not going anywhere.
After fixing the bar to the plastic bumper I then measured from the gaps on both sides and above the light bar to cut out a hole in the lower grill to form around the light bar. I cut 5" from each side and 1 3/4" from the top with my dremel. My grille was now an "n" shape. I redrilled a hole for the sensor to pop back on and then I re-installed the grille. It was a tight fight around the light bar. I could have taken another 1/4" off of the top for an easier re-assembly but it popped back on with a little force.
As for the wiring, I ran the wires along the side of the grille keeping them away from the radiator. I fished them round the headlight along the fender well and connected to the battery post and grounded to a bold attached to the body. I ran a switch through a rubber gasket by making a hole in it and pulled through under the steering wheel. Right now I just have double sided tape holding the switch in place. When I find where the mounting bracket went for the switch I will attach it.
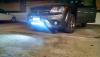
Overall I am very happy with how it turned out.
-
Just do a search for LED lightbars on eBay. There are tons to choose from. Let us know how it turns out.
Actually I've been wanting to do this same mod, but with the light bar exposed in the lower grill area.
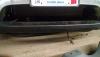
Here you go. 24" LED light bar mounted in grille
-
Removed lower grille with bumper still attached
-
Hi,
I just want to ask how to remove front lower grille only? I already search this forum but there's no step by step instructions or is it just needed to pull out or something or I really need to take out the whole bumper. I do the research here and with google. so please dont tell me to search the forum, if there's one maybe I just missed it.
Thanks!!!
You do NOT need to remove the entire bumper. I have a 2015 crossroad but I imagine it's similar. All I did was remove the the plastic guard located under the bumper that's also attached to the fenders. Not sure what the actual name is. After that is removed I layed on the ground and reached behind the lower grille and pulled on one end and worked my way over. It was much easier than I expected. It's only held in by tabs
-
I have a 2015 crossroad AWD and it's great we love it. I have the V6, was a necessity for us. If you don't plan on using it for towing or hauling passengers much then the 4 cylinder may be all you need but then again if you aren't using it for towing or hauling passengers then you may not really need a vehicle like the journey, maybe if it's for commuting then the dart would be a good option. I get 24-26 average mpg. I commute within the twin cities and for the on ramps for the highways and freeways I'm glad I have the V6 to get up to speed quickly in the short distances. I'm positive it would be a little sluggish when I do haul 6 other people too.
-
-
-
Do you have relays for them both? If not you will need them. I had my high beams set up as HID but I lost the DRL feature and with THE HIDs I've done in the past for previous vehicles I've never needed to use the high beams so I took them out and put them in my fiancee's car.
-
Good electrical tape will hold until you peal it off. I've used it on past vehicles where I didn't have a good place to fasten. These have only been on a few weeks
-
I was able to install without removing the fuse box. There is a wire harness connector just to the front of the fuse box that is attached by rivets that can be pulled out to make the bend a little easier. For the ballasts I snuck them into a hollow spot in the fender well and taped them down, keeps them out of the way of anything.
-
There are none for the journey. There are multiple threads on here about what others have done. I used the K&N from my 2011 avenger and it bolts on the engine exactly the same, just a little lower in the engine cavity. I have pictures in my gallery you can check out
-
I used plastidip on the Avenger I had before the journey. I hated the look of the smoke so I used the standard black and only did a few light coats. Just enough to where you could still see a little red from the housing. Then I finished off with glossifier to give it a solid coat. It still let the light through like it wasn't there, it was just a more defined circle now. I tried using a vinyl tiny but couldn't get it to mild correctly around the odd curves the avenger had. On my journey I used the smoked vinyl on the third brake light and reflectors and they look pretty good. I have pictures in my gallery of the vinyl tint on the journey but I couldn't find any pictures of my avenger that showed the tail lights.
-
Well unlike Dee we love our journey. We don't have kids yet but we do have 2 dogs and at times a third that traveled with us. We bought a large soft crate to fit them all that fills the entire third row and still have plenty of room for all our baggage and more. The V6 has plenty of power for the size of the vehicle, if you don't have a lead foot like me you can have a very smooth take off. Gas mileage wasn't a major concern for me. I would have kept my Avenger if that mattered, it had the same V6 as my journey and was a lot of fun to drive. The journey is really just a larger body on the same frame. We opted for the third row and for the average adult there is plenty of room in the third row. As long as the people in the middle don't feel the need to be slid all the way back they can be comfortable back there. The AWD is a must here in Minnasnowta. We only got to test it or once since we bought it at the end of winter but it was great having 4 wheel drive again, handled very well in 6" of snow. We have put almost 5k miles on since February and no problems yet, only had to go to the dealer to get the towing wiring harness flashed after I installed myself. The only thing that bothers me is that they put LED task lights in the cabin but in the lift gate they have the yellow incandescent light bulbs. I've been looking for a good LED to replace the with. All in all its a great vehicle, insurance was maybe $15 more than my Avenger but my Avenger was a 2011 FWD.
-
Definetly keep us posted on how this works out. I have a 2014 and Want to put an intake on it. Can't find anything that works. K&N or other. People tell me other vehicle brands may work but I haven't seen any proof on here that it will work with a 2014.
Check my gallery, I have a K&N that I took off of my Avenger that fits nicely
-
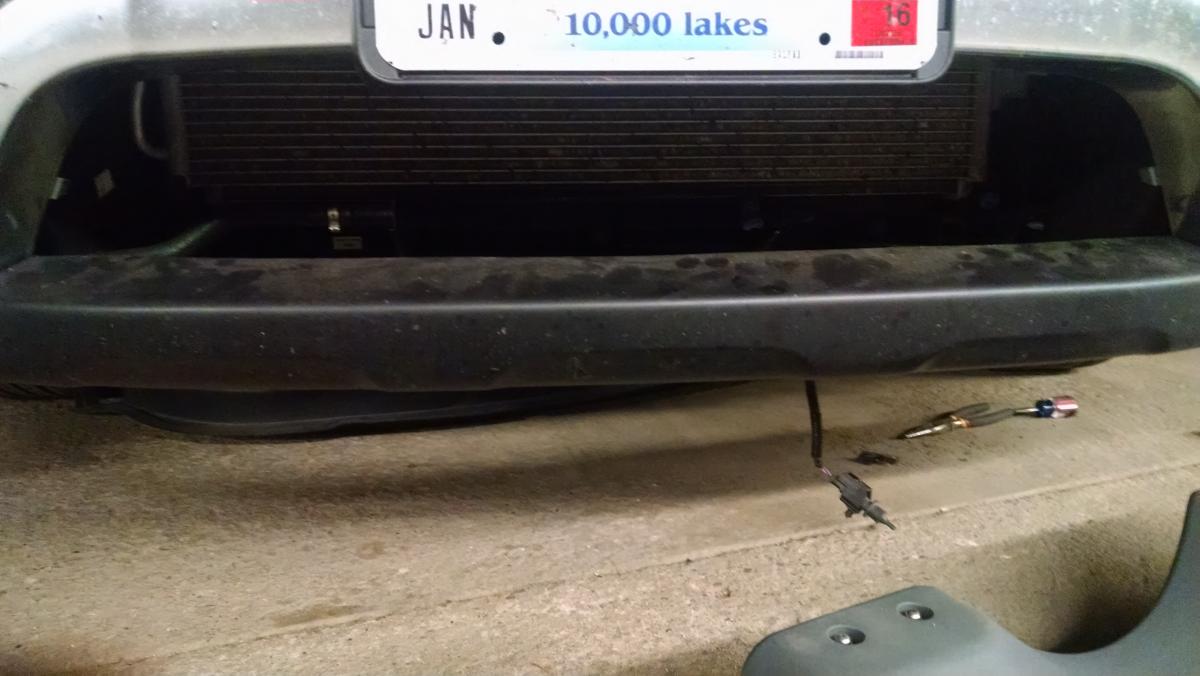
I just got my '15 crossroad flashed today. For some reason it took 2 hours to do the harness, partly because the service rep didn't tell the tech that all that he needed to do was a restoration because the sales codes were already installed (poor communication), and they also had an update to my navigation that was covered under warranty. I installed a Class III Curt receiver (#13201) ($123 online)and also OEM wiring harness 68080977AC ($70 online) . The receiver took maybe 45-60 minutes to install, figuring out how to get the rubber gaskets off the exhaust mounts took the longest but once I got them off it took maybe a half hour to install the actual hitch myself. The wiring harness really only took 10 minutes to install. I laid on the floor and reached behind the bumper, disconnected the cap, plugged in the connector popped the attached rivets into the holes and zip tied the rest to the hitch bar for extra security and I was done. At the dealer they tried to charge me $137 for the flash. I asked how it cost so much since the flash should really be done at the factory and said this should be covered under warranty. The guy came back after talking with his manager and I got to leave without paying a thing. I think I made out pretty good overall other than spending 2.5 hours of my morning at the dealership.
-
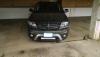
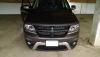
I have a 2015, I removed the emblem to see what it would look like. It really only took about 5 minutes to remove. If you loosen the grille by removing the black rivets on the top of the grill in the engine bay you can pull the grille forward enough to slide your arm down. The badge itself has 2 prongs that stick out the back. There are washer like parts that all you need to do is twist counterclockwise about half a turn and the badge will slide right off. If you plan to keep it off you could easily cut off the small molded plastic pieces to completely eliminate the brackets. I attached a picture with the badge removed but with the brackets still in place. From a distance you can't even see the little brackets.
-
I have a duel cone 12" Mtx that I'm trying to find a way to make work. I may be building my own box to fit behind the third row. I'd rather not try to sell then buy new if I don't have to
-
Hello all, my name is Nathan. Though I'm new to the Journey, I'm not be to dodge.Dodge runs deep in my family and we all love our dodge products. My first car was a '98 stratus, then '01 Dakota, '11 Avenger and now the '15 Journey. I've already taken my cold air intake from the avenger and installed it in my journey and am now looking for ways to install my sub to where I can still use the cargo space and 3rd row seating without much compromise. I'm no stranger to customizing my vehicles to make them more me even if it's only a subtle change to set it apart. I also have various experience with using Plasti-dip for custom accents.
If anyone has any advice on how they setup their aftermarket sub I'm looking for ideas. And if you have any questions for me feel free to ask and I will share my experience.
The picture is of my 11 Avenger and my new Journey when I took delivery.
-
Alright all, I'm a brand new 2015 journey owner. I had a 2011 avenger that I had the k&n intake on. I removed it from the car and put on the journey and it does work. The hoses connect the same and bottom bolts are the same the only difference is that the grille is higher on the journey so the last bolt does not connect. Between the 2 bottom bolts and the hoses, it isn't going anywhere.. Sounds awesome.


LED Off Road Light Bar Install
in Glass, Lighting, Mirrors, Sun Roofs & Wipers
Posted
I'll try to get pictures when I can. I tried to get a picture of the light cast compared to headlights in a darker are but my camera on my phone only picked up as far as the headlights. It couldn't focus past that.
The bar itself is nothing fancy. Just a cheap China bar I got off eBay for $50. I figured I wouldn't really use it too much so I didn't want to buy the really good ones. It's rated at 8400 lumens. It has epistar led chips.