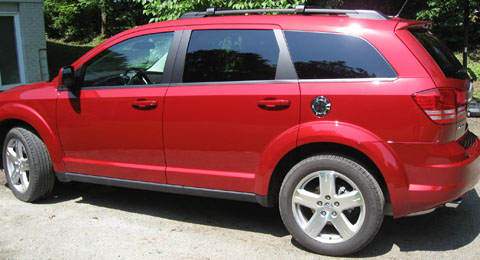
I have a new 2009 Dodge Journey SXT without the towing prep package but just about every other option. I wanted to share with you all my experiences and pictures of the MOPAR hitch 3500lbs (part# 82210403-AB) for this vehicle since I had a very difficult time in deciding which hitch to buy. First of all the Mopar is more expensive than any other aftermarket hitch. In Canada, it sells for $250, however, there is a $50 off coupon available to customers of MOPAR by calling 1.800.465.2001 and requesting the coupon, nicely. You will need your VIN. I received mine in 3 days. Thank you, Chrysler Canada!
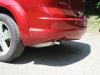
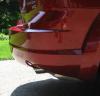
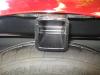
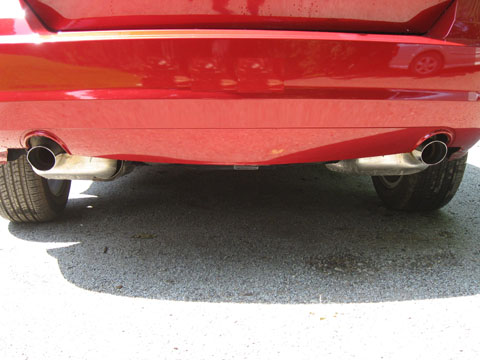
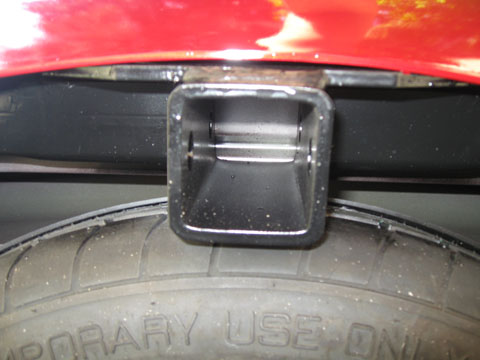
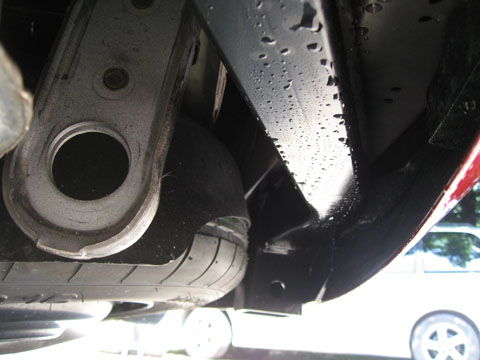
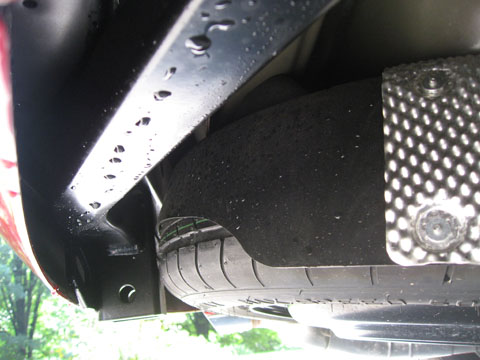
Basically, this hitch is a vertical 2" receiver, meaning the adapters have a 90* bend in them. I chose the MOPAR because all other aftermarket hitches for this vehicle just look awful. Sorry for those who have the Curt, Hidden Hitch, etc but they stick out or are much to visible beneath the fascia (plastic bumper). This hitch is completely hidden except for a small 1/4 piece which you can see from the photos. I did not cut the bumper, however it does have a very slight bump where it contacts the fascia. The hitch comes with a welded mounting plate for the 7-way round electrical connector. I planned only using a 4-way which will remain inside the vehicle when not towing. I carefully removed this mount with a grinder (use your safety glasses) and applied a primer and semi gloss Tremclad when finished. When reassembling the fascia to the Journey, there was no need to remove the entire centre styrofoam backing per the instructions. I only sliced away 3/4" with an Olfa knife. I completed this project in about 3 hours. I have road tested and no rattling or problems were found. My overall impression was that this is a very well made hitch and very precise with all the mounting bolts. The clearances were perfect.
The ball mount (MOPAR part#8220862-AB) is required since regular horizontal mounts will not work. It is well made and I would have no problem using it to tow my trailer.
I have an existing bike carrier which posed a problem because it's meant to be used with the horizontal receiver. I found an adapter(MOPAR part#82209615) from the 2" vertical to a 1 1/4" horizontal receiver. This part is not listed as a Journey part but it works.
I chose to go with the Reese T-connector 4-way wiring harness (part#118474). If for any other reason was that the MOPAR 7-way included opening the fuse box and manually adding the appropriate wires (no thanks!). I have used these T-connectors before and they are easy to install. The Journey required a direct battery connection.
Heads up on the removal of the fascia. There are 10 plastic rivets which must be removed. They are destroyed on removal. The MOPAR hitch only comes with 6 (see the install manual) so make sure you ask for 4 more from the dealer. These plastic rivets can't be installed with a normal rivet gun. A plastic rivet tool is required. I couldn't find one fast enough so I ended up replacing these rivets with the much more user friendly push type fastener, like those used to hold the tail light assembly to the vehicle, which can be removed and reused.
When removing the fascia, there is a 1/4" hex head screw(one on each side) which attaches the fascia to the adjacent panel. This is not shown in the installation instructions. Be gentle when removing the fascia. I always had cardboard underneath me to prevent scratches.
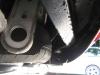
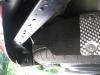
The actual metal bumper must be temporarily removed and the exhaust must be lowered. Removing the rubber hangers was probably the worst step of the entire installation. I used a long pry bar to work one side of the hanger off.
I am happy with the results. I hope this assists others either looking for pictures (which are very hard to find of the MOPAR hitch in detail) and with the installation.
----Update Feb 2012----
I can't believe it has been 2.5 years now since installing this hitch. I hope my write up has informed those who have read it. I am still happy with my decision these years later. The vertical hitch has been used plenty and has performed very well. I am also very happy with my decision to keep the hitch behind the fascia without cutting it. I still see others installing the exposed hitches which I find look horrible, especially with time the hitch will rust.
Earlier this year I was struck from behind while stopped. I strongly believe the presence of the hitch saved my Journey from extensive damage, without it, the other vehicle would have struck much weaker, designed to crumple with impact, sheet metal. The fascia had to be replaced but otherwise the hitch was unharmed. The other vehicle was heavily damaged and likely written off.
I will be upgrading to the 2012 Journey SXT this summer and will be installing a new hitch. Stay tuned.


 paoloparaguas reacted to a post in a topic:
Mopar Hitch Installation
paoloparaguas reacted to a post in a topic:
Mopar Hitch Installation