

Darkpaw
-
Posts
75 -
Joined
-
Last visited
-
Days Won
3
Content Type
Profiles
Forums
Gallery
Posts posted by Darkpaw
-
-
I don't really see where specifically on that site that it shows what the max size is that will fit on the rim, only tire size calculators (there are lots of those around).
wheel-size.com says that the rims are 19x7, but that doesn't seem right. Most tire size calculators also only seem to show the full width of the tire, but not the width of the edge, which would be the mount point on the rim (which is important, for pushing limits like this).
-
Right now I'm running 235/55R19s on my Blacktop 19" rims (same ones as R/T rims, but black). I'm at the point of replacing them, and want to go back to the stock size in front (because they're lighter), and run with 255/50R19 in the rear. I don't have AWD, so the different sizes isn't an issue.
The question is, will a 255/50 actually fit on the OEM rims? It's pretty wide. I know that I've seen posters on here running 245/55R19, but is anybody running 255s? Or have they tried it?
-
i have putco led fog light bulbs with HID head light bulbs mine look great no problems
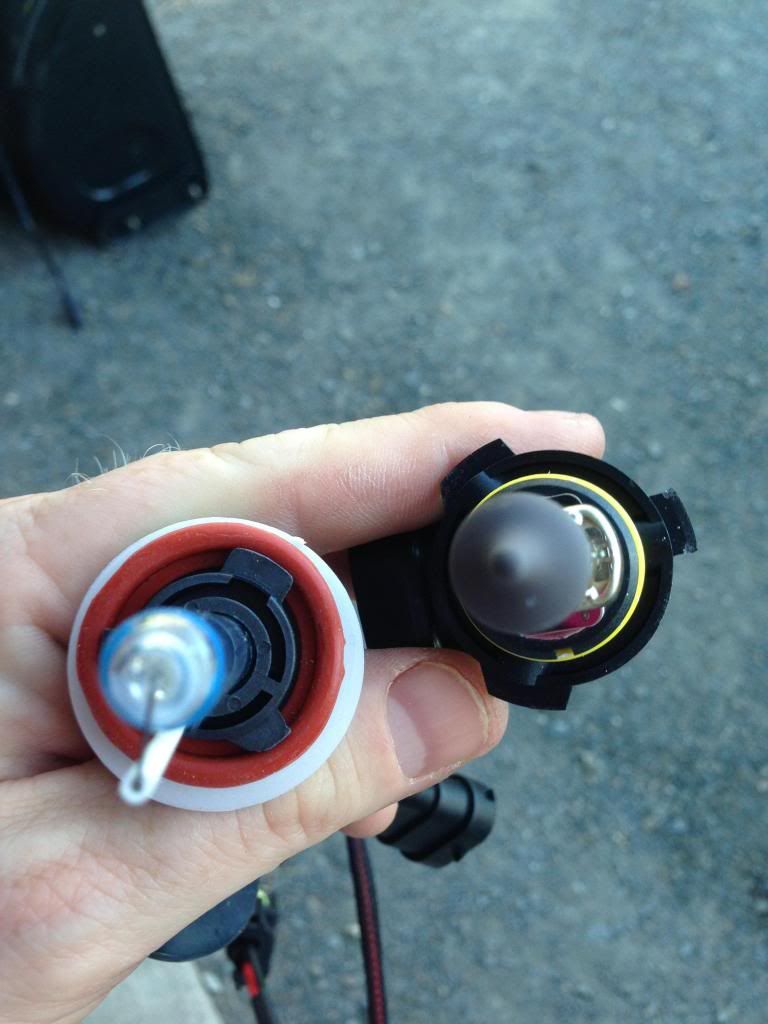
Did you put them in yourself? I ordered a set of H16, as I did some reading on some other forums and this seems to be the "correct" replacement for the Dodge fog bulbs, not 5202 (as seems to be quoted by every company I can find). I didn't get a chance to try these yet, but I will be doing it this week if the weather cooperates. A lot of the websites for bulbs quote many of these as interchangeable, but they're not. The keyed slots are in different spots, and they are VERY slightly different widths (probably in the 1/100s of an inch range) and you will break the housing or the bulb if you force them in.
If I find the exact match for this, I will post info on it.
This is taking a long time, but I will eventually figure it out. :P I need fog lighting (in AMBER) badly here, as we get fog in late summer so dense you can't see 50 feet in front of you. The stock lights aren't "fog" lights, they're driving lights, and worthless in dense fog.
P.S. - The HIDs I installed in my 9006 spots are a VAST improvement over the stock lighting. Who would have thought that blacking out the headlight casings (Blacktop edition) would cause a reduction in visible light? :P Oh, wait....
-
So it's been a while since I first ordered my HIDs. The original bulbs they sent me for the mains were H11 instead of 9006 (despite me selecting the correct ones). They quickly sent me the correct bulbs, which was great customer service. The 9006 work fine, and the ballasts are plug&play CANBUS (no errors, no flicker, they just work).
The fog lights have been another story completely....
So the 3000k bulbs were on back order for a while. I finally got them, and they don't fit. The number listed on the bulbs is a 5202, which is what the company insists it is for a factory bulb. The bulbs are "close", but the keyed slots for where they go in the housing are in the wrong spots. The side with two slotted keys has a slightly too close fitting, and the side with one slotted key is not even close to being in the right spot. I talked to the owner (Ivan, at absoluteHID) and he said to grind the keyed tabs off and try that, and that he'd still warranty the bulbs because he's the one that told me to do it. So four hours later on a Saturday morning, with a Dremel tool, a LOT of swearing, and totally lost patience, there is just no way these bulbs will fit. Even with the slotted keys ground completely off (the edges are now smooth) when putting it in, the little clips on the side don't seem to want to catch. So if I left it like this, the bulb will ultimately eventually vibrate its way out and cause all kinds of problems.
Has anyone successfully bought HID fog light bulbs for a Journey and had them fit...without modification? If so, who was the bulb manufacturer, and what is the correct model number? I wrote down the stock bulb number on the Philips that was in it, but don't have it handy (because I put them back in, when I couldn't get the HIDs to fit). I'm still waiting for word back now from absoluteHID as to what to do next, or if they'll refund it. But would love to hear a success story, the model number of the bulb, and where you found it.
-
So I finally got my HID bulbs installed (well, half of them -- more of that in another thread). It took me a long time to get back to this (well over a month), but I did some testing...
I got an ammeter that's good to 60 amps without a stint, so everything is connected directly inline. I got a 9006 extender cable, and cut the + line of the cable to put the meter inline with it. Then watched the meter (I actually have a small video of it, and may put it up later, for reference) while someone else turned on the lights.
The result...the instant the bulbs turn on, the power spikes to just over 15 amps (about 16 amps), then it falls to about 10 amps and stays there. So there is a spike, but it is well within the spec of an 18 AWG cable, so there is no safety or fire risk of installing the "plug and play" type of ballasts on your Journey. Mind you, my ballasts ran like $135 a pair and have a lifetime warranty, so maybe cheaper ballasts may have different results.
-
I just completed my HID install, and don't find any more scatter than the halogen bulbs had. With it about 10 feet from my garage door, the beam pattern was nearly identical, just brighter.
-
I got an email back from the company...they sent H11s by mistake, and are sending me a pair of 9006s now. They checked their email on a Sunday night. Talk about great customer service.

-
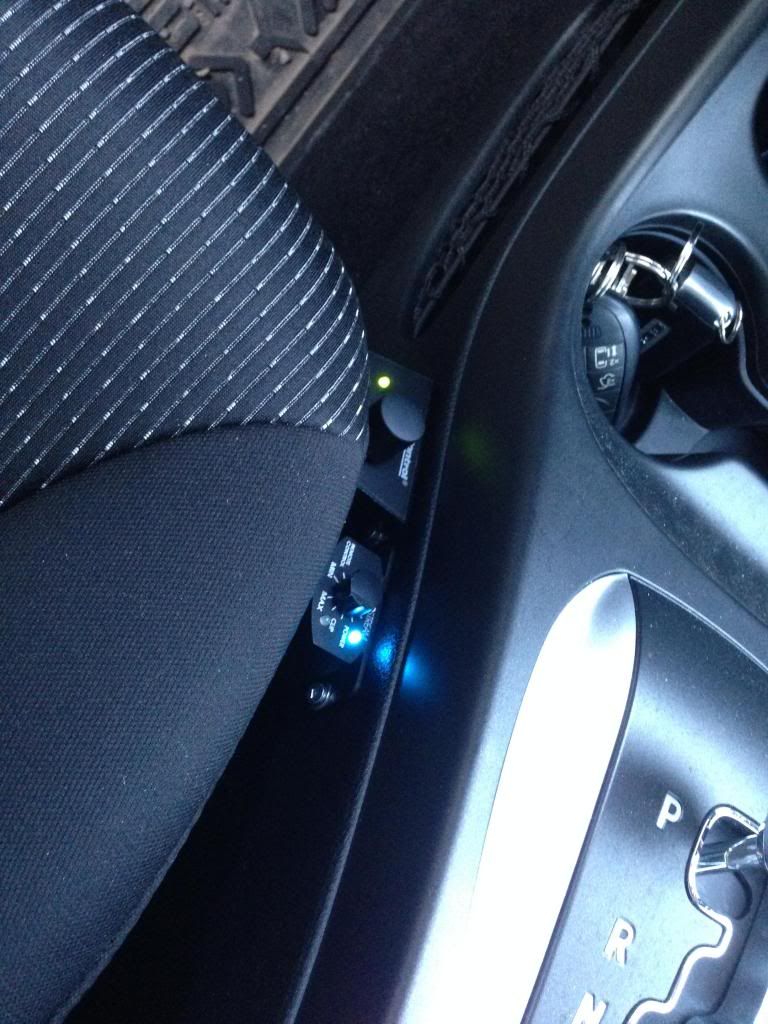
Here's the remote controls...forward (greed LED) one is the control for the doors/midbass, and rearward (blue LED) one is the control for the sub:
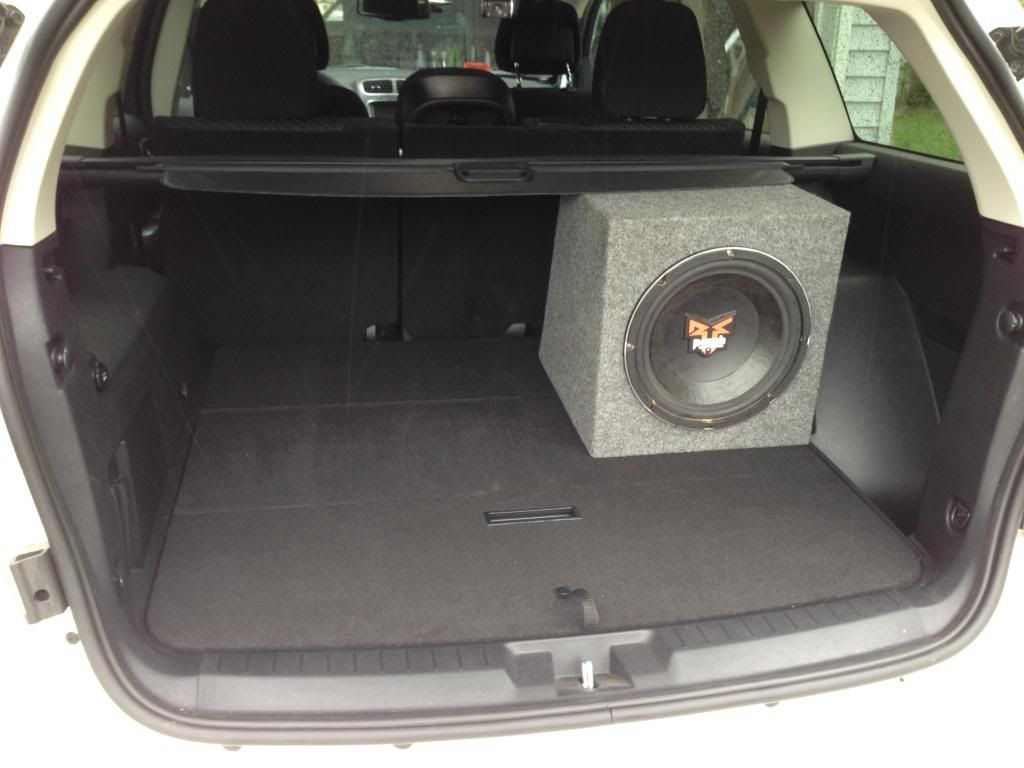
What the whole thing looks like when it's covered up, and only the sub showing:
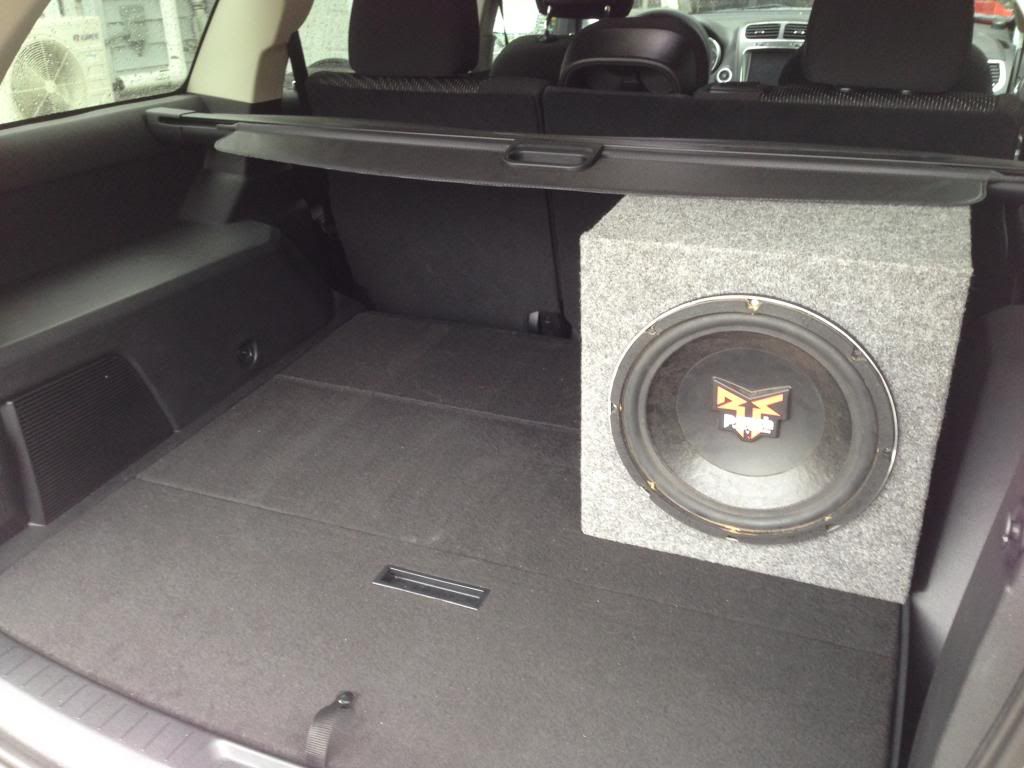
The other angle of this:
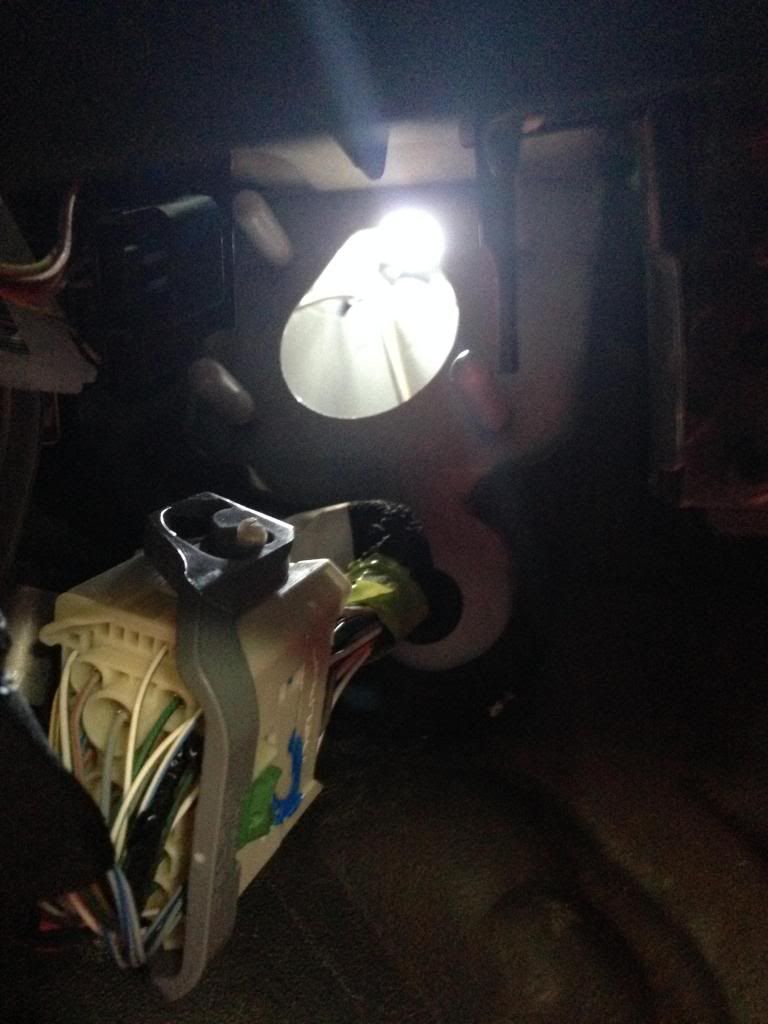
What the custom intake looks like with the mounting bracket I made to hold it securely:
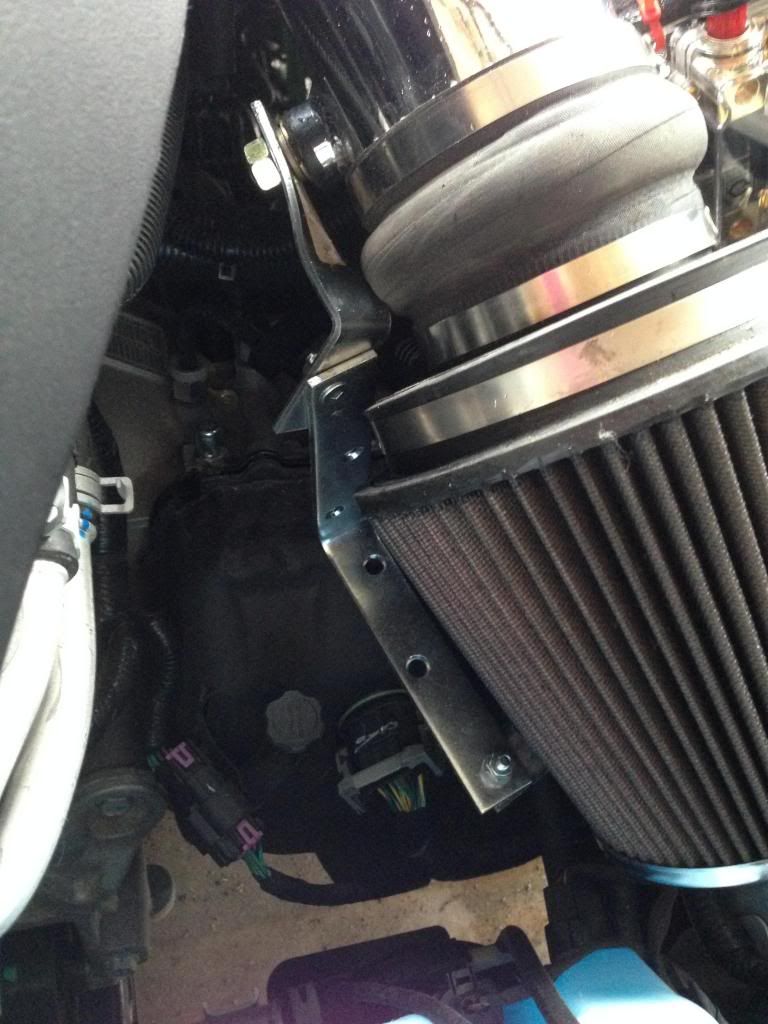
And the far right of the bracket, where is lodges into the original spot where the stud was on the stock intake:
-
That's the problem...the plastic edge parts that "hold" the bulb in place don't seem to be far enough out to hold it. I tried looking at it very closely again today, and it doesn't seem like they will ever be able to reach. I'll have to try contacting the company on Tuesday and see what they say.
-
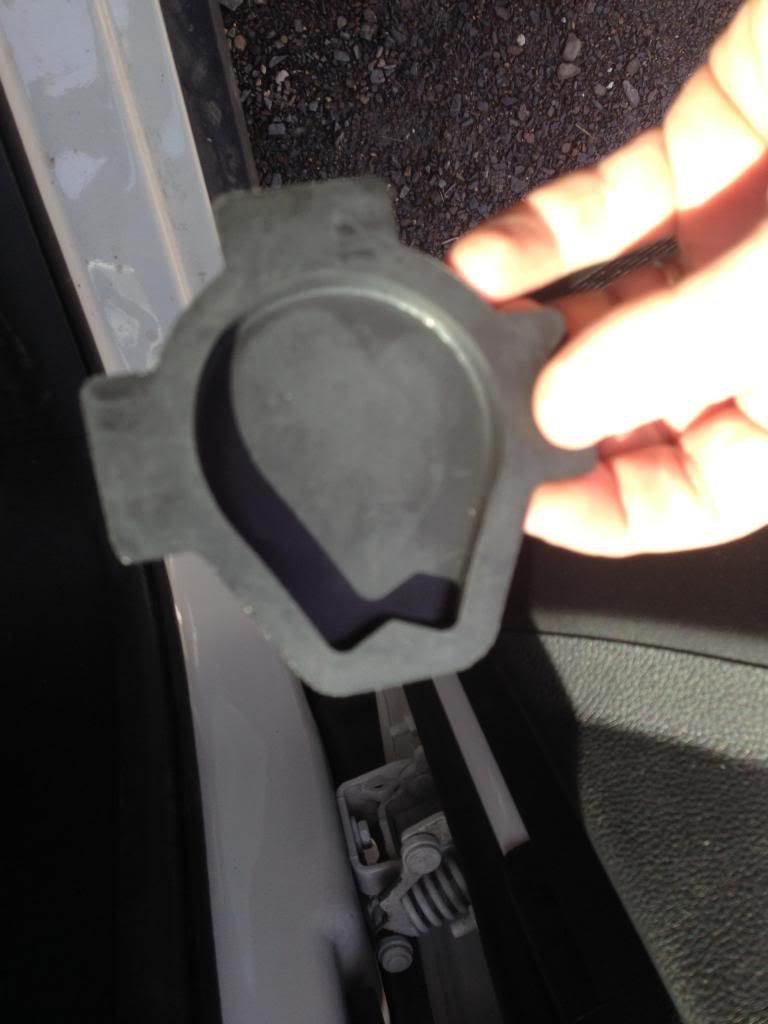
Tomorrow night I'll post the pics of how to rip all that stuff apart, including the cool cubbie-hole that's stock in the firewall. Oh, I can't tease...here it is:
This is the piece that comes out:
And this is what it looks like from inside the engine bay:
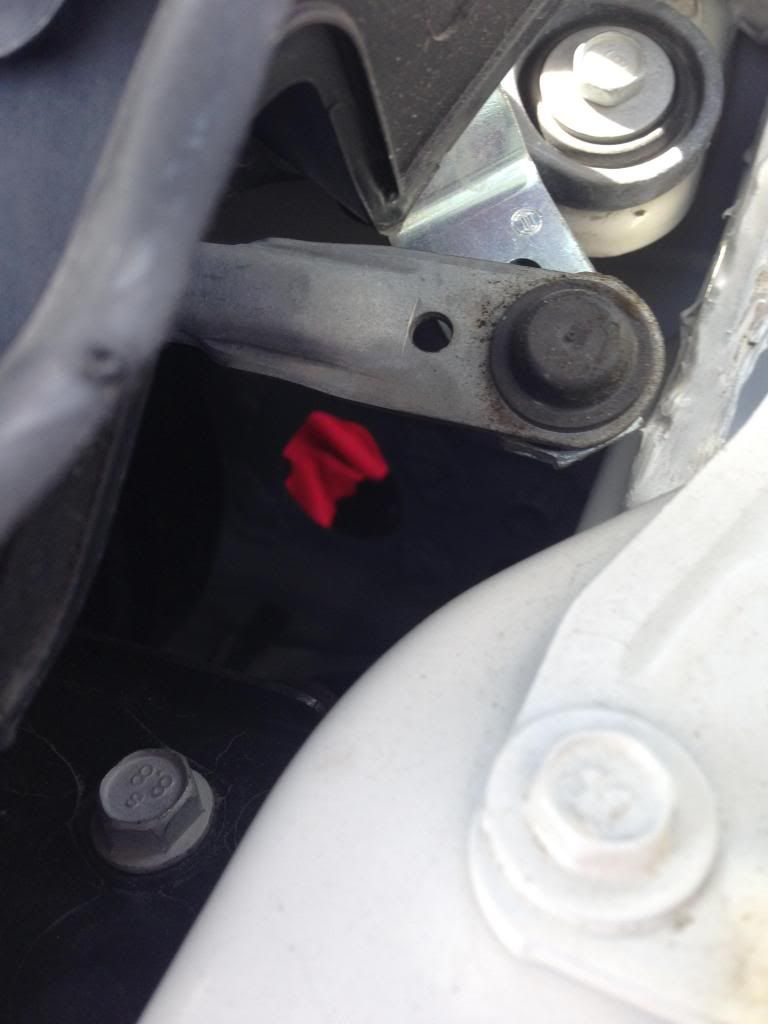
The red thing you see looking through the hole is something I put down on the floor on the inside, to make it easier to see it (and keep my hair from getting dirty, while bending and contorting like a gymnast to try to get the cables up into there).
-
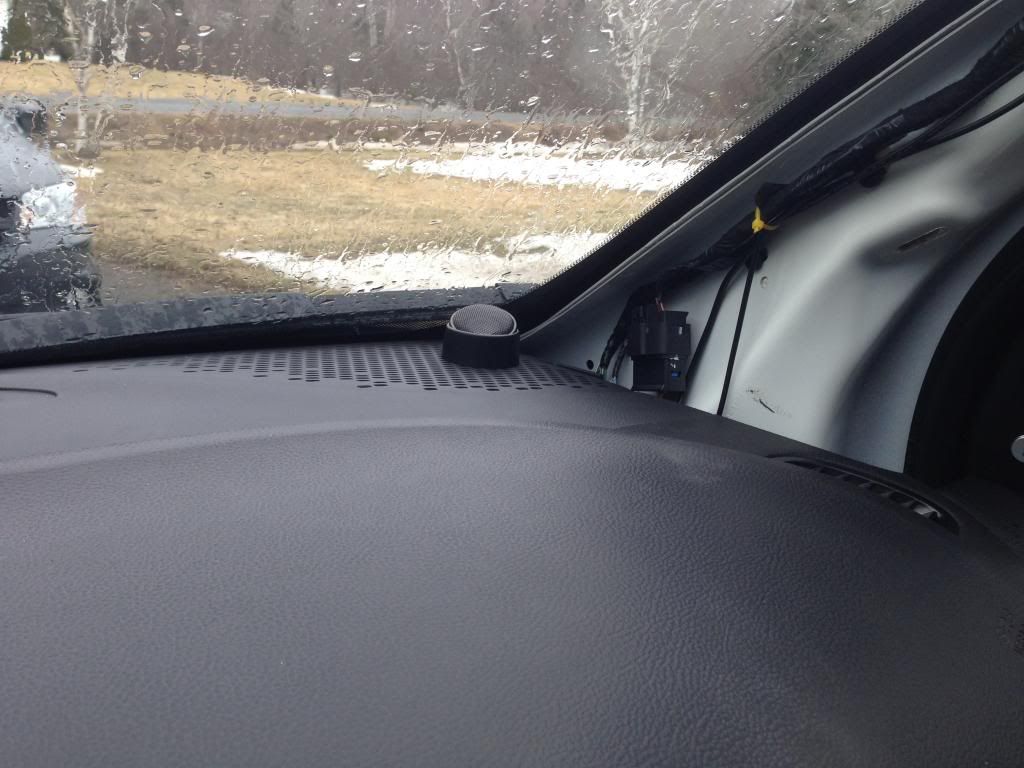
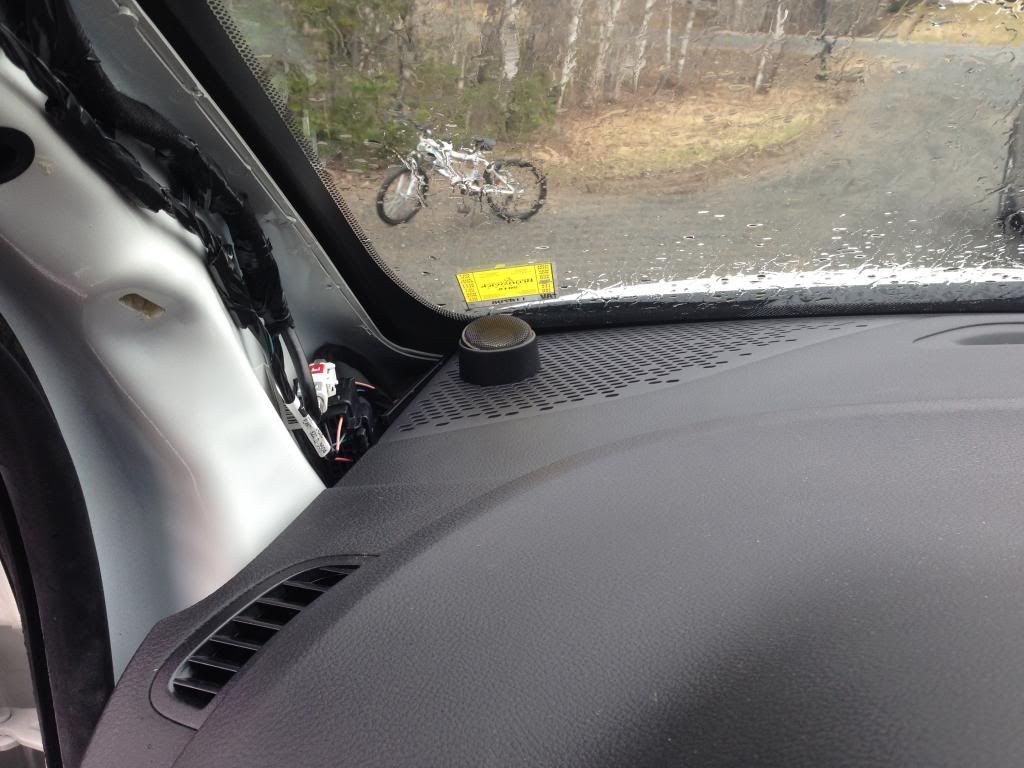
Almost forgot....the Rockford tweeters, installed onto the dash. These are bolted in there pretty solid, was quite a challenge to fit the cables under the trim:
-
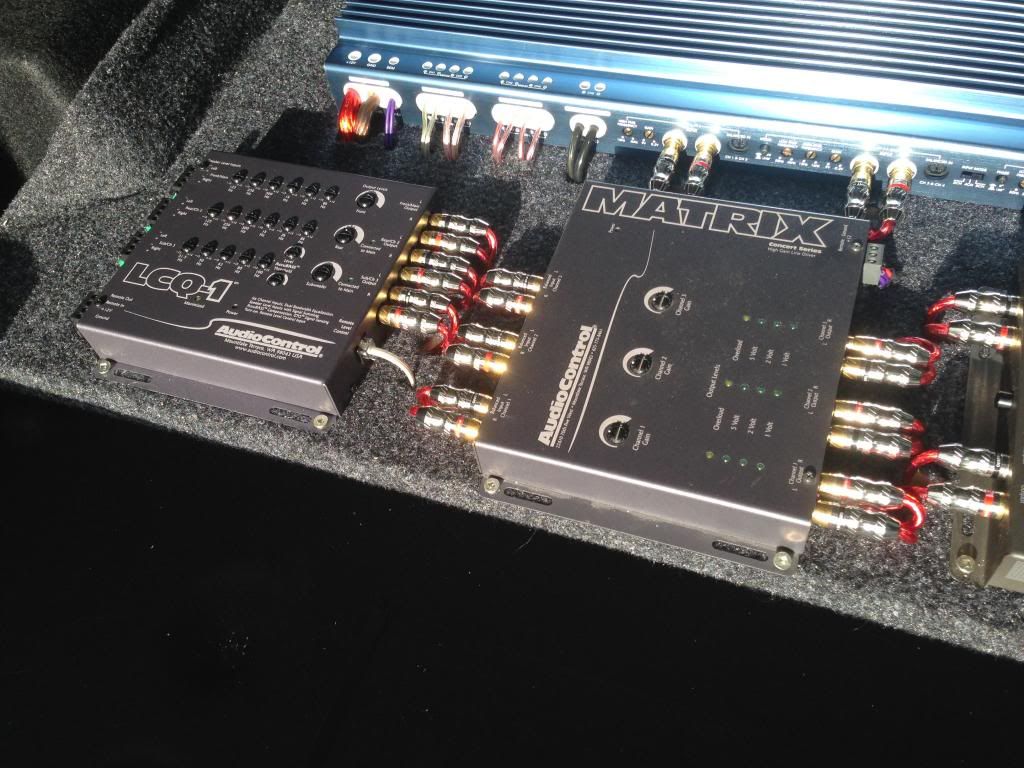
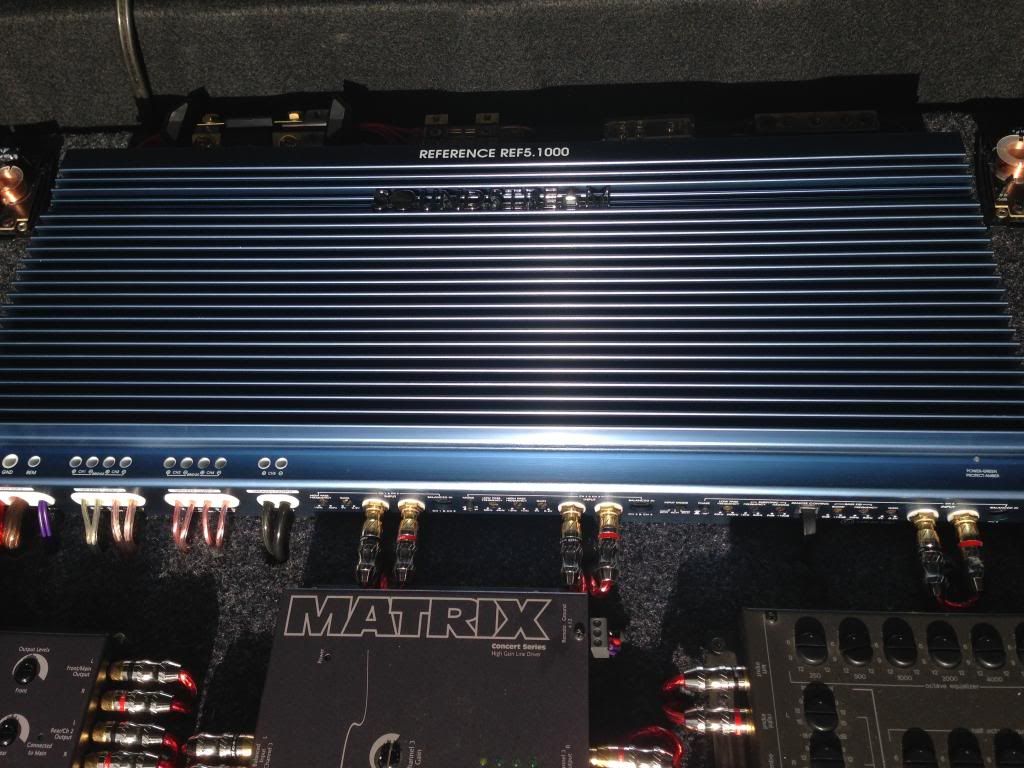
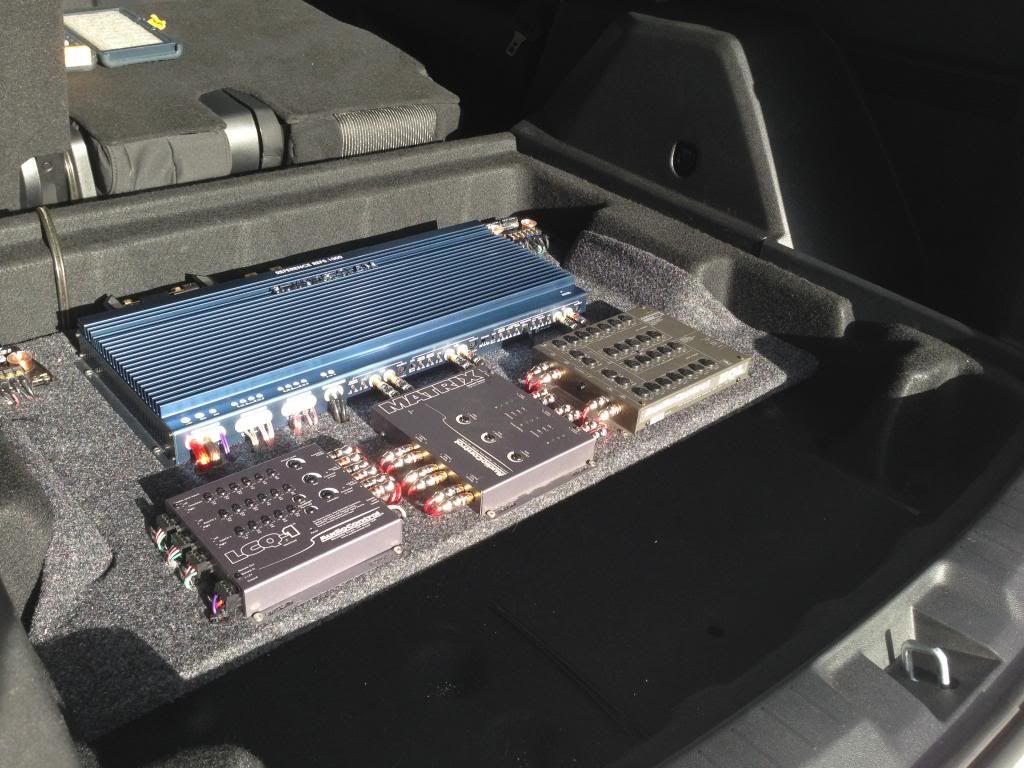
Now for the good stuff.
My new stereo board, sitting all snug in its new little home: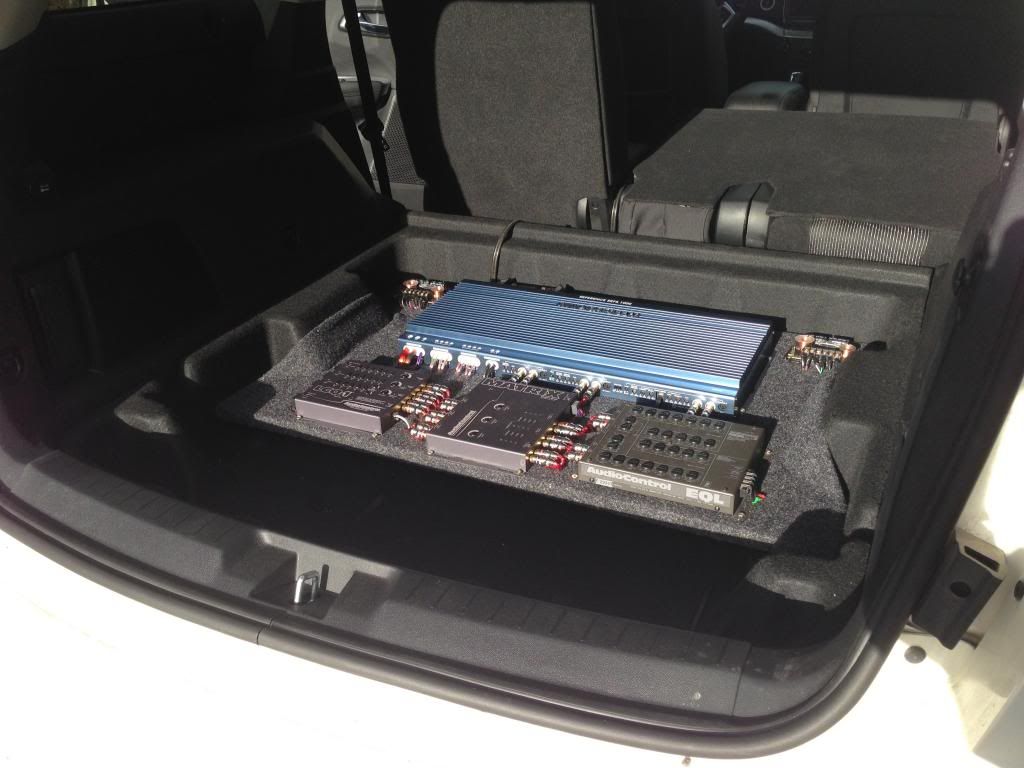
Closeups:

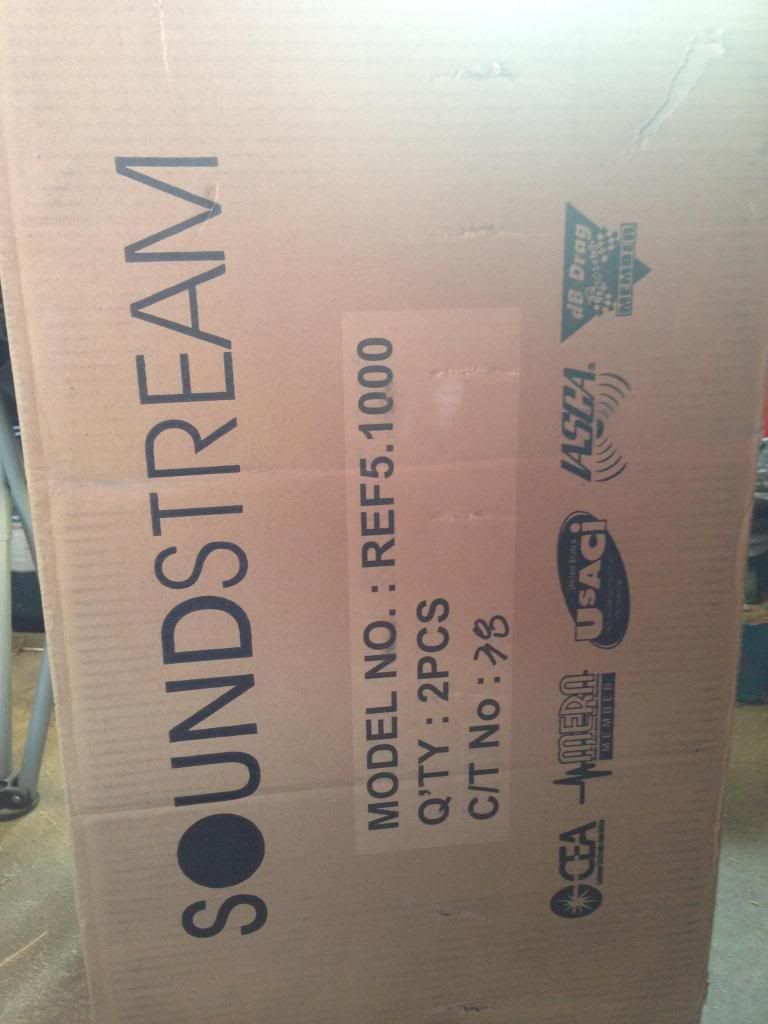
I got giddy when this box arrived:
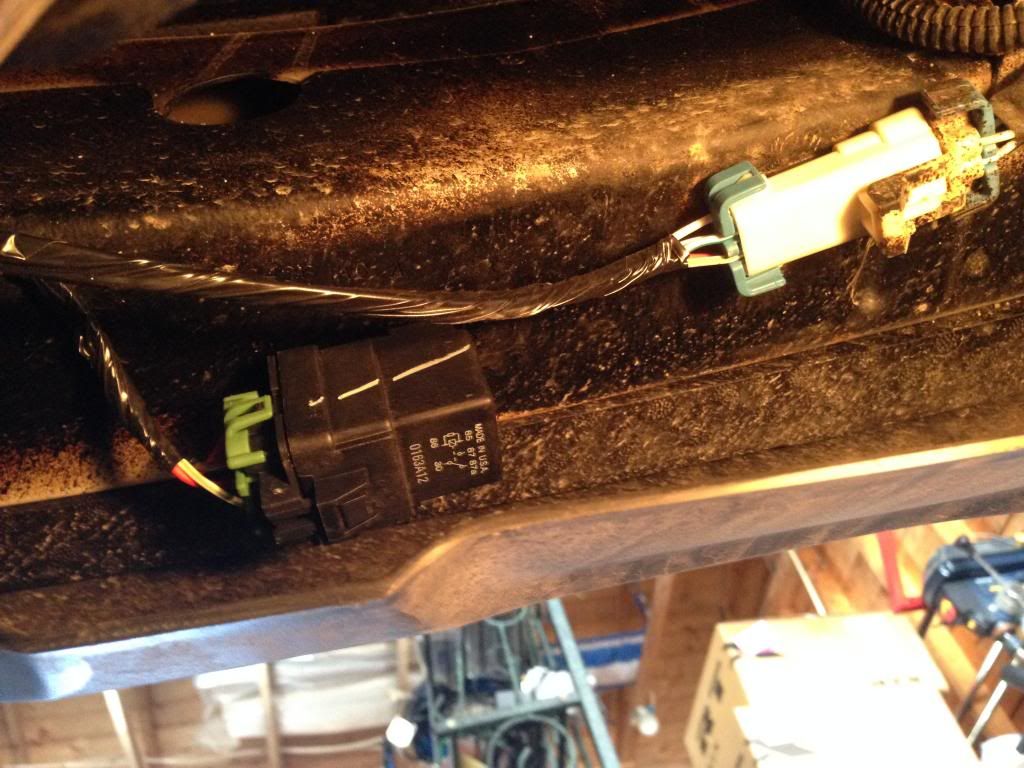
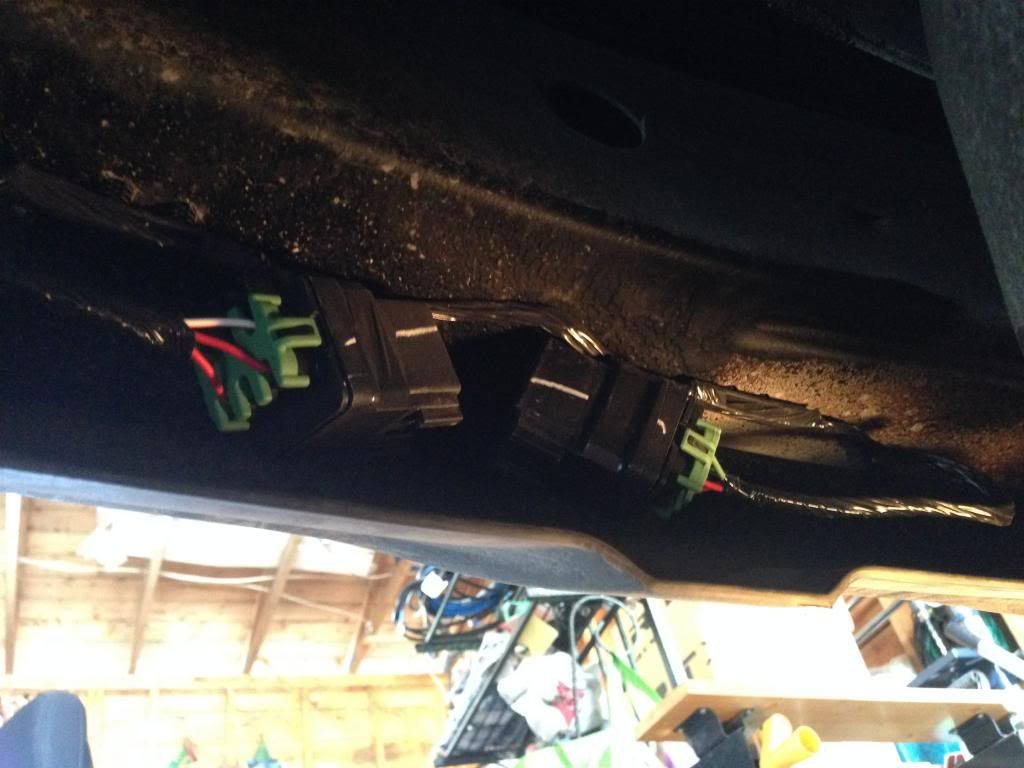
For people installing trailer wiring, and wondering where it is....the first pic is where it is located, and what it should look like with the OEM harness installed. The second pic is where the relays attach under the bumper frame:
-
Okay, so I wasn't going to get any pics posted until everything was done, but the only thing outstanding is the HID lights issue and I need to get a pic of the rear with the cover on and just the sub showing in the back. Other than that, it's game on. A warning to anyone with a low-speed connection...this thread will have tons of pics in it, and may take a while to load. Also, I'm going to post the "what it's like when done" pics first, then will post later in the thread how to take everything apart. That should help people in the future when something won't come apart and they need to know where a bolt of a clip goes.
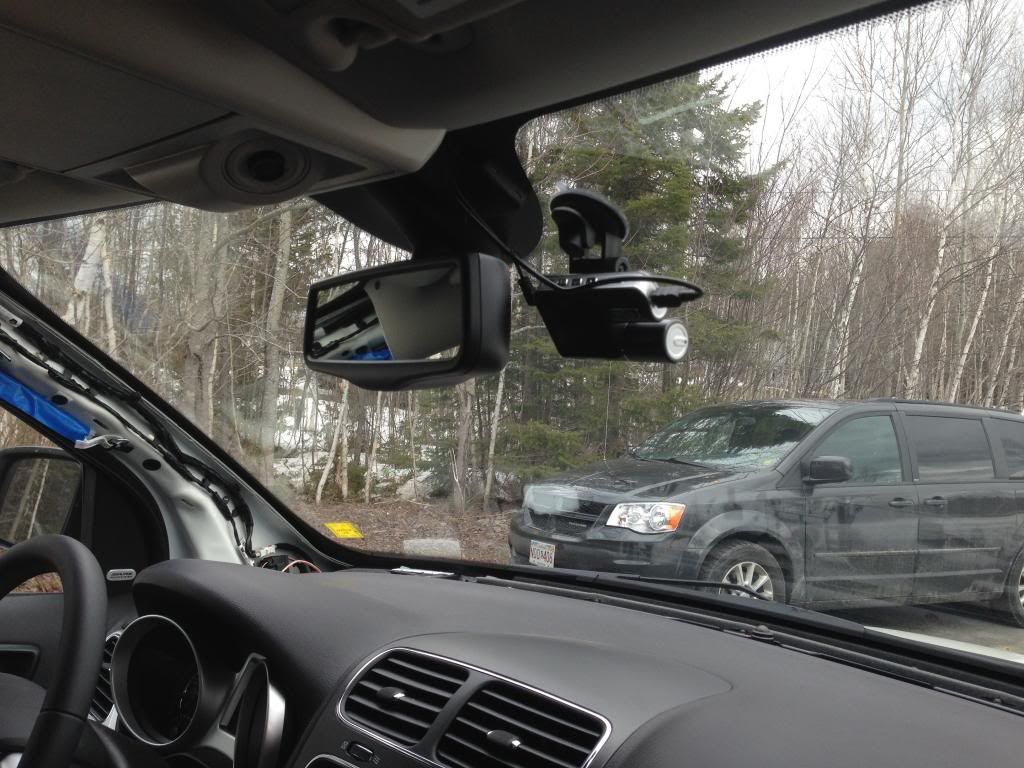
So here goes...dashcam first.
FRONT:
REAR:
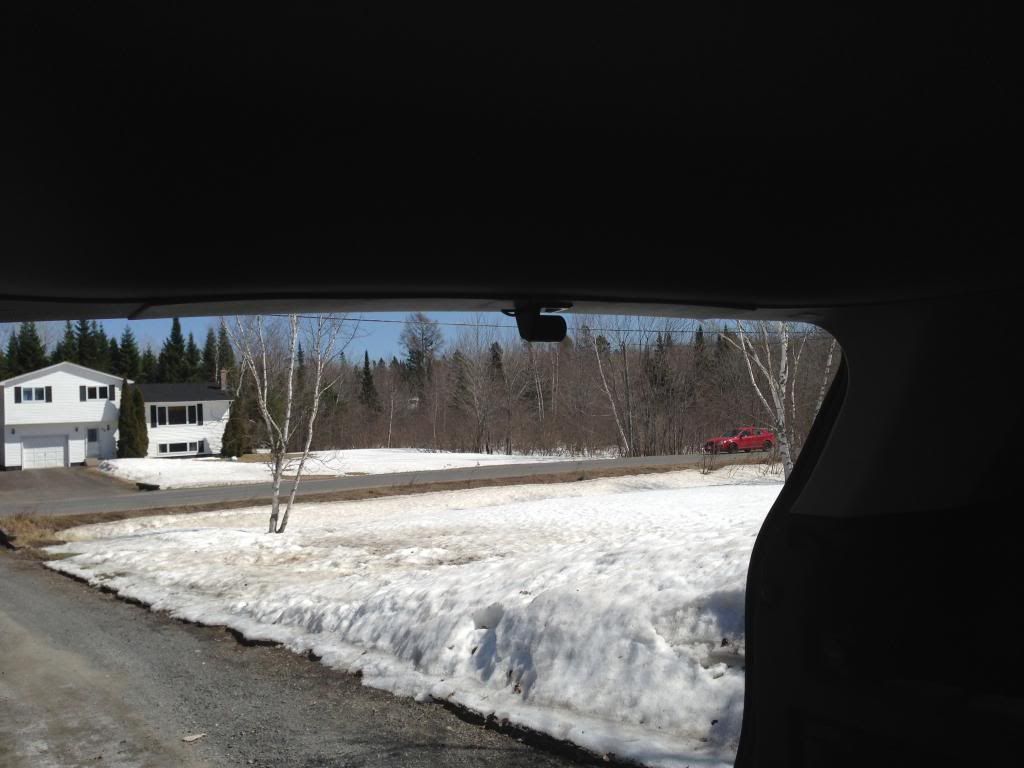
The wiring for this is below all the paneling. Wow, what a chore that was to get the back paneling apart.
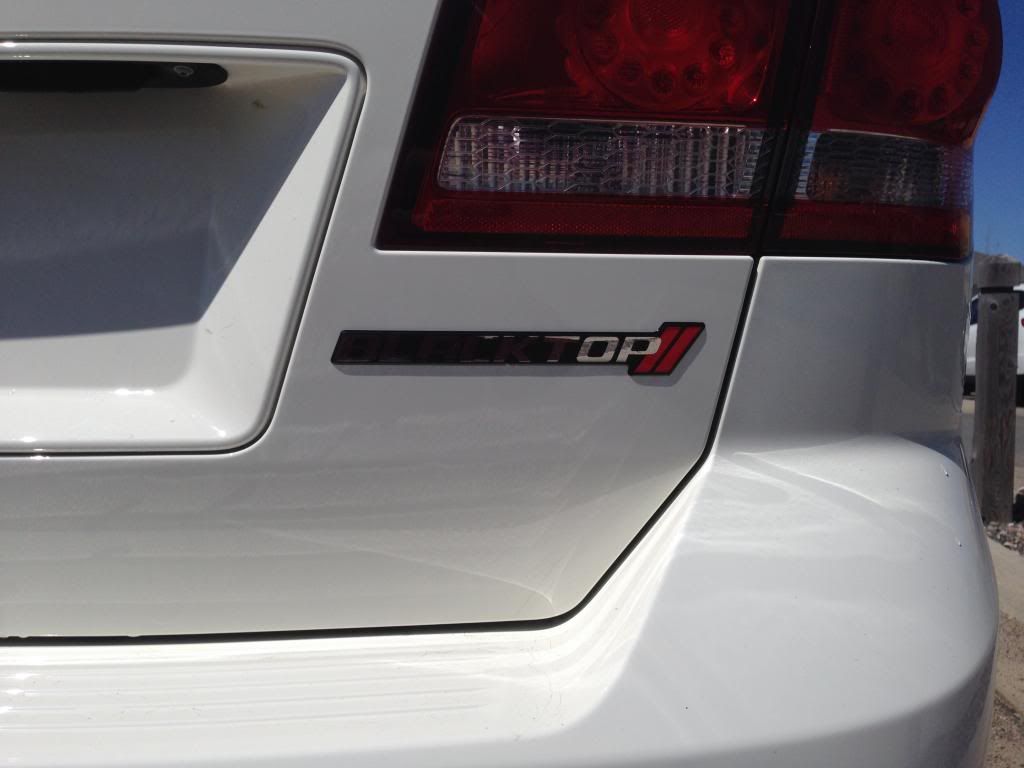
Here's an easy one...my many thanks to Nate as rebadgedesigns for doing a MONDO awesome job on the Blacktop badge:
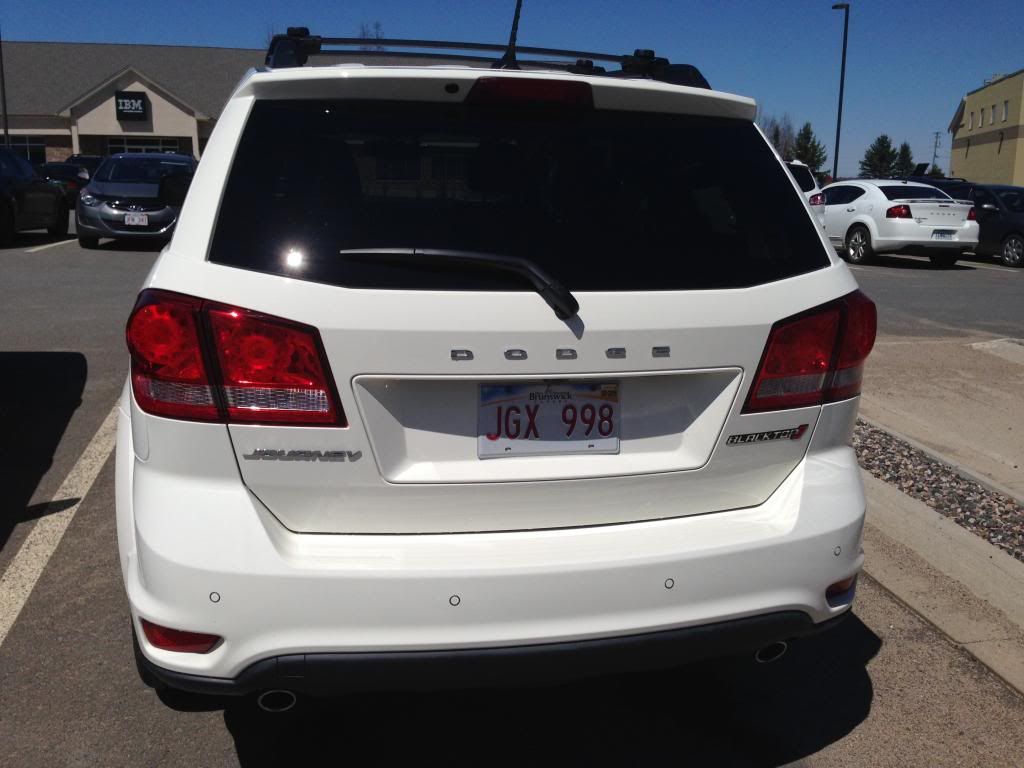
I apologize for the bad lighting on the closeup....but it looks the same as it does in the full rear shot, above:
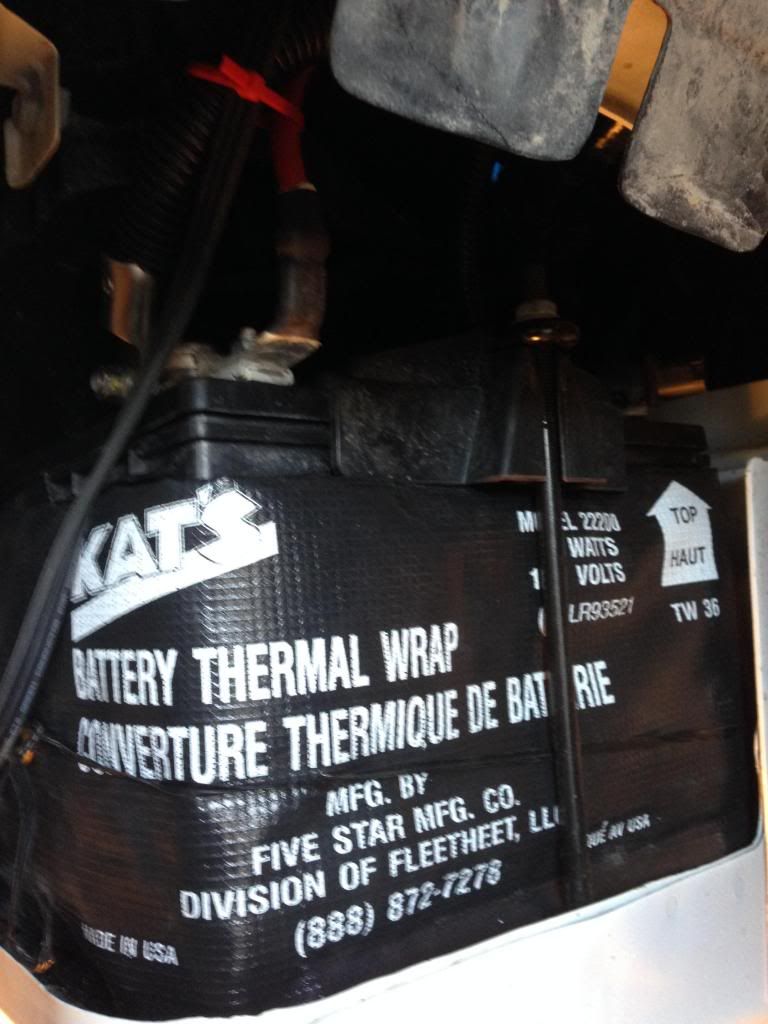
Thermal battery blanket installed...no more hard starts at -20:
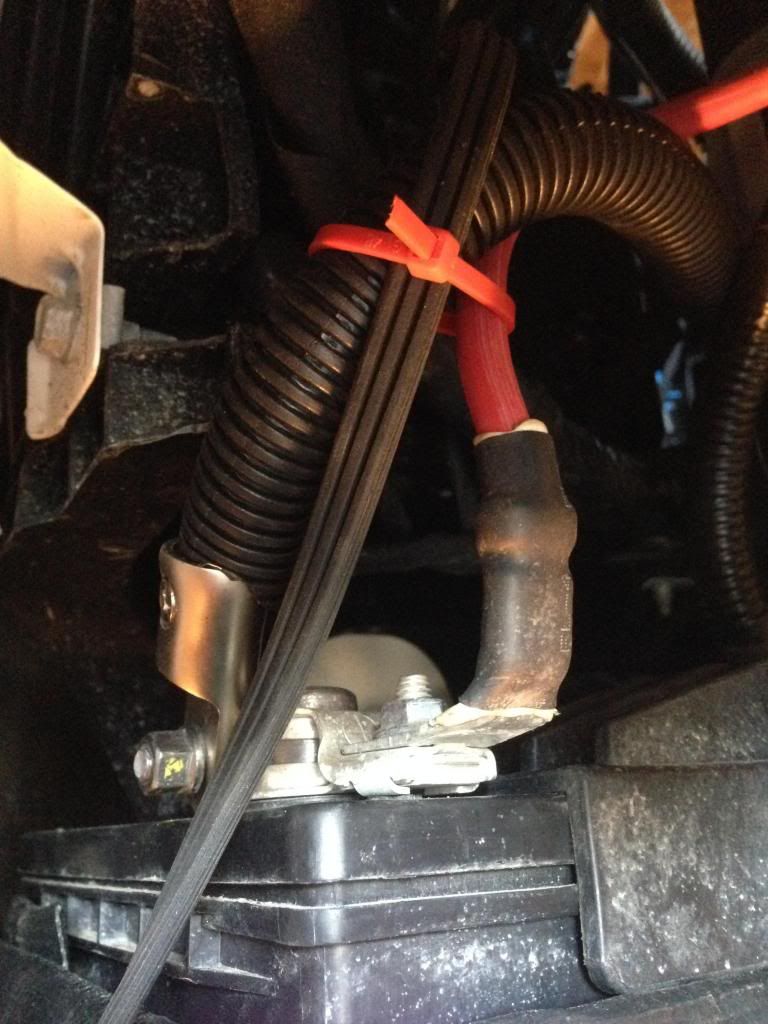
Close-up of the wiring on the top of the battery, including the 1/0 power cable to the stereo:
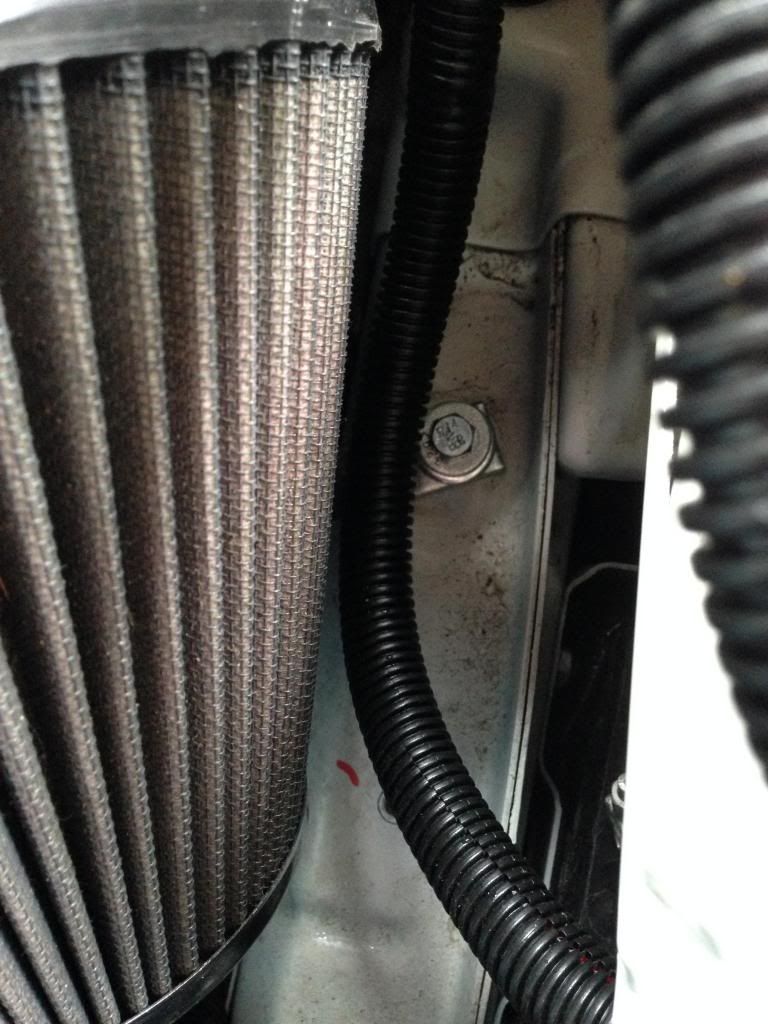
My K&N intake, heavily modified out of my 392 Hemi.
Still need to put the lower bolt on it, to keep it from moving around, but you get the idea. Oh, man, is this loud at WOT: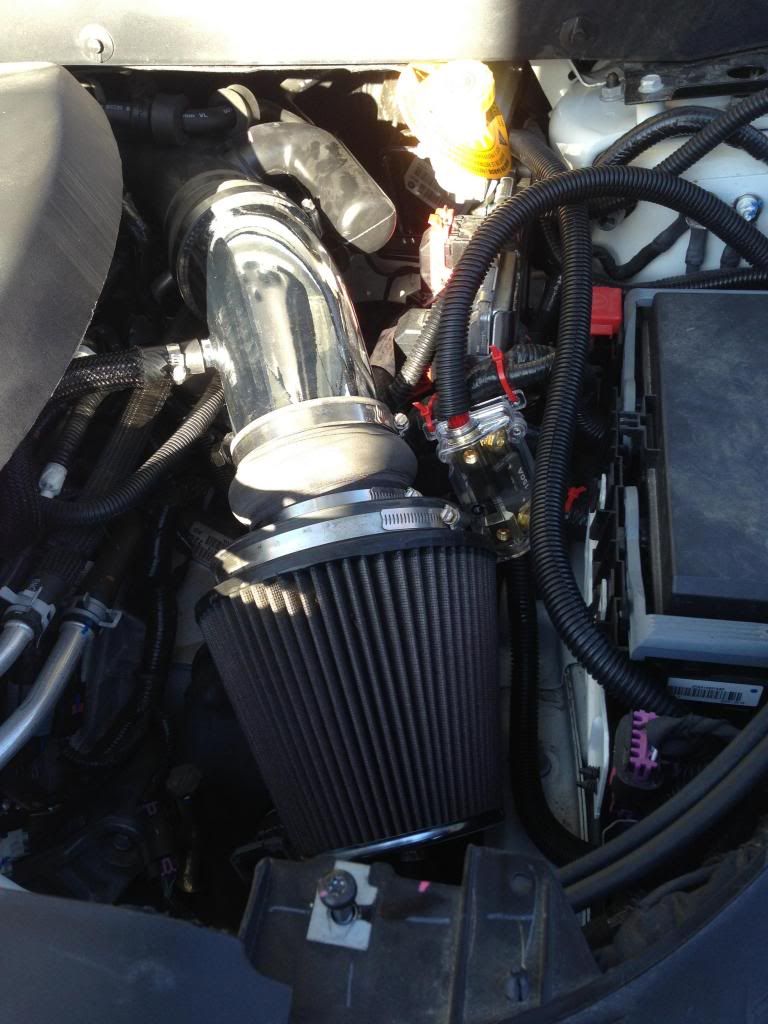
And it uses all stock PCV hoses.
Here's another angle, love the chrome:
Maximum number of pics per post. Will continue in a reply...
-
OK, well I know I haven't posted in a while....but rest assured, I have been doing lots of mods.
Pics will come up once I get everything completed. Right now, I'm stuck. I got my HID lights and extension cables (I'm going to need to get another set of these, to test the amount of current they pull when they initially turn on - I don't want to cut cables I'm going to permanently mount). Problem is, even though it says that they are 9006, and the package says it, and the invoice says it...they sure don't look like it.Here's a pic of the HID light and the stock 9006 bulb (HID is on the left). They don't seem to have the mounting clasps in the same spot.
What gives? Of course this is Saturday night, and I can't contact the company until Tuesday...but if anyone has any idea, or if I'm missing something obvious, I'd love to hear it.
-
Waaaayyyy too high pitched for my liking. The setup on the 3.5 was way throatier. Is that the only one done so far (at least on this board)?
-
Very nice. It's like accenting the Blacktop lights. Are your rims custom painted, or did you order them like that?
-
Thanks for the tip...looks like a browser issue. It worked fine in Firefox, but wouldn't play in IE.
WOW, that sounds fantastic. Has anyone done an exhaust mod on the 3.6 yet? I'm curious how close it would sound to this on the 3.5HO.
-
The safety chain location looks a lot more rigid on the Curt.
-
Blackout,
I haven't heard to much about Motor City yet, but it looks like the overall experience there is improving under new ownership/management.
Having that feeling of being treated with respect and integrity are the building blocks of a good Customer/Dealer relationship.
Thanks for the recognition, Chrysler Canada as a whole puts the Customer first in an effort to offer the best in our products and the services that our Customers deserve.
Now, if we can only get lawmakers in Canada to pass the equivalent of the US's Magnusson-Moss Warranty Act, things would be fine. As it currently stands, dealerships are generally okay with you modifying the vehicle, but if Chrysler Canada finds out you are using so much as a K&N they will void your ENTIRE CAR warranty. That just is not right.
I was once threatened to have my warranty dropped just because I asked a question on the maximum torque of the 62TE transmission. The rep freaked out and asked for my VIN to void my warranty. Just because I asked a question. No sane person can tell me that should be allowed to happen.
-
I would have loved to hear this, but the link doesn't play. I get a picture only (no video/movie).
-
I'm not going to do anything with the battery, but plan to remove the steering wheel cover. I read that negative should be disconnected (and wait 3-10 minutes) to prevent the airbag discharge.
So it sounds like disconnecting the end on the strut tower will disconnect the battery, which is encouraging as I don't have to deal with those clips
Just an FYI, but airbags can deploy even without power to them. They appear to hold charge in probably some kind of large capacitor, so to still be able to deploy in the event power is disconnected on a collision. Not sure how long you would need to wait for them to discharge, but I'm thinking 3-5 minutes wouldn't be nearly enough time...
That piece you are looking to take off has 2 bolts at the bottom of it, and there are 6 or 7 metal clips. Pull STRAIGHT OUT from the dash area to release it, don't pull down on an angle.
-
You only have subwoofer output if you got the upgraded Premium (quote-unquote) Alpine system.
There are no speakers in the back, only the spot in the rear driver's side where the sub would be if you have the Alpine setup. The factory case for the sub is an irregular shape, extending into the wheel well area. If you don't have the Alpine, there is no wiring to that area.
-
If you push it further out, won't you get rubbing on the wheel well? How close is it to the fender side of the wheel well?
-
Thank you. Where is the best place to put the ground wires/rings do you figure? I just ordered a kit from DDM tuning. Can't wait for it to come in!
I hope you're only putting it on the low beams. DRLs (since you're in Canada) run off the high beams at 50% intensity, and you'll be in for a ton of issues if you try putting HIDs on high beams (even without DRLs, for that matter).

will this fit on the 19" OEM rims?
in Wheels & Tires
Posted
Sure enough, in the wheels & rims area of this forum, there are posts with pics of people using 255/50R19, so it looks like they will fit. They look good, too.