QuarterSwede
-
Posts
67 -
Joined
-
Last visited
-
Days Won
6
About QuarterSwede
- Birthday 07/19/1981
Recent Profile Visitors
1,341 profile views


-
 Jagar reacted to a post in a topic:
How To: Run Power Through Firewall
Jagar reacted to a post in a topic:
How To: Run Power Through Firewall
-
Artiflex reacted to a post in a topic:
How To: Run Power Through Firewall
-
Pity Pat.Patton reacted to a post in a topic:
10” Sub Install Compete
-
 QuarterSwede reacted to a post in a topic:
10” Sub Install Compete
QuarterSwede reacted to a post in a topic:
10” Sub Install Compete
-
2015 10” Sub Install Compete
QuarterSwede replied to QuarterSwede's topic in Audio, Infotainment Navigation, MyGig, UConnect, etc.
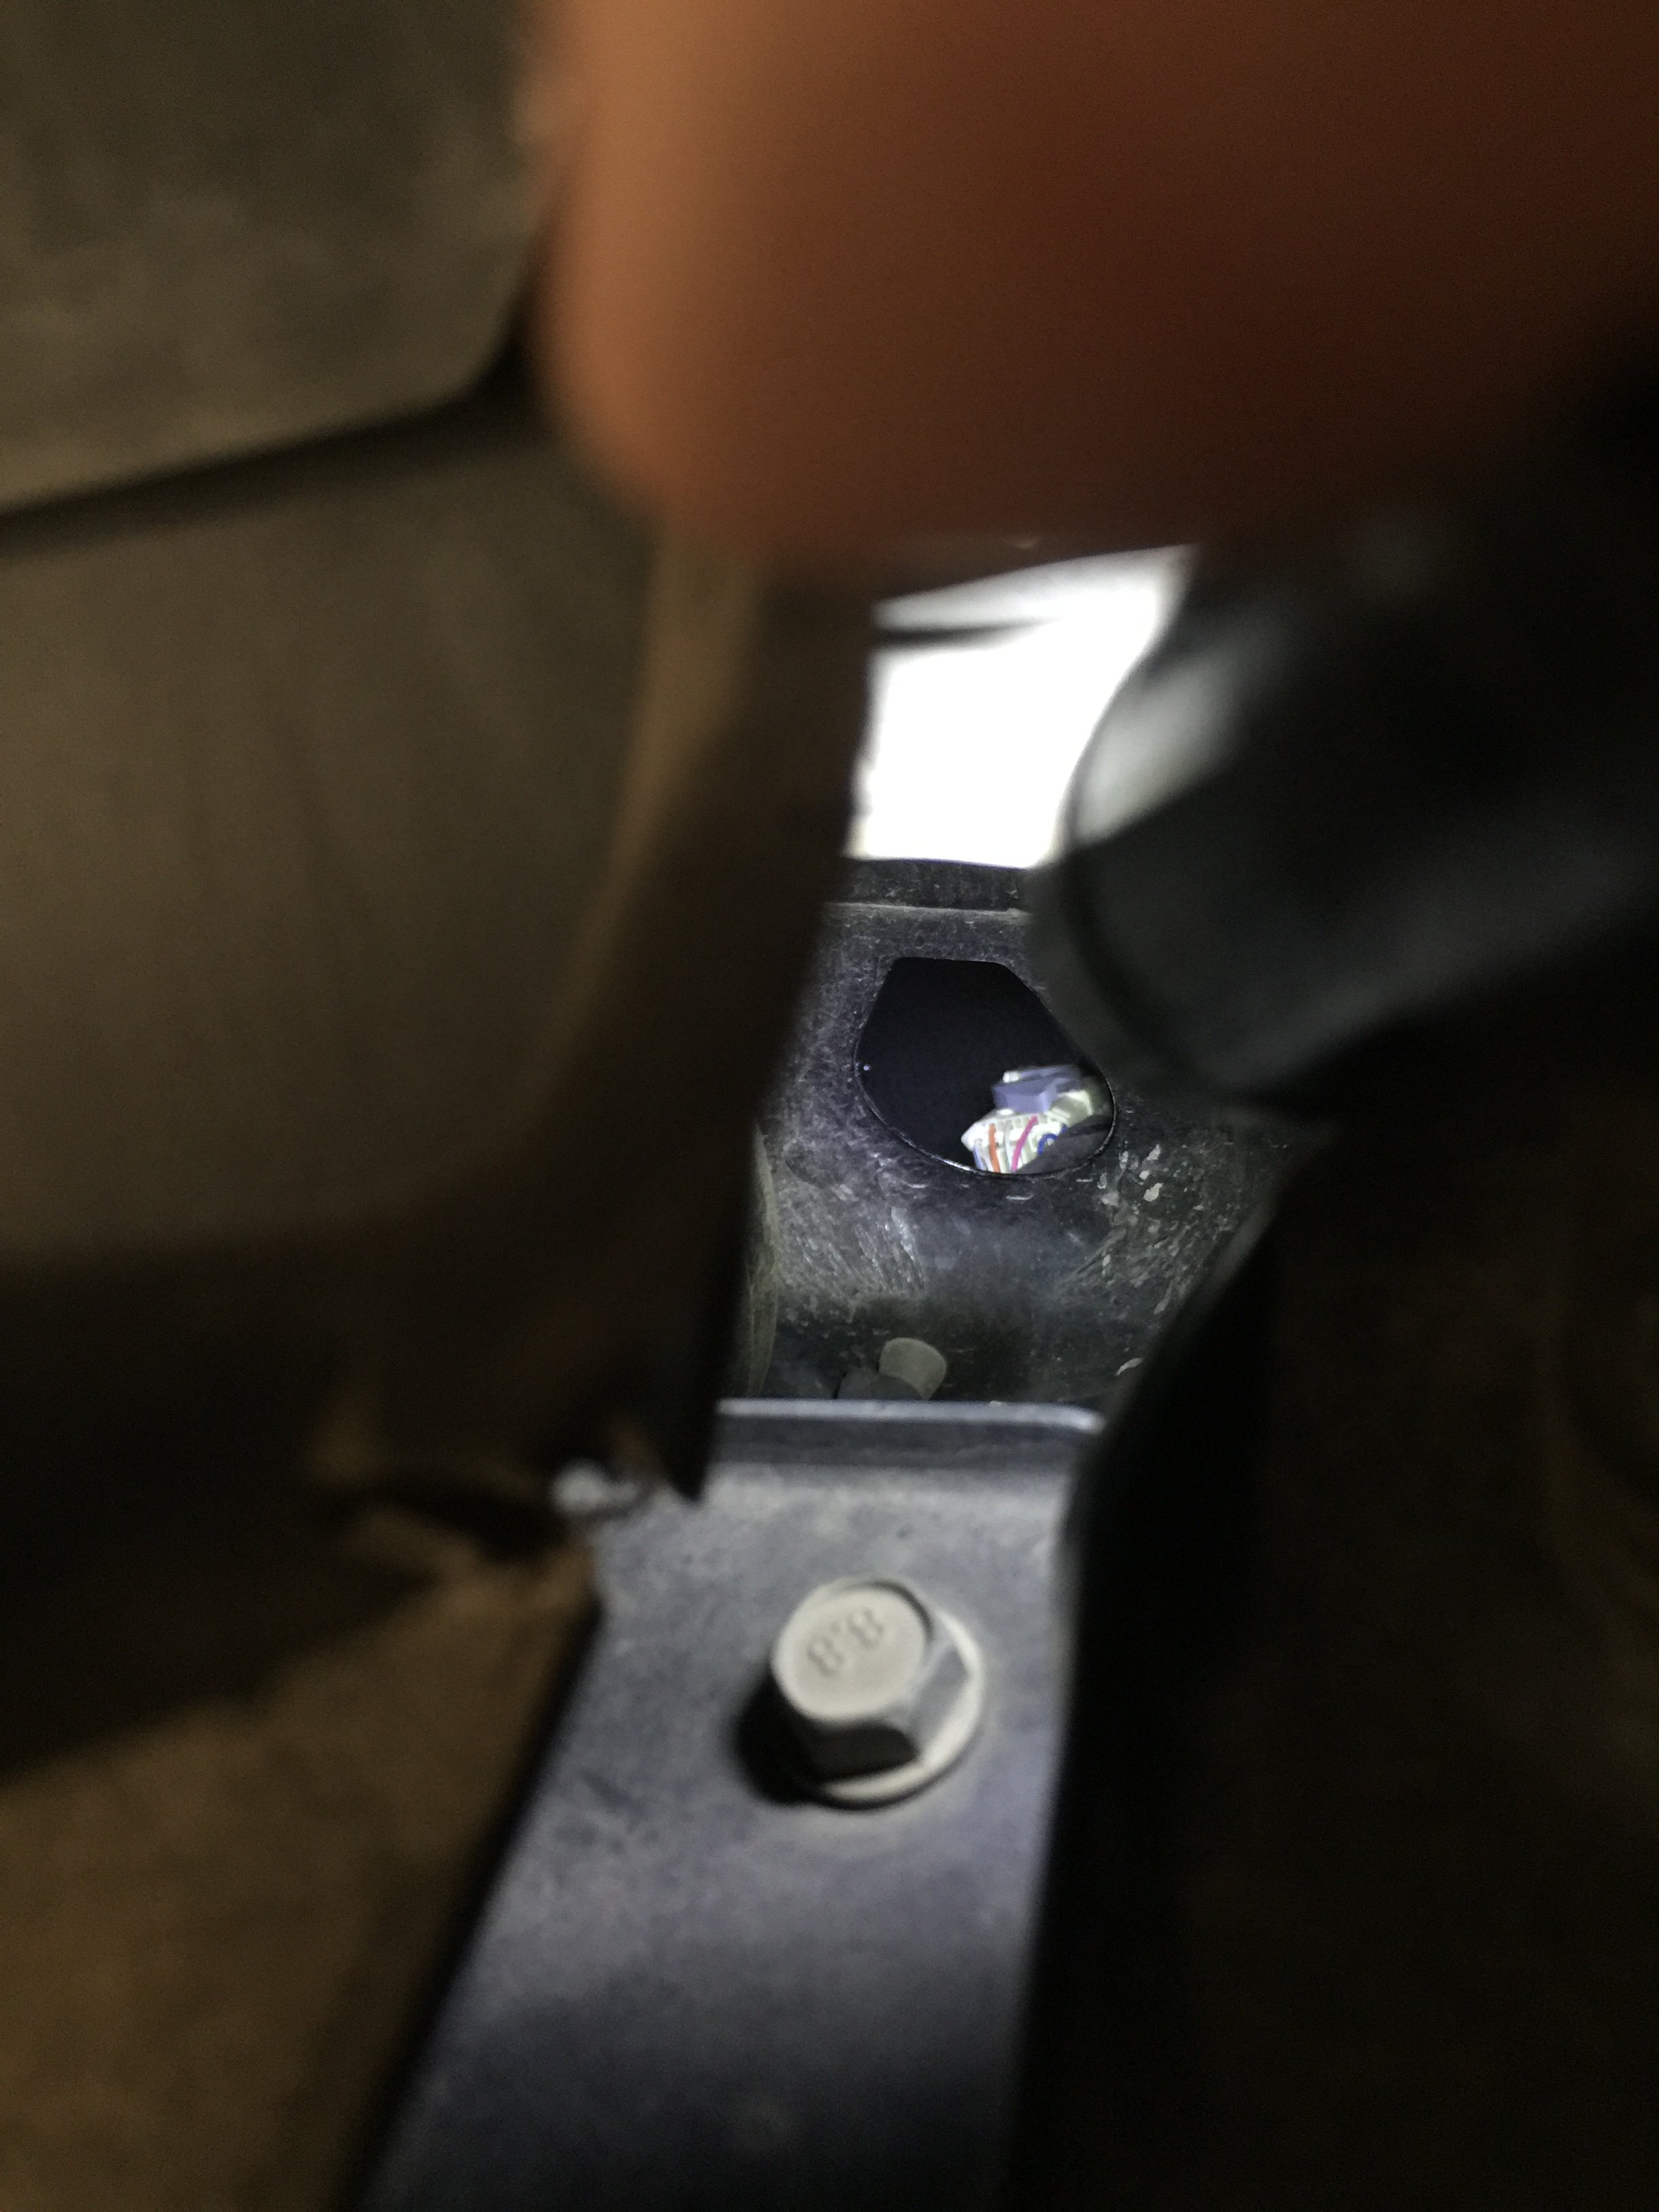
I ran it under the side passengers side floor trim and carpet to the back. The cable is 20’ long. -
USAFGuerin reacted to a post in a topic:
Member Map
-
QuarterSwede reacted to a post in a topic:
Aftermarket amplifier/subwoofer
-
QuarterSwede reacted to a post in a topic:
Journey R/T Custom Exhaust
-
QuarterSwede reacted to a post in a topic:
Journey R/T Custom Exhaust
-
QuarterSwede reacted to a post in a topic:
Journey R/T Custom Exhaust
-
 QuarterSwede reacted to a post in a topic:
Journey R/T Custom Exhaust
QuarterSwede reacted to a post in a topic:
Journey R/T Custom Exhaust
-
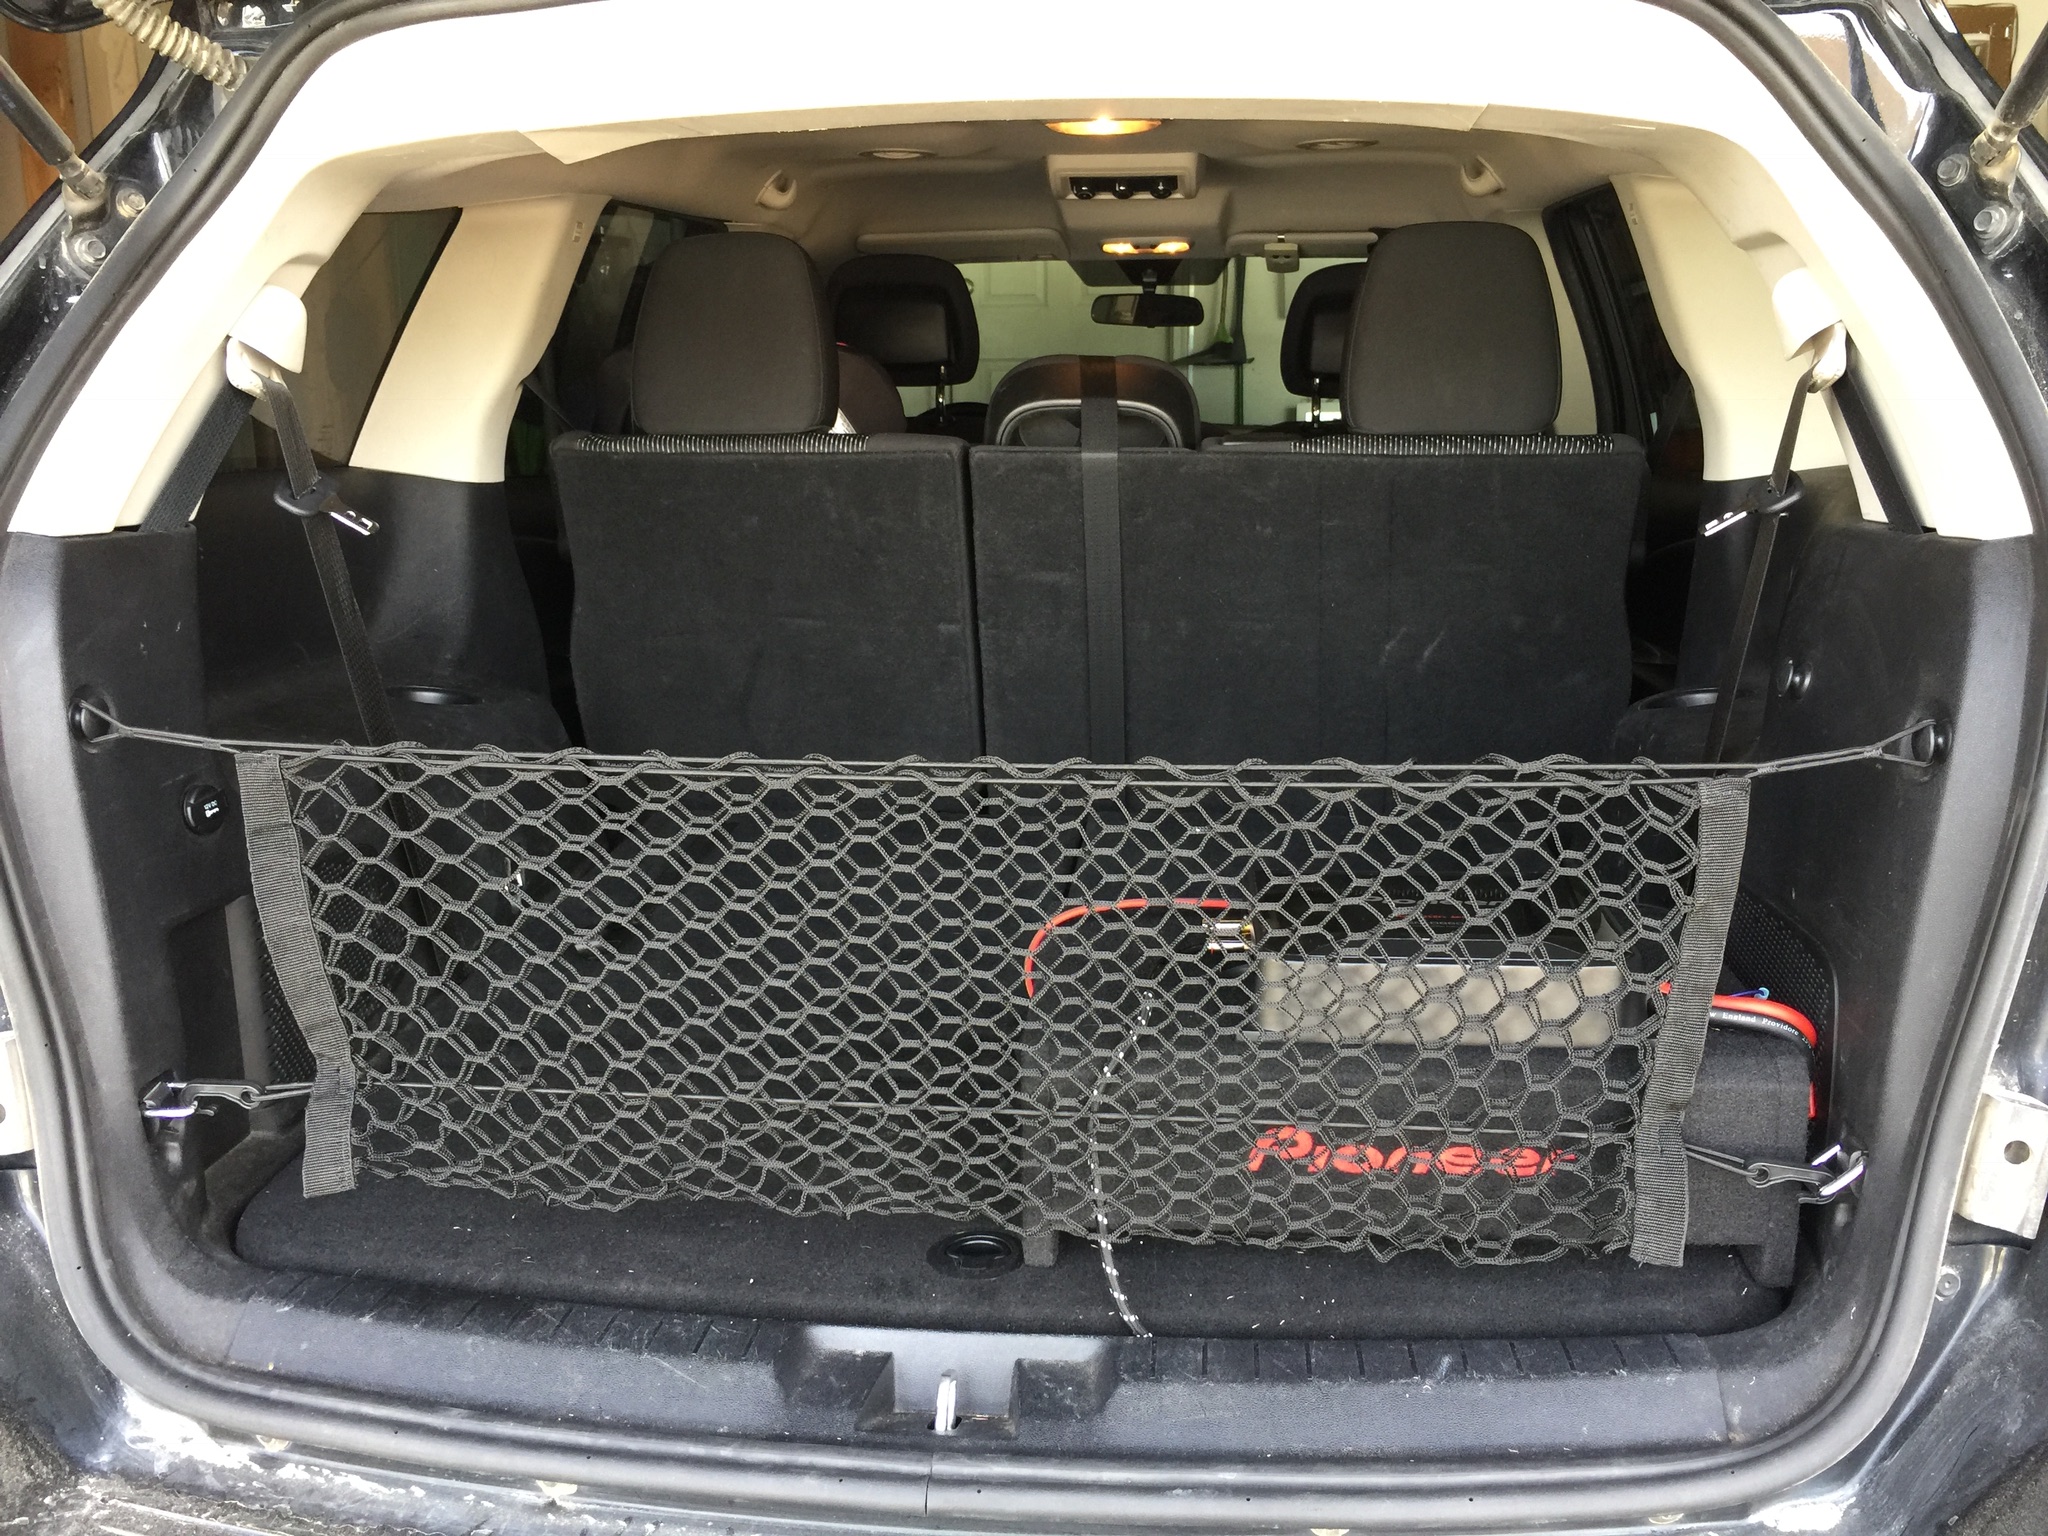
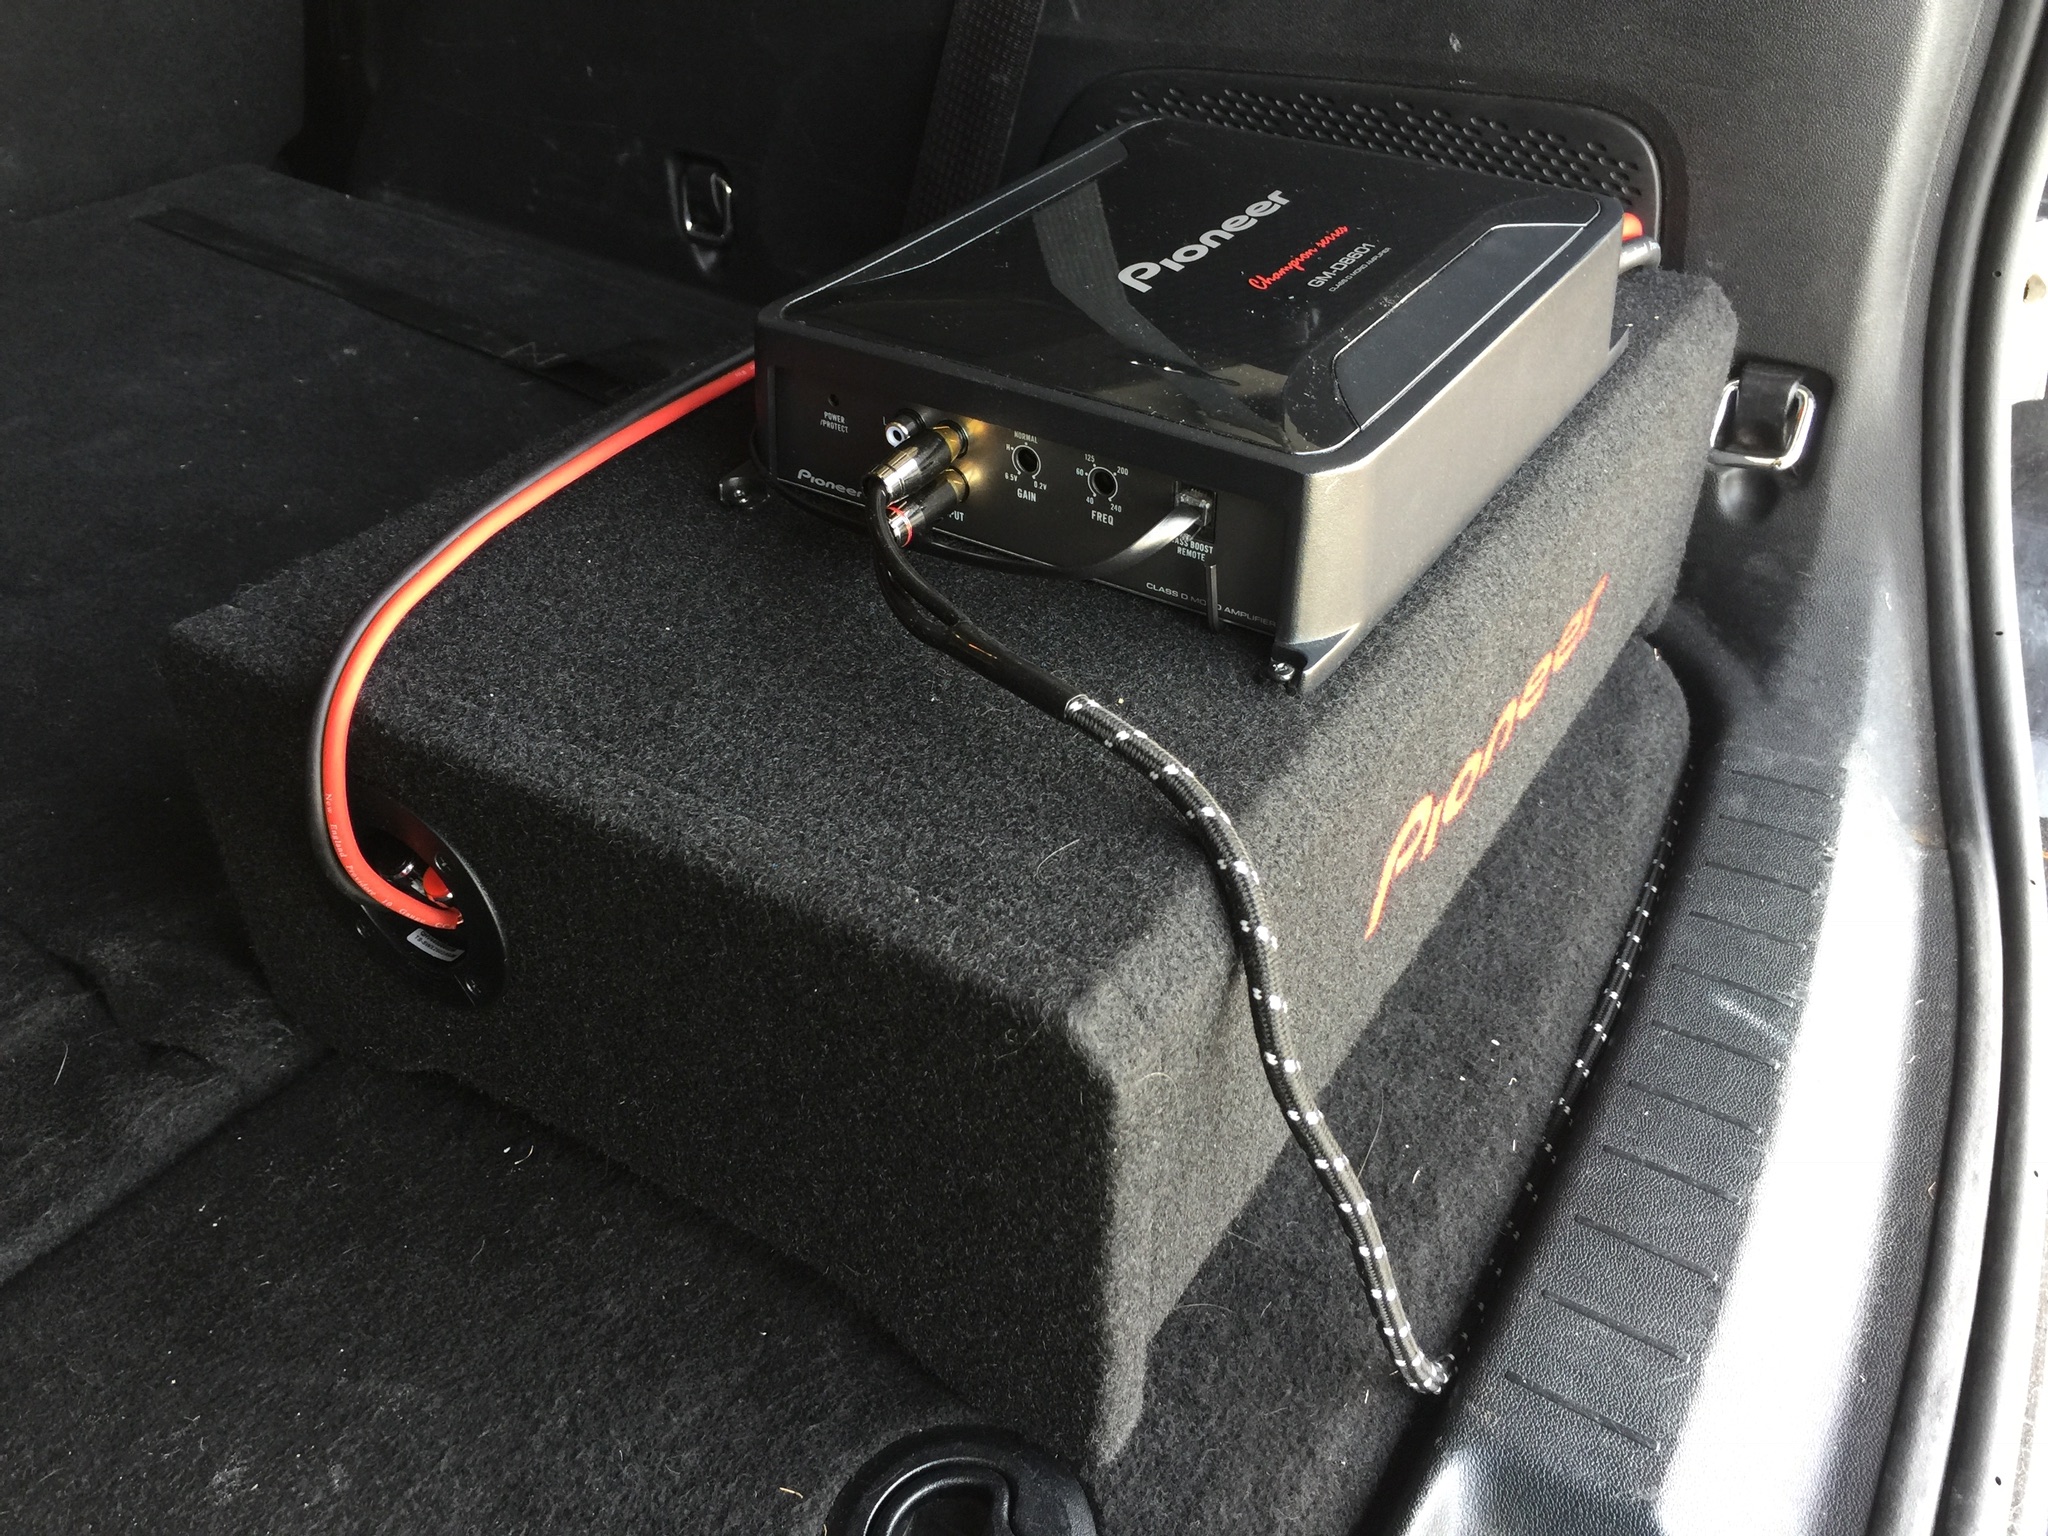
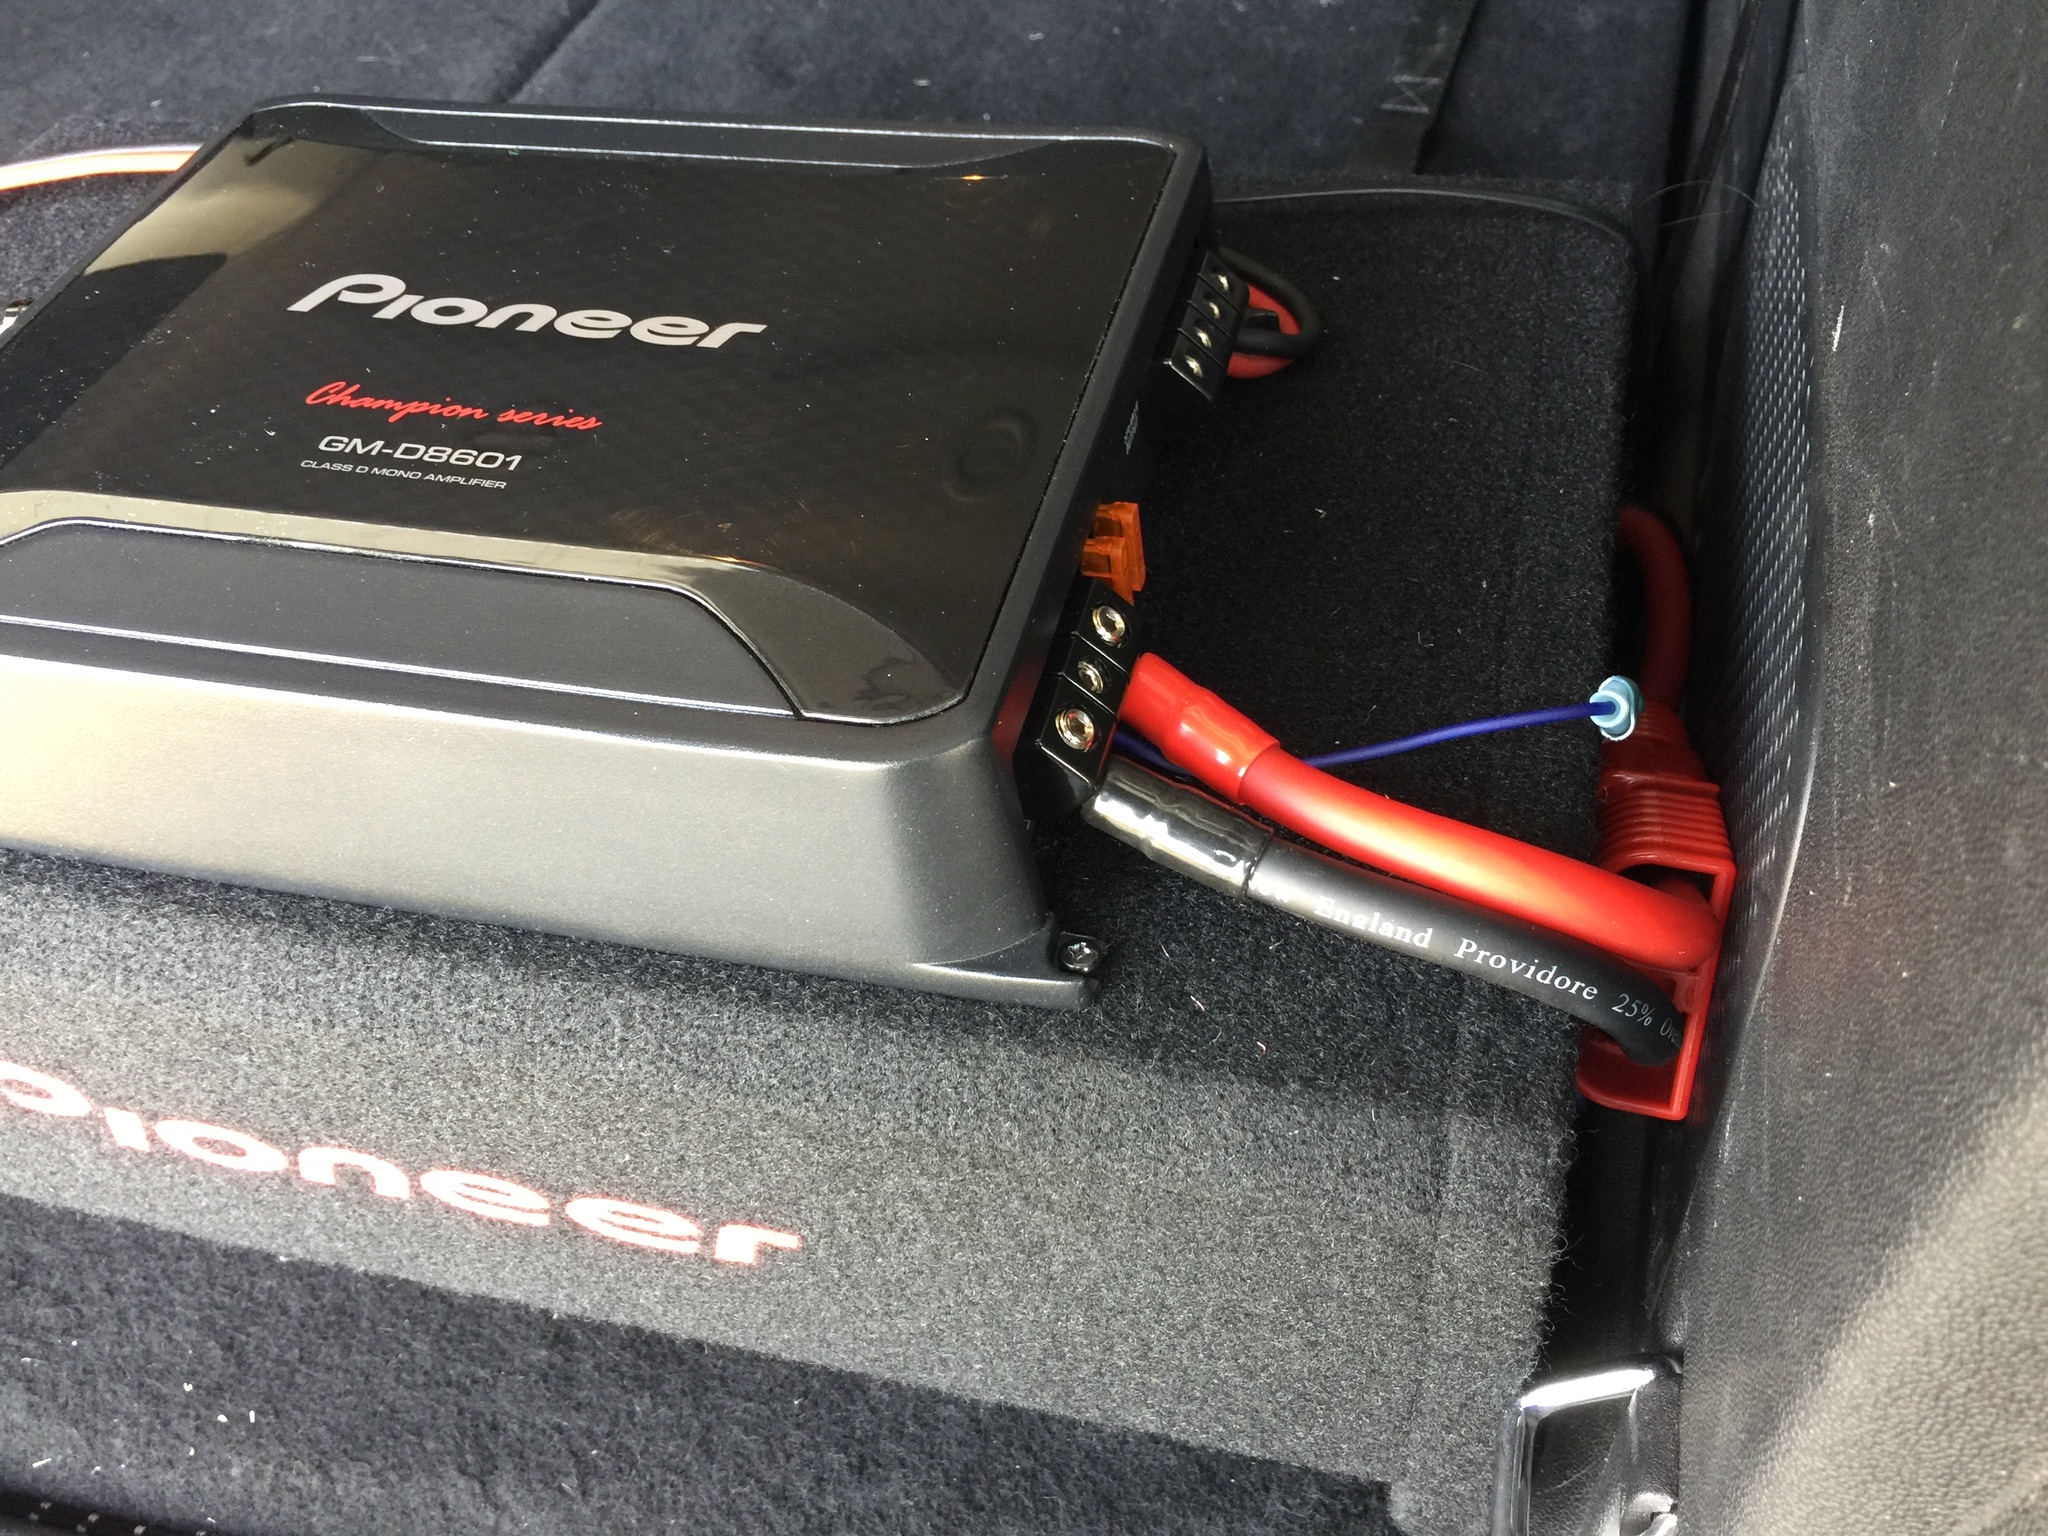
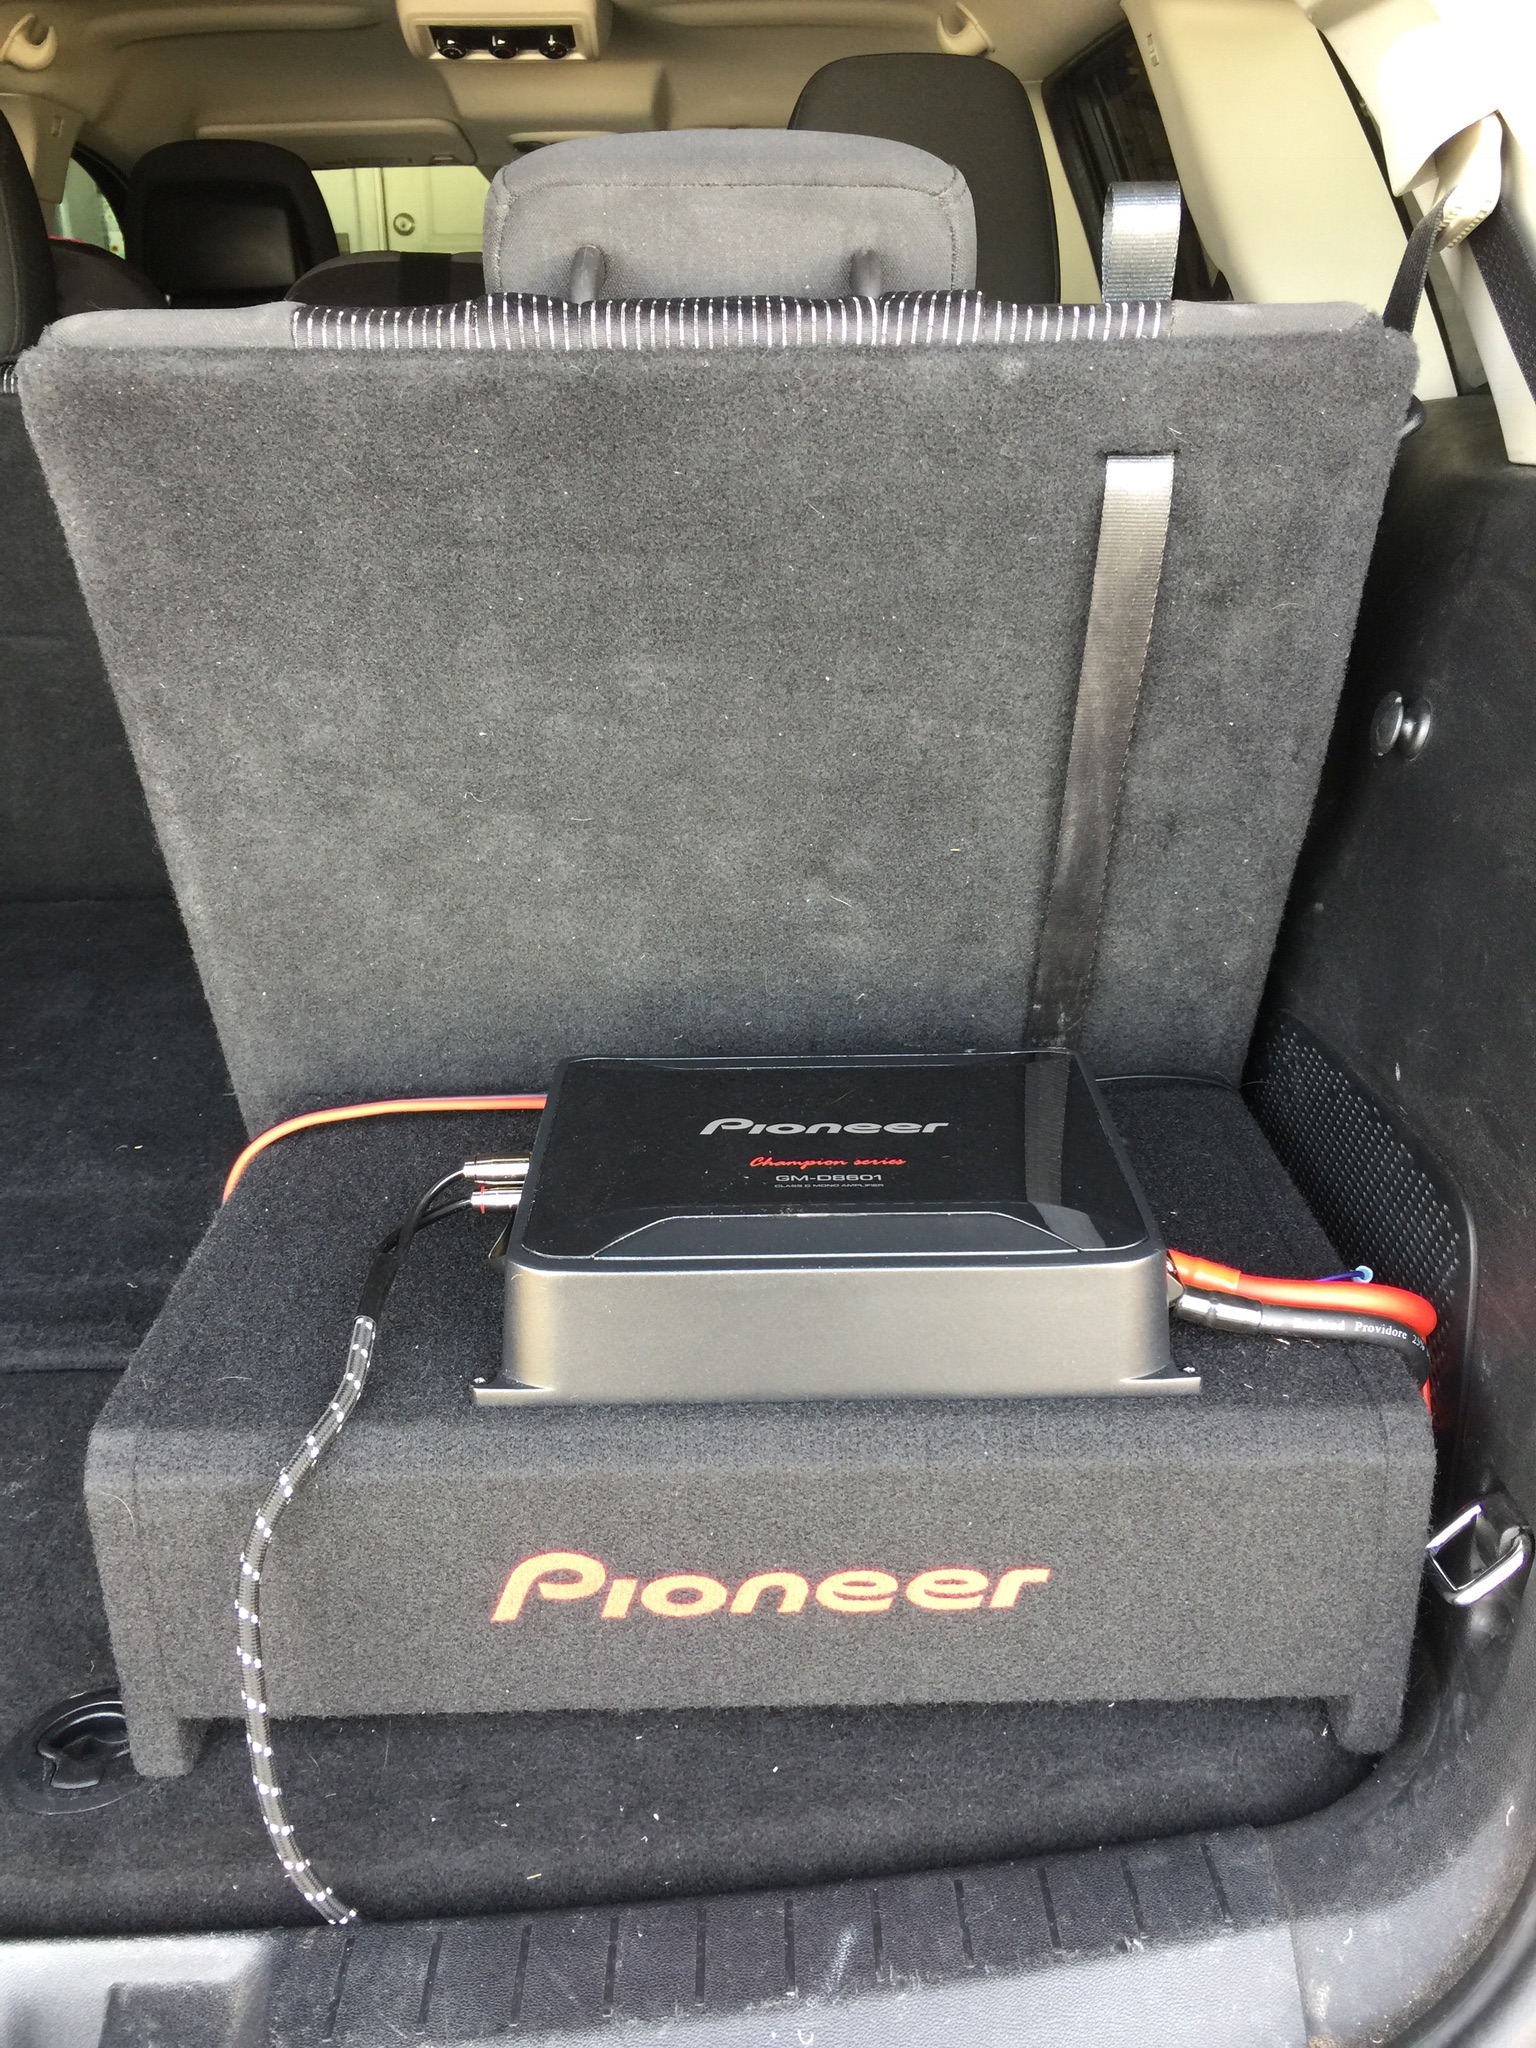
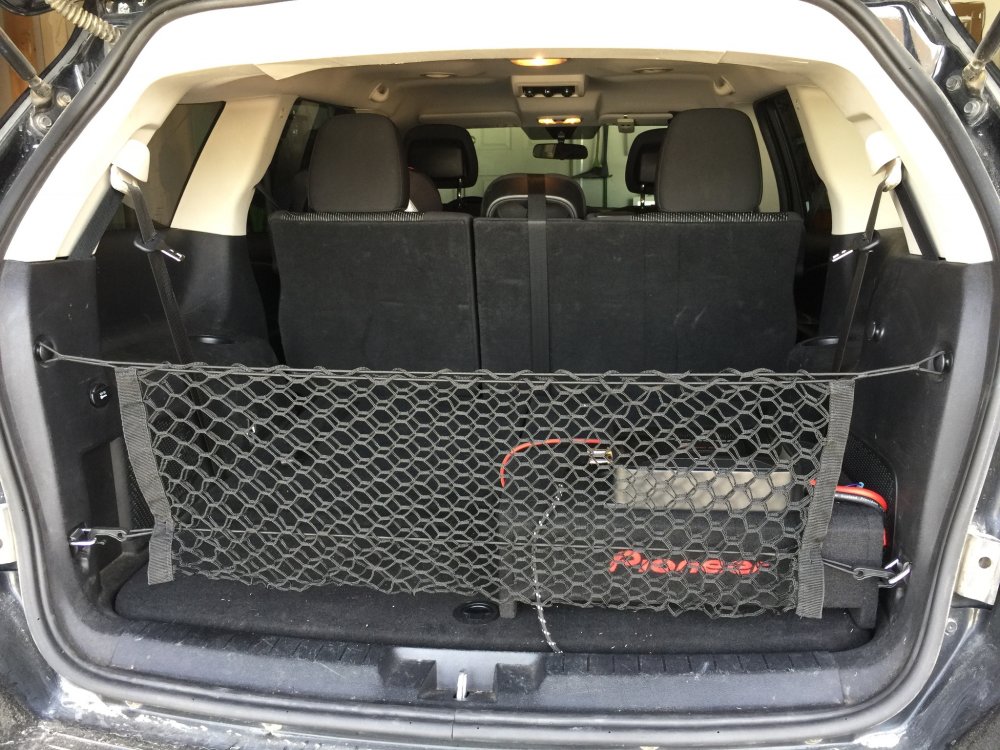
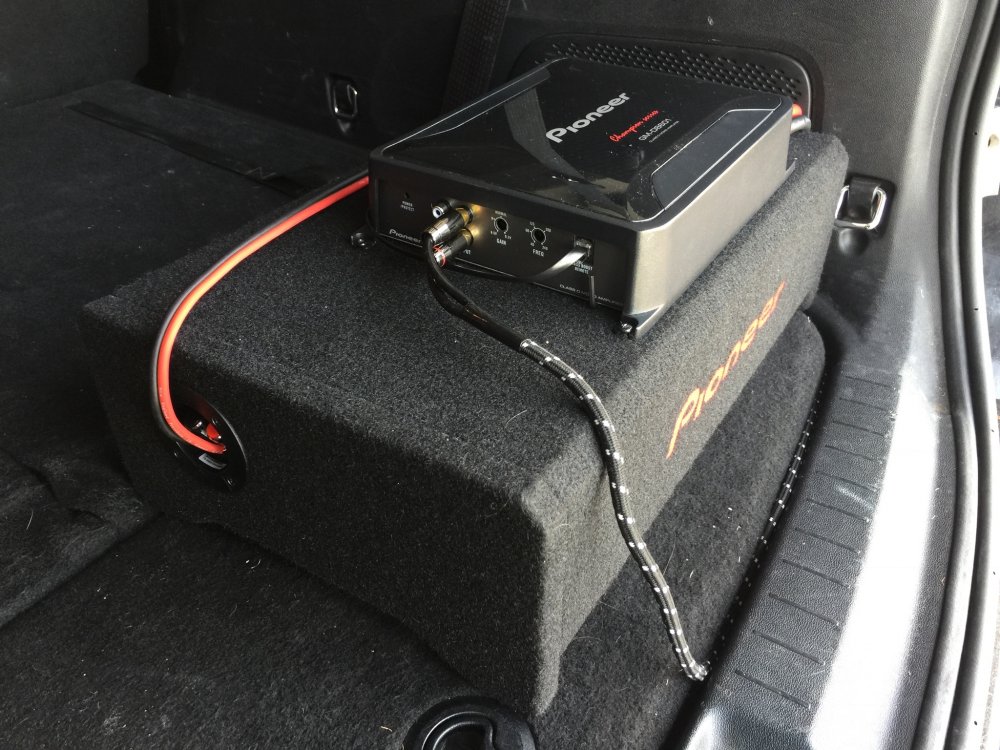
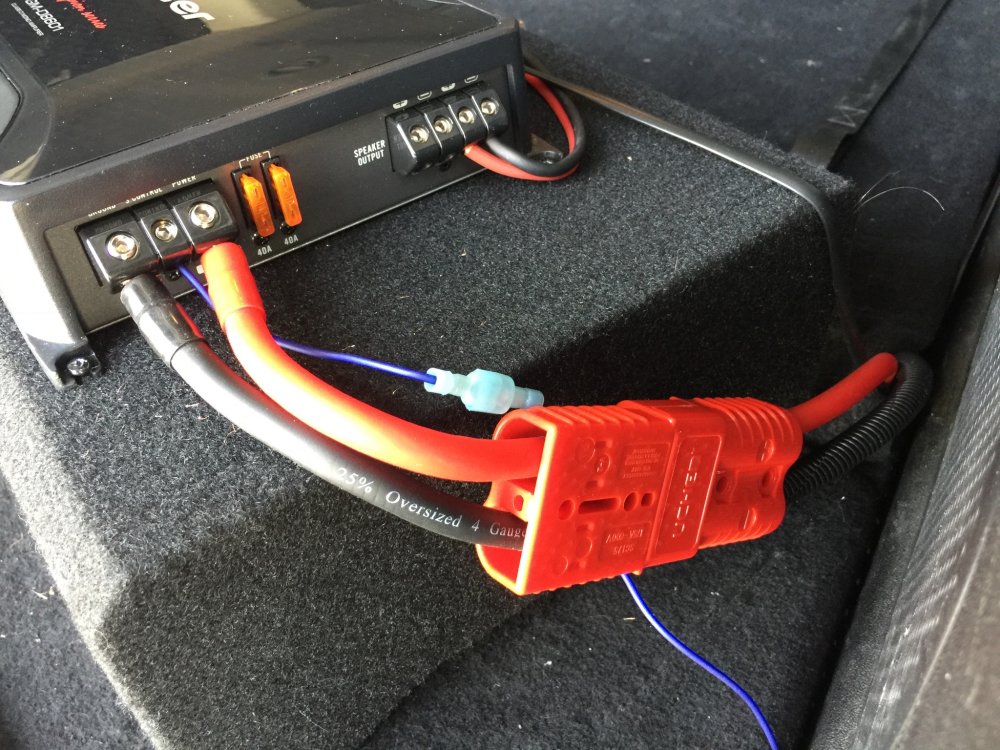
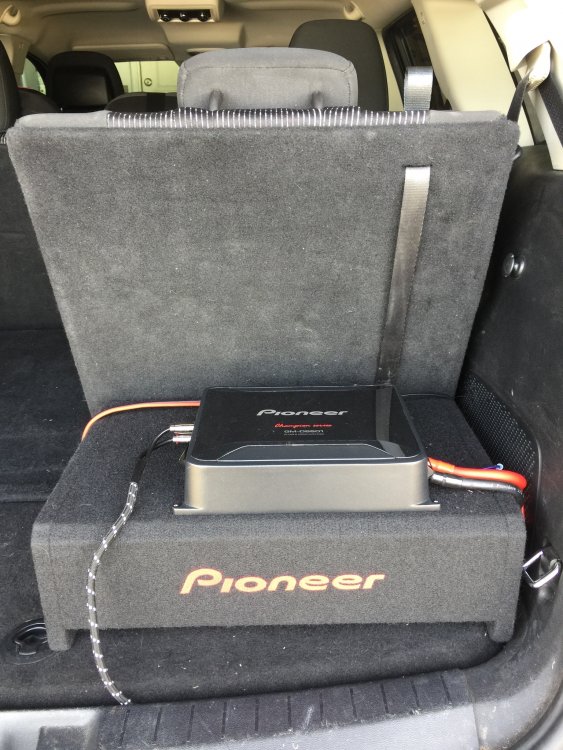
After 24 days I finally got my Pioneer 10” slim sub installed to my satisfaction. My goal was to make it easy to remove so that the trunk could still be fully used for luggage for a family of 5 and to be able to put the back row up without removal. I decided to use large a quick connect/disconnect for my power and ground and a smaller quick connect/disconnect for my amp remote turn-on wire. For those looking to fill in for the low end that’s missing from door/dash speakers this Pioneer 10” sub matched with a Pioneer Class-D mono amp is perfect. It’s also high powered enough to rattle the license plate, if that’s your preference. I ran the power cable from the battery (see previous How To post) down the driver’s side (left) to the rear. I like how easy it is to pop off the trim panels and hide the cabling. It is then routed across the vehicle’s driver side to the passenger’s side (right) under the 3rd Row seat where the back folds. Doing this avoids pinch points. I used a stiff wire hanger to fish the cables through. Taping it on with some electrical tape makes it easy to pull across. I chose the passenger’s side as the location for the amp and sub as the amp’s power inputs are on its right side and it was easier to hide the cables. Note: this slim sub and amp will fit, height wise, under the driver’s seat. It will stick out about 6-8” and I decided against that as it would block the floor compartment and my kids feet would beat it up. The RCA and remote turn-on cables went down the passengers side. I bolted the ground terminal ring under the 3rd Row seats to a bolt in the middle holding the seats down. It was the only bolt in the area without paint. The bolt was too large for the terminal ring so I slide the terminal under and bolted it down with prejudice. It isn’t going anywhere and it’s well grounded. The RCA cables were run up past the 3rd Row seat and then tucked along the channel of the trunk compartment lid. To crimp the terminals for the power and ground quick connect/disconnect I decided against buying a 4AWG crimping tool for a one time use. I used a jack stand as an avil, a torx impact bit, and a hammer. I crimped the terminals on 4 sides and it seems to be holding well. It’s definitely not the recommended way but it’s still safe. My wife thinks it’s large and takes up more room than she realized it would but since I’ve added the quick connect/disconnects she’s happy. Anyone with questions on how to wire their Dodge Journey’s audio system, feel free to ask. I’ve ripped he vehicle apart and learned a few things in the process. Let me know what you think! My system Speakers Dash: Infinity Reference 3.5” 3022cf Front Doors: Kenwood eXcelon 6.5” 3-way - Discontinued Rear Doors: Infinity PR9603IS 6X9" 90W 3-Way Primus Series Sub: Pioneer 10” Shallow Mount TS-SWX2502 Amp Pioneer GM-D8601 Class D Mono Amp Headunit Pioneer 4100NEX Pioneer CD-MC20 Auto-EQ Mic Metra Turbo Kit - moves the climate controls down and puts head unit where climate was. Requires 4.3” screen (basically becomes climate controls all the time) Access ASWC-1 Steering Wheel Control Interface Cables New England Providore 4AWG CCA Wiring Kit with Power, 100A Fuse, Ground, Speaker wire, Remote turn-on wire, and RCA. HYCLAT Battery/Ground Quick Connect/Disconnect Terminals

-
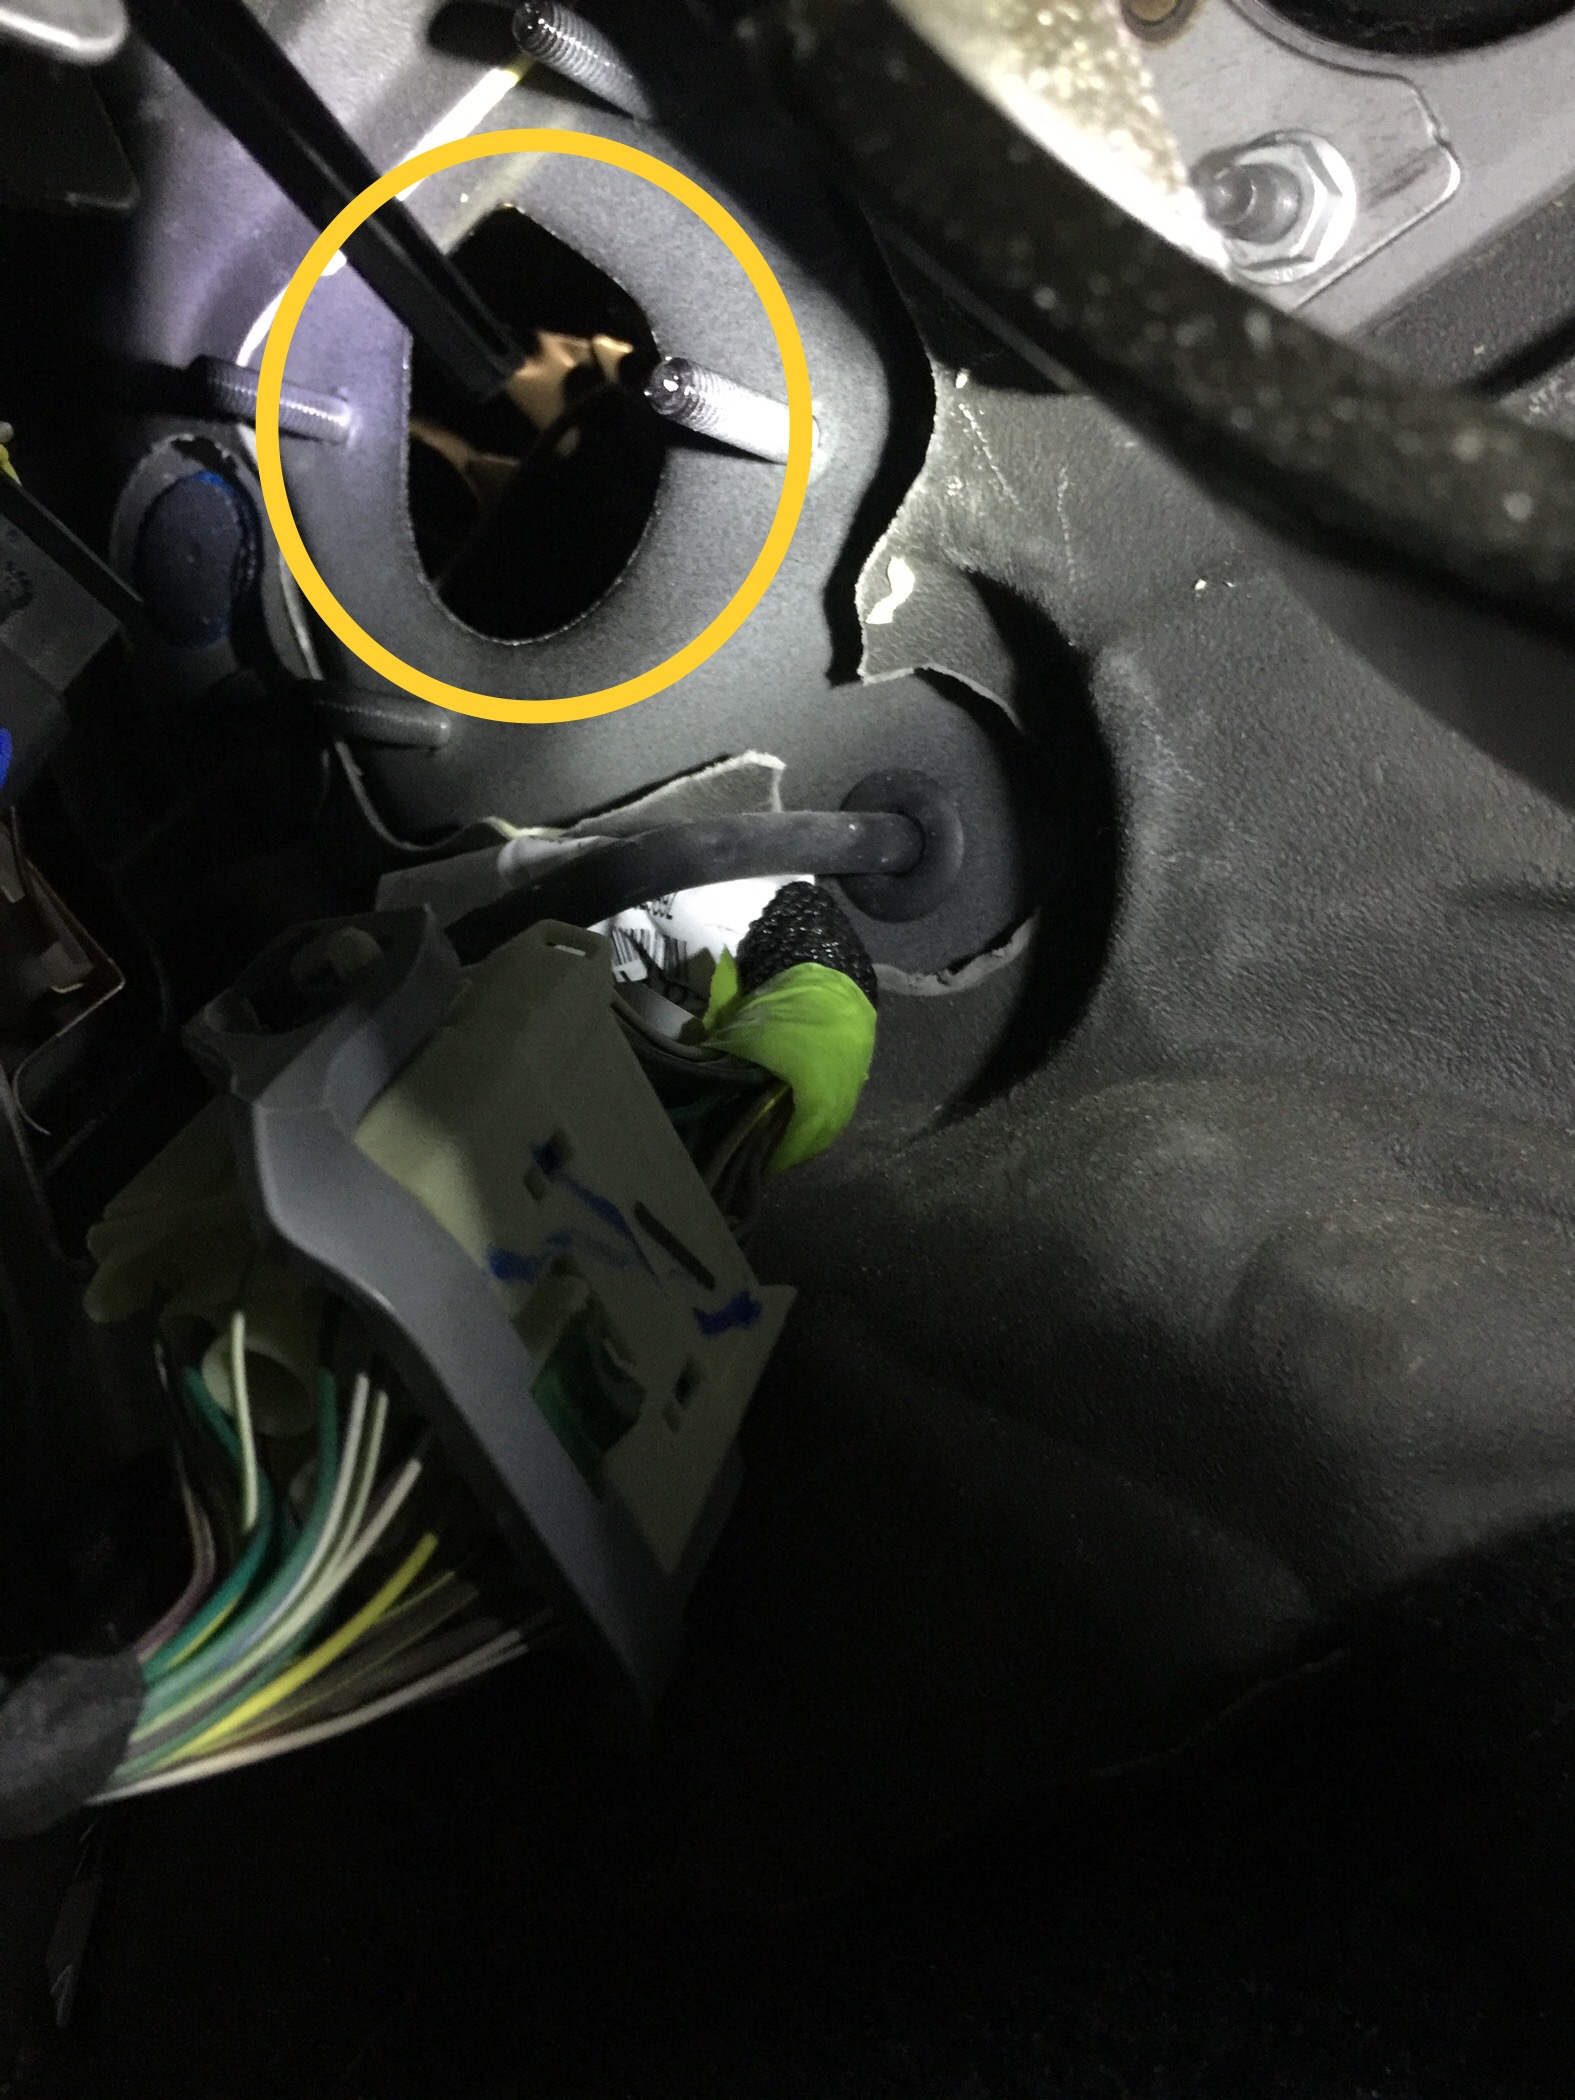
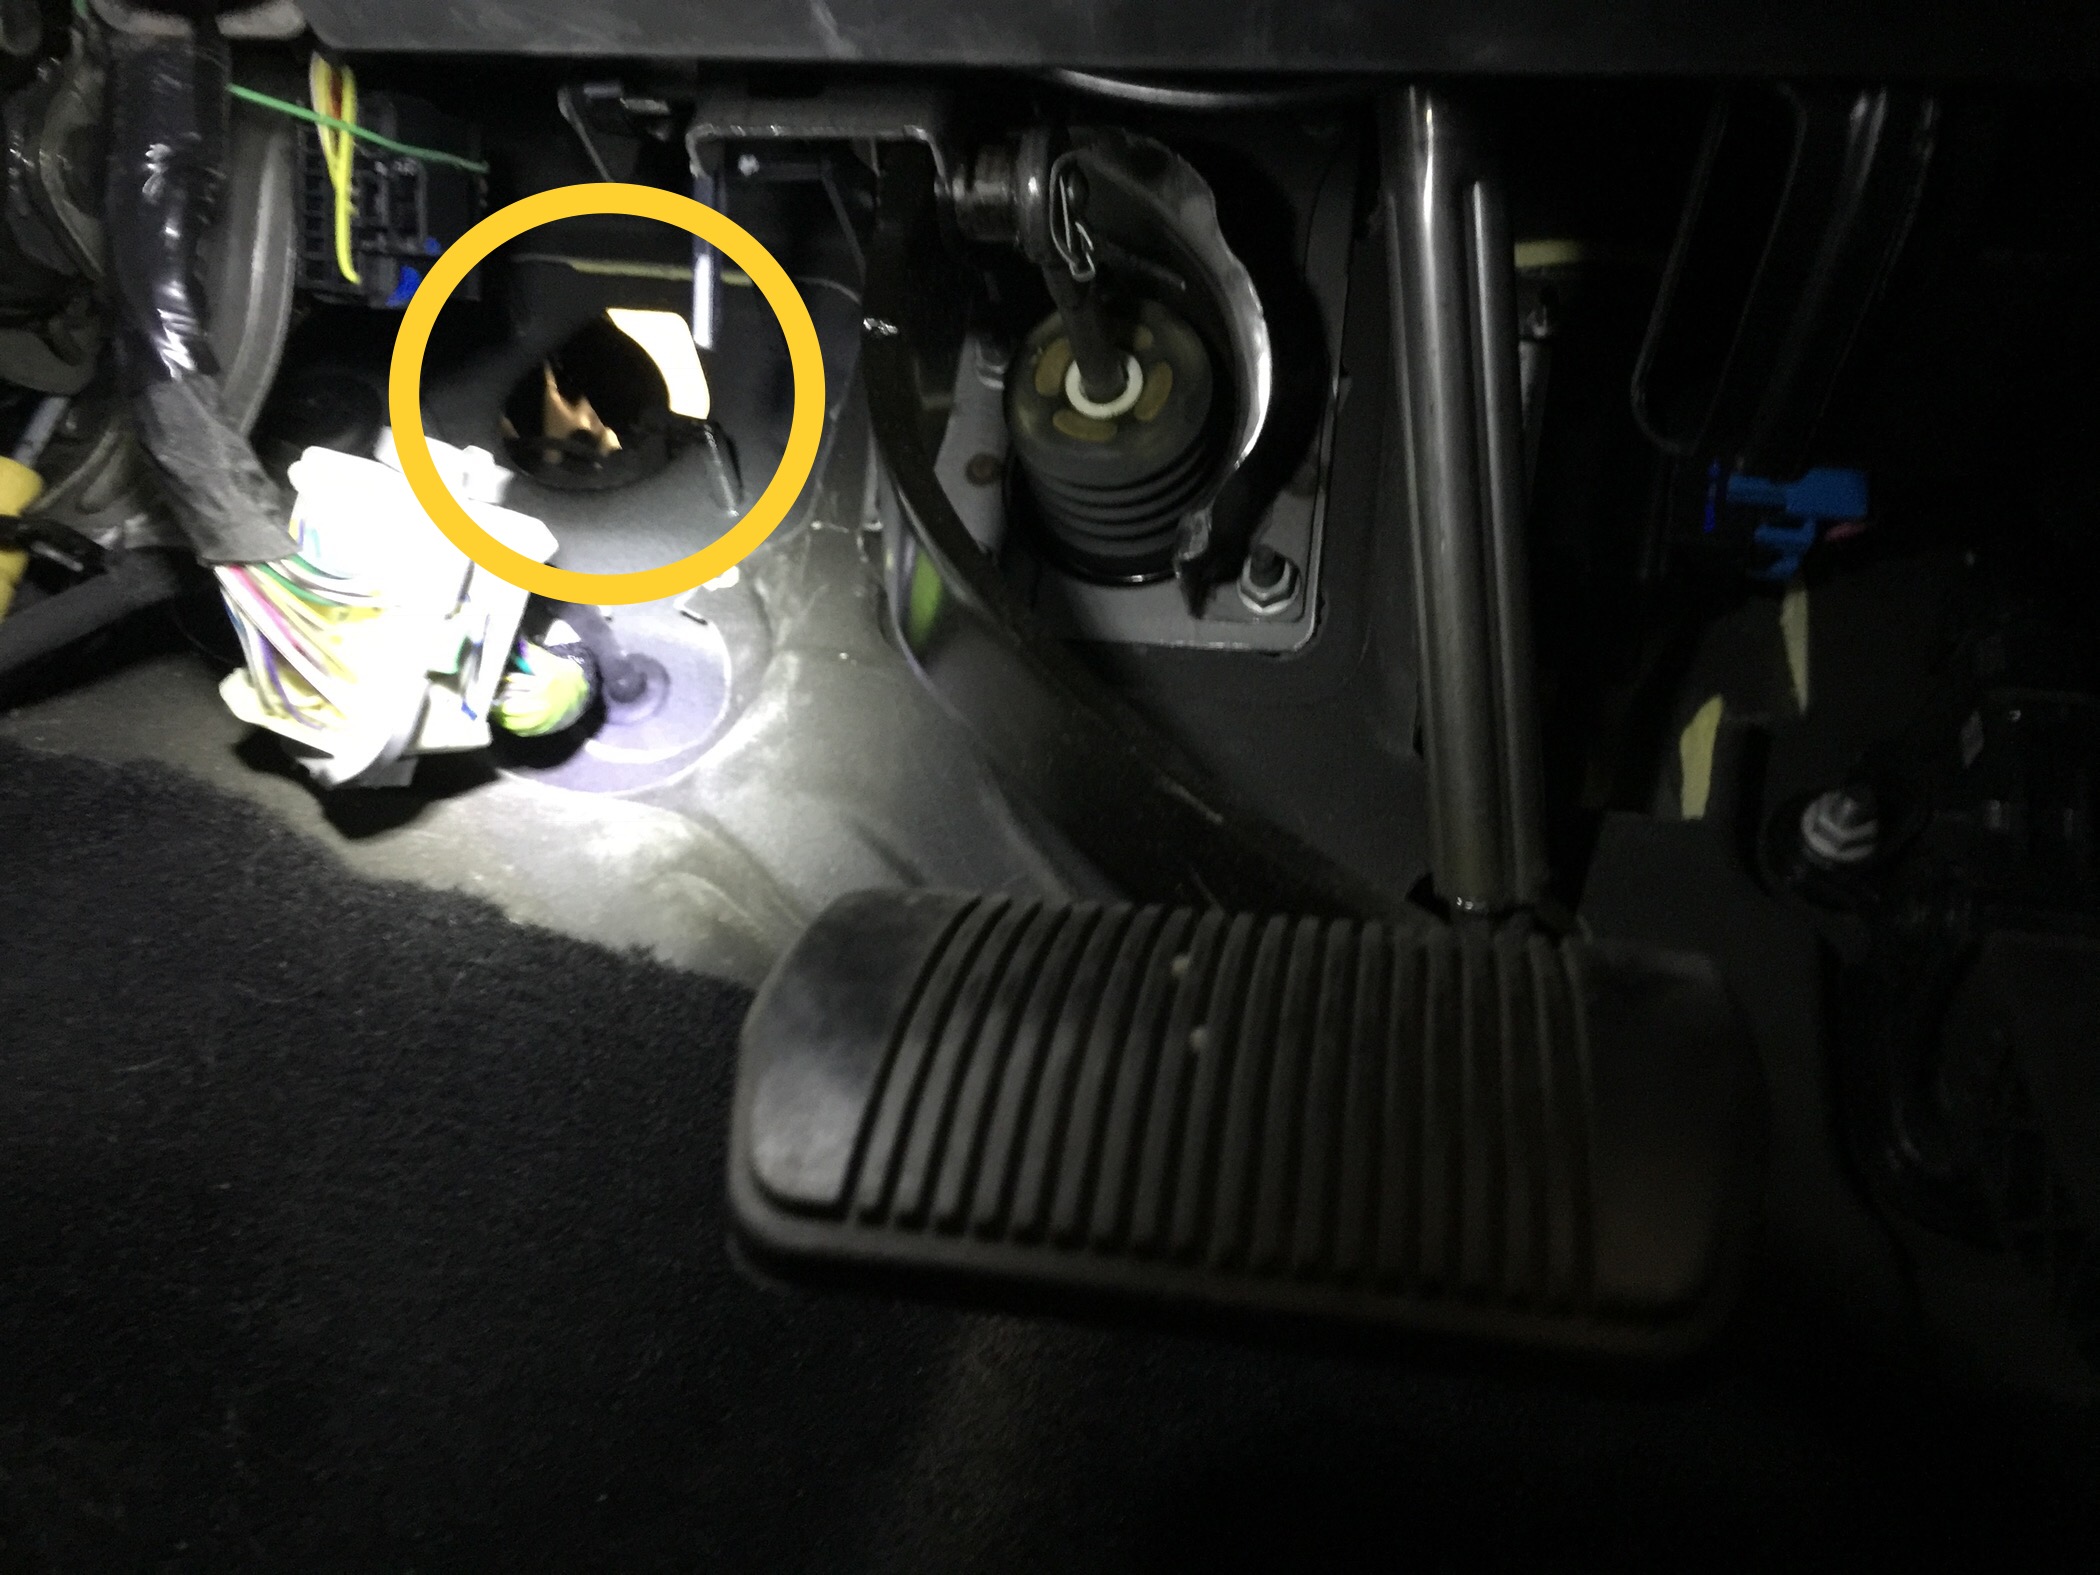
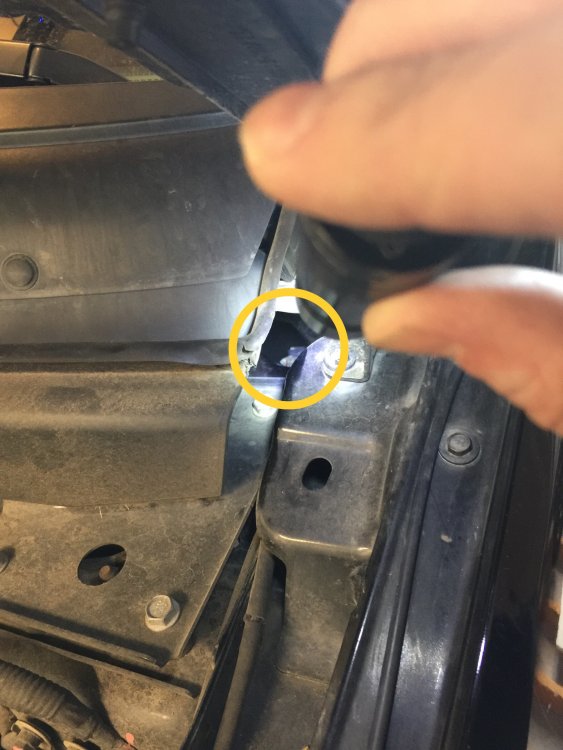
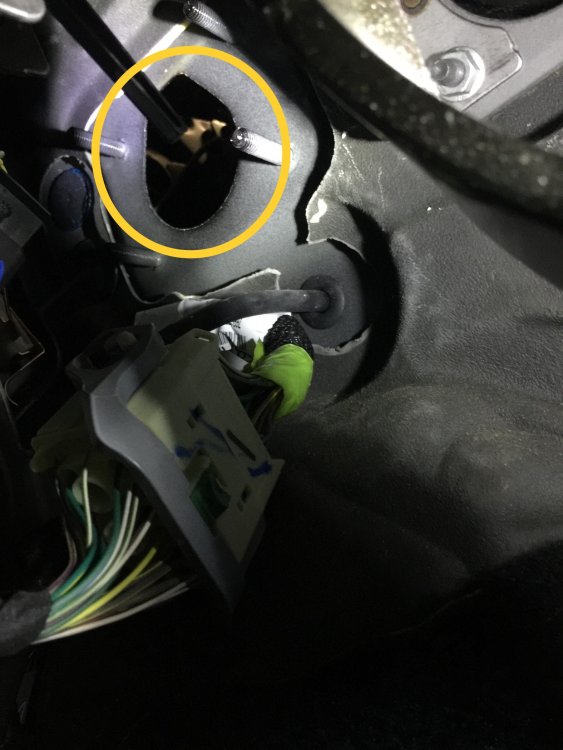
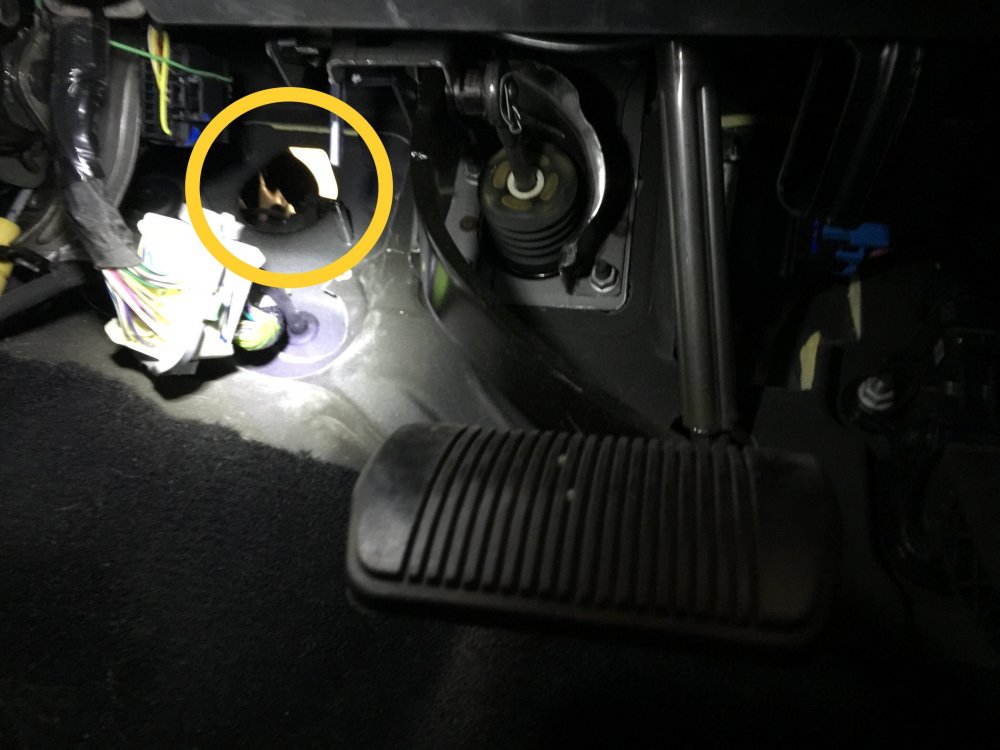
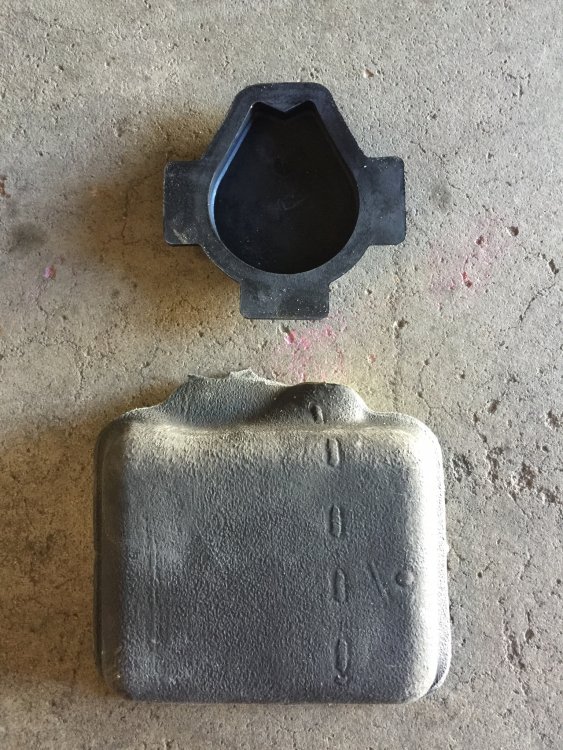
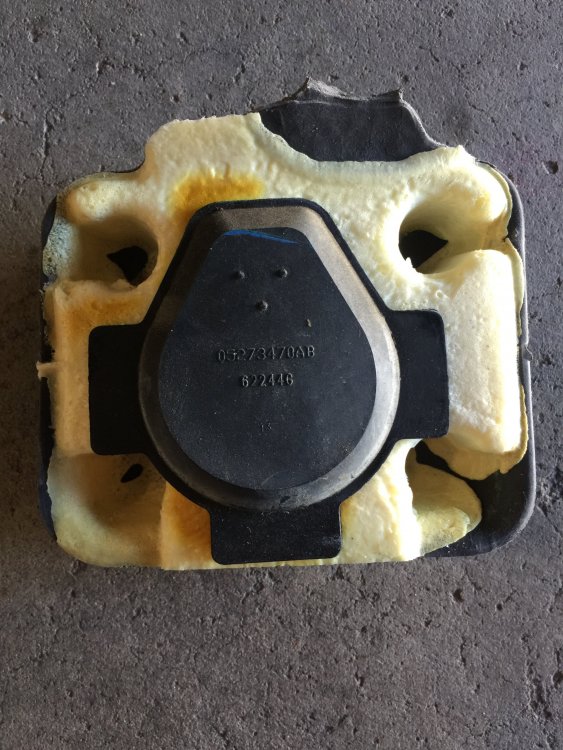
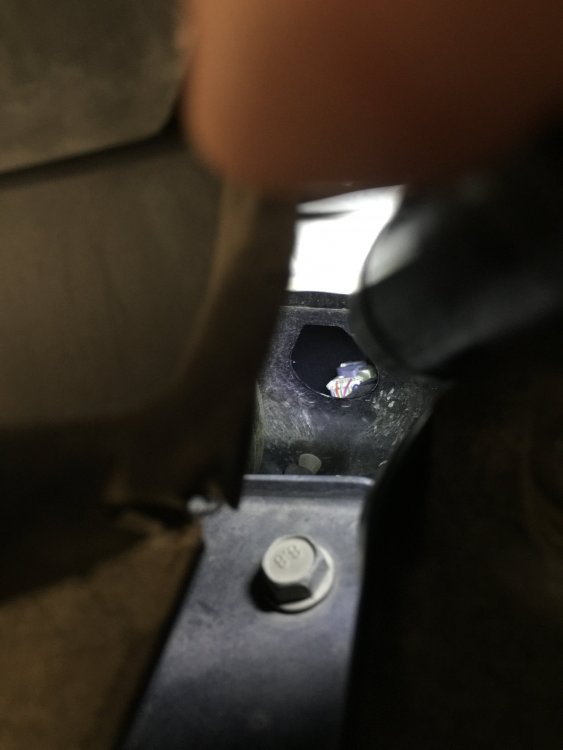
I just received a sub (the excellent 10” Pioneer TS-SWX2502) and amp (amazingly small 1600w mono Pioneer GM-D8601 amp) for Christmas and went to run power through the firewall of my 2015 (automatic/no clutch) and could not locate a grommet that wasn’t in use. I read a lot of threads talking about where there is a 2” one but no one had pictures and I couldn’t locate it myself. After an hour I found it by accident. It’s just to the left of the brake booster and hidden under the rubber mat. Its right underneath the protruding rubber square. This rubber square pulls away and off to reveal a massive 2.5” grommet. From there it’s trivial to wire it to the the posts (near the drivers shock tower). You used to be able to get through the drivers door grommet but that no longer exists on the 2015 (you should avoid possible pinch points anyway). It seems that as Dodge is refining the Journey’s design they’re making it more difficult to install aftermarket accessories. Why hide the grommet at all? It serves as a fireblock but once it’s permanently removed that is no longer the case so why have it there? Anyway, I thought I’d post this to help anyone else installing aftermarket power for an audio system. Hole in Firewall after rubber and 2.5” grommet have been removed: A closer shot. You can see where the rubber mat was removed: From the hood (driver’s side): A closer shot from the hood: The 2.5” grommet (top) and square rubber piece that hides the grommet: Just to show how they fit together while installed:
-
If you don't mind me asking, which ones did you buy and do they still dim on door closing?
-
QuarterSwede reacted to a post in a topic:
In-floor Storage bin mod?
-
QuarterSwede reacted to a post in a topic:
In-floor Storage bin mod?
-
I'm thinking of getting one as well. However I already have a backup camera (aftermarket) and was wondering if anyone knows if you can tap into that for use. Seems like I'm probably asking too much but it is just a composite video feed.
-
Thanks dhh3. That clears it up.
-
QuarterSwede reacted to a post in a topic:
Tow Prep-Package!!
-
dhh3 reacted to a post in a topic:
Tow Prep-Package!!
-
QuarterSwede reacted to a post in a topic:
Towing camper with 2014 Journey 6cy
-
Thanks for the link. Now I'm more confused; doing research on towing a pop-up. My DJ has the engine cooler listed and I have the white and blue harness that terminates near the spare but it doesn't list the tow prep group package.
-
dhh3 reacted to a post in a topic:
Where do you place you phone with the 8.4 touchscreen
-
Where do you place you phone with the 8.4 touchscreen
QuarterSwede replied to mjnb's topic in Accessories, Modifications
I put mine in the center console since it's connected to my headunit and CarPlay. -
dhh3 reacted to a post in a topic:
First Impressions of 6 Speed Trans
-
Mine was definitely jerky when I bought it used. Took a few weeks and I suddenly realized it was smooth. It only has jerkiness now when I'm trying to avoid someone hitting me and it doesn't expect me to either slam on the breaks or gas.
-
DJDiggler reacted to a post in a topic:
How to remove Aux inputs on center console?
-
dhh3 reacted to a post in a topic:
2014 journey speaker sizes?
-
Ouch. That's about $1K right there for the bumper and labor. I had to have mine replaced a few months ago when I slid off an exit ramp. Damn ice.
-
Dash speakers are the 3.5" standard.
-
dhh3 reacted to a post in a topic:
Added rear splash guards today.
-
Added rear splash guards today.
QuarterSwede replied to priell3's topic in Accessories, Modifications
I could definitely use them in Colorado! The amount of dirt and snow it gets all over the side and back of the vehicle makes daily washing almost necessary. -
In my experience the Journey has very little drive by wire throttle lag. It's never caused me an issue on the highway when I need it most. The 200 on the other hand has HORRIBLE throttle lag. It may as well have been a turbo lag. Slam on the gas, count to 1 Mississippi, then it goes. This tech would definitely be recommended for that vehicle. Not that FAC shouldn't fix it with a firmware update anyway for safety reasons but they won't.
-
Or slam on the gas. The AWD difference is definitely noticeable then as it just digs in and goes without raising the front end.
-
How quiet the interior is. I've been spoiled and didn't realize it until my wife complained about brake noise on her 2004 Jeep Liberty. When I drove it around the neighborhood I couldn't believe not only how loud it was inside but how loud the window motors were too. Love my 15 Journey!