Jump to content

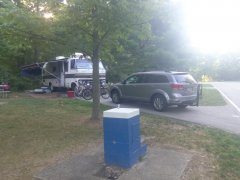
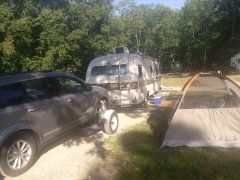
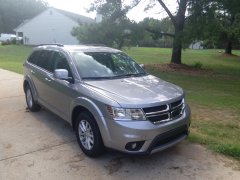
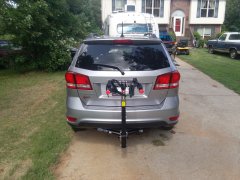
New hitch and Bike rack installed. Only 3 day old at the time


pzookey

From the album:

Pzookey

· 4 images
  • 4 images
  • 0 comments
  • 3 image comments

Photo Information

  • Taken with Amazon Fire
  • Focal Length 3.9 mm
  • Exposure Time 1/414
  • f Aperture f/2.0
  • ISO Speed 40

Recommended Comments

looks like it sticks out quit far hard to tell from the pic .i just ordered a curt hitch ( 13201) for my 2014 crossroad sunday it is supposed to come( thur am)in the moring going to pick it up from ups then have to spend the rest of the day taking wife to the dr. office and shopping,plan on putting it on fri. i watched the u tube videos and looks pretty easy. cost me $117. U.S. from amazon  didnt get the wire kit yet as i plan on using it to carry wife's scooter in a small carrier, but will get the kit ( 56154 ) later just to have it should cost about 45.17 on amazon even though they say its not the right kit it is the kit everybody says works for the journey with led lights.

Link to comment

well went and picked up  my hitch at ups and did all our stuff today got home about 3pm so i unpacked my curt hitch which wasn't much, got out some gloss black paint to touch up all the scratched spots on the hitch showing bare metal then backed the journey into the garage out of the sun jacked it up put my jack stands under both sides and then put a strap from both sides to help hold up the exhaust pipe sprayed all the rubber parts on the exhaust hangers and started cussing and fighting with getting them off the hangers took about 20 minutes till i got the hang of it( they do sell a tool for removing them for about $18.)then fished the brackets and bolts thur the channels in the underbody then took the hitch which was still a little tackey in some spots and put a couple of rags on top of my jack and then set the hitch on top of them then i taped the two outer spacers into position on top of the hitch with electrical tape then scooted it into position and raised it up was a little difficult, an extra person would have made it a lot easier but no one around so had to make do, got the nuts started and had problem with one side with the spacer slipped out of where i had taped it on ( u tube showed a guy using wide painters tape covering the hole spacer and then just making a hole thur the tape) and i would recommend that instead of using 2 pieces of electrical tape like i did would have saved some trouble i had with the one that came loose.then just tightened all the bolts up even and torqued to 110 ft lb. and then resprayed all the rubber exhaust connectors again and slid them back into position took the strap off and let the journey down off the stands,looking great the hitch has about 1 inch or more between the top of it and the bottom of the spare. looks great and will add the electrical later as i am just going to use it for a small basket on the back for the wife's 3 wheel scooter at a later date.all told took me about 1.5 hr labor not bad for an old man laying on his back. glad i live in alabama as the bottom of the car was real clean and not all corroded  up from the salt like the cars up north i'm sure it made the install easier I would recommend the CURT hitch to any one easy install and looks like a quality piece of equipment it could have been better wrap for delivery but wasn't to bad bad scratched.....

Link to comment

Join the conversation

You can post now and register later. If you have an account, sign in now to post with your account.
Note: Your post will require moderator approval before it will be visible.

Add a comment...

×   Pasted as rich text.   Paste as plain text instead

  Only 75 emoji are allowed.

×   Your link has been automatically embedded.   Display as a link instead

×   Your previous content has been restored.   Clear editor

×   You cannot paste images directly. Upload or insert images from URL.

×
×
  • Create New...